Keeping kids safe is the top priority for any parent or caregiver. A baby gate for the stairs is one of the best ways to help prevent falls and accidents. There are several key features to consider when choosing a gate. This guide walks you through the most important ones so you can make a confident choice.
Safety Standards
To truly protect your child, a baby gate for stairs should meet current safety guidelines. Look for gates that are certified by reputable safety organizations. These certifications show that the product has undergone thorough testing. When a gate complies with safety standards, it reduces the risk of injury and gives you peace of mind that it will help prevent accidents.
Material Quality
The material of a baby gate plays a big role in its durability and safety. Manufacturers typically make gates from materials like wood, metal, or durable plastic. Each material has its own advantages. Metal gates are usually more sturdy and long-lasting, while wooden gates often have a more decorative look and can better match your home’s style. Choose the material that best fits both your safety needs and your home décor.
Ease of Installation
An easy-to-install gate saves you time and effort. Some gates use pressure-mounted systems that don’t require drilling, making them a better choice for short-term or rental situations. Others use hardware-mounted systems with screws and brackets for a more permanent, secure installation. Choose a gate that works well with your space and gives you the level of stability you want.
Adjustability
An adjustable gate is more versatile because it can fit a variety of openings. Some models come with extensions to cover wider spaces. Make sure the gate can be adjusted to fit different stair layouts so it lines up securely with the doorway or top of the stairs. This helps ensure proper coverage and safety.
Locking Mechanism
The latch on a baby gate should be sturdy and tricky enough that your child cannot open it, but still easy for an adult to use. A dual-locking system adds extra safety because it typically requires two separate actions to open, which most young children cannot figure out. Look for designs that require pushing, lifting, or sliding in two steps so curious little hands don’t gain easy access.
Height Considerations
When purchasing a baby-safe product, height is one of the most important factors to consider. The right gate height is crucial for preventing children from climbing over it. The more adventurous or active your toddler is, the taller the gate should be. In general, gates that are at least 30 inches tall are a good starting point for most homes, but taller models may be better for older or more determined climbers.
Swing Direction
The direction a gate swings can affect both convenience and safety. Some gates swing in both directions, while others open in only one direction. For stairways, it’s safest to choose a gate that swings away from the stairs to help prevent falls. Consider the layout of your stairs and the path you usually take, and choose a gate that opens in a way that feels natural and safe for everyday use.
Appearance and Design
A gate may be functional, but its appearance can matter too. Many parents prefer gates that blend in with their home décor. Today there are many styles, finishes, and colors available, so you can find a gate that matches your furniture and overall look. Ideally, your gate should be both functional and stylish, adding safety without making your space feel cluttered.
Portability
If your family is often on the go, a portable baby gate can be extremely helpful. Some models fold flat for easy storage and transportation, making them great for travel, visiting family and friends, or using in multiple areas of your home. If you plan to move the gate frequently, look for a model that is lightweight, compact, and easy to set up.
Cost Consideration
Price is often an important factor when comparing baby gates. It’s important to balance cost and quality. While there are budget-friendly options, it’s usually worth investing a bit more in a sturdy, well-built gate that you can rely on for safety and long-term use. Spending slightly more upfront on a durable, high-quality gate can save you money and frustration over time.
Conclusion
Choosing the right baby gate for stairs can feel overwhelming because there are many factors to consider, including safety standards, material quality, installation type, adjustability, design, and price. By keeping these points in mind, caregivers can select a gate that is safe, practical, and visually appealing in their home. The right gate will help protect your child, fit your space, and give you greater peace of mind every day.
A shower door does more than just keep water off the floor; it defines the look of your bathroom and gives the space a finished feel. If you’ve always called a pro for jobs like this, tackling the installation yourself can seem intimidating. But with basic tools and a careful plan, it’s an absolutely doable project. You’ll save significant money and gain the unique confidence that only comes from completing a job with your own two hands.
The Cost Factor
Hiring an installer gets pricey, and the total climbs fast if your walls are uneven or you’ve chosen a heavy glass door. A basic framed kit might run $200 to $600 for materials, while a frameless setup can land closer to $600 to $1,500 or more. Professional labor typically adds at least a few hundred dollars on top of that.
When you handle the install yourself, you eliminate that labor cost. You can then put those savings toward thicker glass and premium hardware, or just bank the cash for your next upgrade. That freed-up money can also cover small extras that improve daily life, like a quieter bath fan, brighter vanity lights, or premium caulk and sealant for a longer-lasting job. It’s not just about spending less—it’s about spending smarter to get a bathroom that looks great and functions perfectly.
Learning and Gaining Confidence
Every DIY job teaches you something, and installing a shower door is a great way to level up your skills without committing to a full remodel. By reading the instructions carefully and working slowly, the process is surprisingly straightforward. You can often see the final results in a single afternoon.
Before you start, pull up the manual for your specific model and watch the manufacturer’s installation video. For best practices, you might consider seeking practical help for DIY bathroom projects to guide you through the process. This preparation ensures you know the correct drill bit sizes, the proper order of parts, and where to apply sealant. As you work, you’ll pick up valuable, reusable skills, like measuring accurately, drilling into tile correctly, and laying a clean, professional silicone bead. That confidence carries right over to the next project.
Tools and Preparation
Good preparation makes the installation smoother and is key to preventing leaks. Gather everything you need before you open the box.
Tape Measure: Confirm the width and height at the top, middle, and bottom to catch any out-of-square walls.
Level: Check that your walls and shower curb are plumb (perfectly vertical) and level (perfectly horizontal). You’ll use this constantly to keep the track or hinge side straight.
Drill: Use a carbide- or diamond-tipped bit if you’re drilling through tile. Always use the exact bit size specified in the instructions.
Caulk Gun: You’ll need 100% silicone sealant that is specifically labeled for kitchen and bath use to ensure the seams stay watertight.
Stud Finder: Use this where possible. If there’s no stud behind the hinge or track locations, you’ll use the wall anchors included with your kit.
Safety Gear: Wear safety glasses and cut-resistant gloves. Tempered glass is heavy, and its edges (or shards, if it breaks) can be extremely sharp.
Extras: Keep painter’s tape (for marking drill holes on tile), shims (for leveling), a rubber mallet, a pencil, and a shop vacuum on hand to make layout and cleanup easy.
Having these basics ready not only speeds up the job but also sets you up for other quick fixes around the house. The same tools are perfect for hanging shelves, mounting mirrors, or swapping out hardware.
Choosing the Right Door
To avoid installation headaches, pick a door that fits both your physical space and your bathroom’s style.
Sliding (Bypass) Doors: These work well when floor space is tight and you don’t have room for a door to swing out.
Hinged (Pivot) Doors: These offer a classic look and a wide opening, which helps with accessibility and makes cleaning easier.
Bi-fold Doors: These doors tuck in on themselves and are a handy solution for very small bathrooms.
You’ll also need to decide between framed, semi-framed, or frameless glass. Match the hardware finish (like the handle and hinges) to your faucet and showerhead so the room feels cohesive. Clear glass can make a small bathroom feel larger, while textured or frosted glass provides privacy and helps hide water spots. Finally, double-check that your shower curb (threshold) slopes slightly toward the shower so water naturally drains in, not out.
Installation Steps
Measure Your Space: Take width and height measurements in three spots (top, middle, bottom). Use the smallest number for your final measurement to ensure the door fits.
Mark Your Layout: Hold the main track or hinge rail in place. Use your level to get it perfectly plumb, then mark your drill holes with a pencil. Placing painter’s tape over the marks provides a cleaner entry point for the drill bit on tile.
Mount the Track or Hinges: Drill slowly, using the correct bit. Vacuum the dust as you go. Set your wall anchors if needed, and follow the manual’s precise order so all parts seat correctly.
Hang the Door: This is a two-person job. Get a second set of hands and wear your gloves. Lift the panel and set it into the track or onto the hinges. Tighten the hardware just enough that you can still make fine adjustments to get it perfectly level.
Seal and Finish: Run a neat bead of bath-grade silicone along exterior seams only. Critically, only seal the outside of the bottom track. This allows any water that gets inside the channel to drain back into the shower. Smooth the bead, wipe away any excess, and let it cure for at least 24 hours before using the shower.
Work at a steady pace and double-check that everything is level after each step. You’ll end up with a door that looks clean and closes tightly. Best of all, you’ll know exactly how it’s built, which makes any future adjustments or part swaps simple.
Post-Installation Satisfaction
That first shower after the silicone cures just hits different. You can see and feel exactly what you built. You saved money, you matched the door perfectly to your style, and you get a small win every time the glass glides smoothly and the seal holds. When friends ask who installed it, you get to say, “I did,” and maybe even share a tip or two.
Building on Your DIY Momentum
Once you’ve successfully hung a shower door, other home projects feel much less intimidating. Don’t be surprised if you start eyeing the vanity, the light fixtures, or the bath fan next. The same ‘measure twice, prep once’ mindset works for all of them, and your new tools will keep paying off.
Most home projects are manageable when you plan the steps, read the directions, and give yourself enough time. The payoff is seeing your space improve because of the work you put in. If you’re thinking about what to try next, start small, pick something useful, and keep the momentum going. Your next DIY win is closer than you think.
Renovating your home makes it more comfortable and increases its value, but home improvements aren’t cheap. If you don’t have enough cash on hand, a home renovation loan might be the solution to get the project done.
In this guide, we’ll break down what home renovation loans are, cover the different types available, and walk you through how to choose and apply for the best option for your needs.
What Is a Home Renovation Loan?
A home renovation loan is a broad term for financing that pays for upgrades, repairs, or remodeling in your home. Simply put, it’s money you borrow specifically to improve your house. This could mean anything from renovating a kitchen or bathroom to adding a new room or fixing an urgent problem like a leaky roof.
Home renovation loans come in many forms. In some cases, it might be a regular personal loan, while other times it’s a secured loan that uses your home as collateral. The defining feature is that the funds are meant for home improvement. Because “home renovation loan” covers a lot of ground, it can actually refer to several financing products, like these:
Purchase or Renovation Mortgages: These are home loans or mortgages that include extra money for renovations. For example, For example, a renovation mortgage lets you buy (or refinance) a house and roll the renovation costs into one loan. Government-backed programs like the FHA 203(k) loan or Fannie Mae’s HomeStyle loan fall into this category.
Home Equity Loans or HELOCs: If you already own a home and have built up equity, you can borrow against that equity. A home equity loan gives you a lump sum, while a home equity line of credit, known as a HELOC, works like a credit line you can draw from as needed. These use your home as collateral.
Cash-Out Refinance: This replaces your existing mortgage with a new, larger mortgage so you can take out the difference in cash. The cash can then fund your renovation.
Personal Loans: These are unsecured loans often marketed as home improvement loans that you can use for almost any purpose, including home upgrades. They don’t require home equity or collateral, so your income and credit score are the main factors for approval.
Government Loans or Subsidies: In addition to FHA loans, certain government programs can help with specific renovations, such as VA renovation loans for eligible veterans or HUD Title I loans for home improvements. These often have special requirements or limits.
No matter the type, the borrowed funds help you get your project started faster. You’ll receive the money either in a lump sum or in stages and then repay it over time with interest, just like any other loan. Some renovation loans even keep the funds in an escrow account to pay contractors directly, making sure the money is used for the intended repairs or upgrades.
Why Consider a Renovation Loan?
Borrowing makes the most sense when the renovation is urgent, like a critical repair, or when the improvements are likely to increase your home’s value in the long run. For example, fixing a safety issue or modernizing an outdated kitchen could boost your property’s value and your quality of life. It’s wise, however, to keep project costs in check. You generally don’t want to borrow more than the value added to your home.
Key Things To Look For
Before signing anything, compare these key features:
Loan Type: Note if it’s secured, like home equity or a refinance, or unsecured, like a personal loan.
Interest Rate: Find out if it’s fixed or variable. Secured loans tend to have lower rates.
Repayment Term: Longer terms mean lower monthly payments but more total interest.
Fees: Origination, appraisal, or closing costs can add up.
Collateral Risk: Using home equity means your property backs the loan.
Looking at these details helps you find the balance between affordability and flexibility.
Pros and Cons of Home Renovation Loan Options
Loan Type
Pros
Cons
Home Equity Loan
Fixed interest rate, predictable monthly payments, may be tax-deductible, and offers large loan amounts.
Requires sufficient equity, has closing costs, and risks foreclosure if unpaid.
HELOC / Home Equity Line of Credit
Borrow only what you need, flexible access to funds, and interest may be tax-deductible.
Variable rates, payments can increase, and your home secures the debt.
Cash-Out Refinance
Replaces mortgage with one larger loan, potentially lower rate, and one payment.
New closing costs, resets loan term, and you must keep at least 20% equity.
FHA 203(k) / HomeStyle Loan
Combines purchase or refinance with renovation, considers future value, and allows a low down payment.
Strict rules, more paperwork, and licensed contractors are required.
Personal Loan for Home Renovation
Fast approval, no collateral, and it’s ideal for smaller projects.
Higher interest, shorter terms, and limited borrowing amounts.
How to Choose the Right Loan
Your best option depends on equity, credit, and project size.
If you have little or no equity, a personal loan or FHA 203(k) may be your best bet.
If you have a good amount of equity, home equity loans or a cash-out refinance can offer lower rates.
If you’re not sure about the total cost, a HELOC lets you draw funds as you go.
Always compare APR, fees, and repayment terms from several lenders. Even a 1% rate difference can save thousands over time.
How to Apply for a Home Renovation Loan
Plan your project. Gather cost estimates and timelines.
Check your credit and budget. A score of 670+ helps secure better rates.
Compare lenders. Look at banks, credit unions, and online lenders.
Prepare documents. Proof of income, tax returns, and contractor quotes may be required.
Submit your application. Expect a credit check and possible appraisal.
Close and fund. You’ll receive the money or access to a credit line once approved.
Keep receipts and contracts. Lenders might need proof the funds were used for home improvements.
How Interest Rates Are Determined
Rates depend on a few key factors:
Loan type. Secured loans are generally cheaper.
Credit score. Better credit usually means a lower rate.
The current interest rate environment.
Loan term. Shorter loans often carry lower rates.
As of late 2025, personal loan APRs average 12% to 14%, while home-equity products range from 6% to 9%, depending on credit and collateral strength.
FAQs
How much can I borrow for a home renovation? Most lenders let you borrow up to 80% to 90% of your home’s value, minus your mortgage balance, depending on credit score, income, and renovation costs.
Can I qualify for a renovation loan with bad credit? Yes, FHA 203(k) loans and some personal loan providers accept lower credit scores, though you may face higher interest rates or stricter terms based on risk.
Are renovation loan interest rates fixed or variable? It depends on the loan type. Home equity loans typically have fixed rates, while HELOCs and some renovation mortgages use variable rates that fluctuate with the market.
Do I need equity to get a home renovation loan? Not always. Personal loans and FHA 203(k) renovation mortgages allow homeowners with little or no equity to finance upgrades using income and credit score for approval.
Are the interest payments tax-deductible? They can be, but only if the loan funds are used for substantial improvements to your primary home. Always confirm eligibility with a qualified tax advisor.
The Bottom Line
Home renovation loans let you improve your space now and pay later, balancing comfort and long-term value. Compare options carefully, make sure you can handle the payments, and pick what fits your project.
Truss Financial Group offers tailored home renovation loan solutions for U.S. homeowners, helping you finance upgrades confidently and efficiently. Explore your options with their team to start transforming your home today.
Creating a comfortable home is not just about furniture or paint because the right radiator keeps every room warm without wasting energy. With so many models out there, the smartest way to start is to match the radiator to your room size, your climate, and how you like your space to look.
This guide covers room size, heat output, materials, style, and controls so you can find a radiator for your living room, kitchen, or bathroom that balances comfort, style, and long‑term efficiency.
1. Understand Your Heating Needs
Before you shop, figure out how much heat each room actually needs because the right size radiator is what keeps you comfortable and keeps bills in check.
Heat demand depends on room dimensions, insulation, window area, ceiling height, and local climate. A quick rule of thumb is to aim for 20 to 30 BTU per square foot in a well‑insulated home in a mild climate, or 40 to 50 (or more) BTU per square foot in colder regions. If you prefer watts, the conversion is simple: 1 watt equals 3.412 BTU per hour.
If you are upgrading old radiators or a boiler, use a reputable BTU calculator or ask a pro to do a heat loss calculation so you get the right output for each room.
If you heat with a heat pump or plan to in the future, choose radiators that work well at lower water temperatures, as this helps the whole system run efficiently.
2. Consider Room Size and Layout
Room size and layout drive the size and placement of your radiator. Bigger living rooms usually need a higher output unit to push heat evenly across the space.
For a large living room, look for a model with enough BTUs and place it where air can flow freely so warmth spreads without cold corners.
Smaller rooms like bathrooms often do best with compact units or towel warmers that provide focused heat and give you a handy spot to dry towels.
Placement matters. Units under windows or on exterior walls help counter drafts, while vertical radiators can save wall space when furniture blocks a long wall.
If a room struggles to warm up, consider double panel or models with convector fins because they pack more surface area into the same footprint and move heat faster.
3. Choose the Right Radiator Material
Material affects how fast a radiator warms up and how long it holds heat. However, proper sizing still does the heavy lifting for comfort and efficiency.
Common radiator materials include the following:
Steel is durable, widely available, and warms up quickly, and it is a solid all‑round choice for most rooms.
Aluminum is lightweight and heats up very fast, making it great for rooms you use on and off, like kitchens or home offices.
Cast iron holds heat for a long time after the system shuts off, and that steady warmth suits older homes or rooms where you want an even, gentle heat.
Stainless steel resists corrosion in humid spaces like bathrooms and offers a clean, modern look with low maintenance.
Whatever you decide on, make sure the output fits the room because even the best material cannot make up for an undersized radiator.
4. Look for Energy‑Efficient Options
Efficiency is not only about the radiator because it is about the whole system working together with the right controls and temperatures.
Electric radiators convert electricity to heat at the point of use with essentially no losses, but the operating cost still depends on your local power rates. That’s why in many homes, a central hot‑water system or a heat pump feeding low‑temperature radiators is cheaper to run.
If you already have central heating, opt for radiators with the right output at your system’s typical water temperature because lower temperature operation saves energy and pairs nicely with heat pumps and condensing boilers.
Electric units can be a smart choice for small rooms or spaces far from pipe runs, but you should still size them correctly to avoid excess runtime and higher bills. Leading suppliers like ukradiators offer a wide range of efficient models, from standard hydronic to electric, ensuring you can find an option that works with your home’s setup without wasting energy.
5. Select the Right Radiator Style for Your Home
Radiators are now part of your decor, so find a look that fits your space and your cleaning routine.
Modern radiator styles work well in contemporary rooms and flat panel steel and slim column designs blend in cleanly without feeling bulky.
Traditional radiator styles, like cast iron columns, add character. They also hold heat longer, which keeps the room cozy even after the system cycles off.
If wall space is tight, consider a tall vertical model that tucks into a narrow spot, and in bathrooms a dual fuel towel warmer can run with your central heat in winter and on electric alone in summer.
6. Consider Smart Heating Controls for Greater Efficiency
Smart controls help most when they let your system run at the lowest temperature that still keeps you comfortable, and weather compensation or outdoor reset controls are especially effective because they match water temperature to outdoor conditions.
Room thermostats and smart valves let you set different schedules by space. Features like occupancy sensing and geofencing also prevent you from heating empty rooms.
Finding the best radiator is much easier once you size each room correctly, match the material and style to how you live, and set up simple controls that keep heat steady without waste.
If you want radiators for kitchens, bathrooms, or living rooms, work with a supplier that publishes honest heat outputs and reliable build quality. Reputable brands offer a wide range of styles and sizes so you can find a clean fit for your home.
Keep these tips in mind and you’ll build a comfortable and efficient setup that looks good and feels right all season long.
Not long ago, using the sunshine on your roof to charge your car would’ve sounded unreal. Now it’s totally normal. All over North America, families are taking control of their energy, not just for lights and fridges, but for their cars too.
The shift isn’t about gadgets or trendy tech. It’s about security, rising bills, and the desire for independence. At the center of this change are integrated systems that combine solar panels, smart batteries, and EV chargers into a single, cohesive setup. Among the leaders in this space is the OCEAN Pro solar battery storage, which acts like the backbone of an energy-resilient household.
Image Source: ecoflow.com
Why solar is moving from “nice to have” to essential
Sure, solar panels have long been marketed as eco-friendly. But let’s be honest—that’s not the only reason people are climbing onto rooftops to install them. The practical side is just as compelling.
Electricity rates in North America are not slowing their climb. On average, they’ve risen almost 3% a year for decades. Add that up, and you’re paying far more for the same comfort. With solar power for your home, you suddenly flip the script. Instead of relying entirely on the grid, you’re producing a chunk of your own electricity every single day.
Image Source: ecoflow.com
EcoFlow makes this transition easier by offering panels that match different lifestyles:
Portable panels: Flexible, lightweight, and great for road trips or emergencies.
Rigid rooftop panels: A more permanent setup for homeowners ready to commit.
Balcony systems: Compact but clever, ideal for apartments or smaller spaces.
Bottom line: solar isn’t just about “going green.” It’s about taking control.
Storage turns solar into a 24/7 solution
Here’s the catch—solar panels stop producing once the sun sets. That’s where storage changes the game.
The OCEAN Pro is more than just a big box of batteries. Think of it as an energy brain for your home. It manages solar input, grid electricity, and even generator backup automatically. With a continuous output of 24kW and expandable storage up to 80kWh, it’s built to keep entire households running without skipping a beat.
However, the real magic lies in its intelligence. It doesn’t just store power—it predicts when you’ll need it most, and even factors in utility pricing. That means using stored energy when rates are high, or saving excess solar to sell back to the grid in some regions. It’s not just backup power—it’s bill management with brains.
For homeowners, the difference is clear: no spoiled groceries, no stuffy nights without AC, and no surprise utility charges.
Smarter driving starts right at home
EV ownership is climbing fast across North America. But charging is often the sticking point. Public stations are expanding, but they’re not always convenient or affordable. Charging straight from the grid at home can also rack up costs during peak hours.
EcoFlow’s OCEAN EV Charger plugs directly into the OCEAN Pro system. Instead of unquestioningly pulling from the grid, it prioritizes solar first, then stored energy, and only dips into grid power when necessary. That means cleaner miles and cheaper fueling.
Why it matters:
Speed: Up to 11.5kW charging, giving you ~46 miles of range per hour.
Smart scheduling: No need to wake up at midnight to plug in—the system knows when to charge.
Compatibility: Works with most EVs thanks to the SAE J1772 connector.
Weather-ready: Outdoor rated with a 25-foot cable.
For EV drivers, this is freedom. You wake up each morning with your car fully charged—without spending hours at a public station or watching your bill creep up.
The financial equation
Money always tells part of the story. And when it comes to solar + storage + EV charging, the math makes sense:
Bill savings: Households can cut costs by 30–40% through smart scheduling.
Tax credits: A 30% U.S. federal tax credit applies to solar + storage, with state rebates layered on top.
Outage protection: Hotels, spoiled food, missed work—all the hidden costs of blackouts—disappear.
EV charging savings: Solar charging is often half the cost of public charging.
What was once seen as an “extra expense” is now a long-term savings plan.
Convenience without complexity
Here’s a reality check: most families don’t want to tinker with their energy system. They want something that works. That’s where EcoFlow’s design shines.
Plug-and-play setups simplify installation.
App-based control keeps everything visible—solar production, storage, even car charging.
Quiet, clean systems eliminate the noise and fumes associated with gas generators.
Scalable design lets you start small and expand later.
This balance of power and simplicity is what makes energy independence attainable for everyday households.
EcoFlow’s lineup for every stage
One size doesn’t fit all. That’s why EcoFlow created a whole ecosystem:
OCEAN Pro → The flagship, whole-home system.
DELTA Pro Ultra → Modular, expandable up to 90kWh for long-term planners.
DELTA Pro 3 → A hybrid solution for portability and backup.
DELTA Pro → Compact yet expandable, scaling up to 25kWh.
RIVER Series → Lightweight power stations for travel or emergencies.
Pair these with solar panels and the EV charger, and households can build energy independence step by step.
The human side of energy
Beyond savings and specs, energy security changes how families feel. Imagine a summer blackout where your neighbors are sweating it out, but your AC is humming. Or waking up after a storm knowing your EV still has a full charge.
For parents of young children or caregivers supporting older relatives, this isn’t just convenience—it’s peace of mind. No frantic trips to gas stations, no worrying about medical devices, and no stress about spoiled food.
Resilience isn’t only technical. It’s emotional.
Looking ahead
What used to be a “nice extra” is quickly becoming a standard expectation. Just like Wi-Fi and air conditioning once shifted from luxuries to necessities, home energy systems are heading the same way.
Solar panels on rooftops, smart batteries in garages, and EV chargers in driveways—it’s a picture of everyday life that’s becoming more common across North America. And it’s not futuristic anymore. It’s practical, affordable, and, increasingly, essential.
Conclusion: the future starts in your driveway
From the OCEAN Pro Solar battery storage to solar power for your home and the OCEAN EV Charger, EcoFlow’s solutions aren’t about flashy tech—they’re about giving households more control.
In a world where outages, costs, and EV adoption are colliding, these systems give families the independence they need. The driveway, the rooftop, the garage—they’re no longer just parts of a house. They’re where the future of energy lives.
Home remodeling projects always start with excitement, new designs, better layouts, more usable space. But the step that makes or breaks the outcome isn’t the color of tile or the brand of flooring. It’s the contractor you choose to trust with your home.
The right remodeling contractor can deliver a space that looks better, performs better, and lasts longer. The wrong one can leave you with uneven floors, plumbing headaches, or a half-finished project that drains your savings and your patience.
Whether you’re updating a bathroom, finishing a basement, or adding a new deck, choosing a remodeling contractor is both a financial and emotional investment. This guide explains what to look for, how to compare bids, and how to keep your project on track once work begins.
1. Start With Proof of Experience
Remodeling involves more than following blueprints, it’s about sequencing trades, anticipating hidden problems, and coordinating inspections. Always start your search by confirming that your contractor has direct experience with the type of project you need.
A bathroom remodel, for example, requires waterproofing and moisture control knowledge. A basement finish demands insulation, egress planning, and humidity management. A deck addition needs structural understanding of load, ledger attachment, and drainage.
Ask potential contractors for a portfolio of similar completed projects. Photos of past work tell you more about craftsmanship than any sales pitch.
2. Check Licensing, Insurance, and Local Familiarity
A professional remodeling contractor should carry general liability insurance, workers’ compensation, and where required state or county licensing. Don’t hesitate to request proof.
Local familiarity also matters more than most homeowners realize. A contractor who regularly works in your area understands local codes, inspection schedules, and material suppliers. For instance, crews in Terre Haute deal with clay soils, freeze–thaw foundations, and humidity swings that require different construction details than projects a few counties away.
Hiring local general contractors keeps timelines shorter, supports regional suppliers, and simplifies communication if you ever need follow-up service.
3. Read the Estimate Line by Line
When you receive quotes, the lowest price isn’t automatically the best value. Examine scope and specifications closely. If one bid excludes demolition, permits, or debris removal, you’re not comparing equals.
Every professional estimate should clearly outline:
Labor and material costs
Allowances for fixtures and finishes
Payment schedule
Warranty terms
Change order process
A transparent estimate is a sign of a contractor who plans projects carefully rather than improvising as they go. Hidden line items and vague descriptions often signal corners being cut later.
4. Ask About the Crew and Subcontractors
Remodeling involves multiple trades such as carpenters, electricians, plumbers, tile installers, HVAC technicians, and painters. Clarify whether your contractor uses an in-house crew or coordinates trusted subcontractors.
Consistency matters: a dedicated project manager or foreman keeps the schedule organized and ensures accountability. When too many unknown subs rotate through, details like drywall alignment, fixture placement, or trim finishing can suffer.
5. Communication Is Everything
Even the best contractors face occasional delays like material shortages, weather, or inspection backlogs. The difference between a smooth project and a stressful one is communication.
Before signing, ask how updates are handled:
Will you get a weekly progress email or call?
Who is your daily point of contact?
How are change orders documented?
Clear communication prevents misunderstandings about cost, schedule, or expectations. It also shows how seriously your contractor values transparency.
6. Plan for Permits, Inspections, and Cleanup
Many homeowners assume their contractor handles all permits automatically. Confirm it. Pulling proper permits ensures your remodel meets code which is crucial if you ever sell or refinance.
Cleanup is another detail to check. A professional crew keeps job sites organized, seals off dust, and hauls debris daily. Ask what protection measures they use for flooring and furniture in adjoining rooms. Small habits like shoe covers and plastic barriers reveal big things about work ethic.
7. Watch for Red Flags Before You Sign
Be cautious if you notice any of the following:
No physical address or business name listed on paperwork
Requests for large upfront cash payments
Reluctance to provide proof of insurance
Pressure tactics like “today-only discounts”
Unclear warranty or change order policies
A legitimate contractor will never hesitate to document credentials, show proof of insurance, or walk you through past projects. They know trust takes time to earn.
8. Understand the Remodeling Timeline
Even small remodels involve multiple steps such as demolition, framing, rough-ins, inspections, finishes, and final walkthroughs.
Ask your contractor for an approximate timeline that includes:
Planning and design approval
Permitting
Material ordering lead times
Construction start and milestone checkpoints
Final punch list and cleanup
Realistic expectations keep everyone calm when weather or supply chains throw a curveball. If your contractor offers a schedule that seems too good to be true, it probably is.
9. Why Hiring the Right Team Matters
Remodeling is not just about aesthetics, it’s about protecting structure, improving energy efficiency, and adding long-term value to your home.
A skilled contractor builds with both comfort and code in mind. They’ll waterproof properly, ventilate efficiently, and seal framing for durability. That kind of precision isn’t random, it comes from experience, training, and pride in workmanship.
One trusted source,Patriot Property Pros, emphasizes that success in remodeling comes down to planning, transparency, and craftsmanship. Their team works on everything from bathrooms and basements to decks and home additions, ensuring each project is built to last in Indiana’s changing climate.
When you choose a contractor who values both design and performance, you get a finished space that feels like part of your home, not an afterthought.
10. Final Thoughts: Building Confidence Before Construction
Home remodeling can be exciting when handled by the right professionals. The process is smoother, the costs stay predictable, and the results stand the test of time.
Before you sign any agreement, invest a little extra effort in vetting credentials, reading reviews, and verifying communication habits. Choose a contractor who treats your home with the same respect they’d treat their own. That’s the difference between a project you regret and one you enjoy every day.Whether you’re updating a bathroom, finishing a basement, or adding a new deck, a porch enclosure, choosing a remodeling contractor is both a financial and emotional investment. This guide explains what to look for, how to compare bids, and how to keep your project on track once work begins.
There’s a special kind of satisfaction in having a yard that doesn’t just look good but truly belongs. The kind of space where everything fits the climate, the soil, and the rhythm of North Texas. That often means planting natives, species that evolved for this environment long before irrigation systems and lawn services came along. They’re resilient, low-maintenance, and best of all, they actually make your property feel alive in a way cookie-cutter landscaping never does.
Why Native Plants Belong in Dallas Yards
When you choose native plants, you’re not just planting for looks. You’re building a micro-ecosystem that supports pollinators, balances moisture naturally, and handles the Texas heat without complaint. Plants like black-eyed Susans, purple coneflowers, and Gulf muhly grass thrive in the clay-heavy soil most Dallas properties sit on. They don’t need constant watering or special fertilizers because they already know how to live here. That’s what makes them one of the smartest outdoor upgrades. They save you time, money, and gallons of water over the years.
The other upside is authenticity. There’s a beauty in letting your yard reflect where you actually live. Dallas has its own palette of greens, golds, and blooms, and native plantings bring those colors out naturally. A yard filled with regional plants looks settled, timeless, and perfectly at home.
Trees That Actually Thrive in Dallas
Trees are the backbone of any yard, but not every species can handle the Texas temperament. Native trees like live oak, cedar elm, and bur oak are rock-solid choices for long-term shade and stability. They’re deeply rooted, literally and can handle the unpredictable swings between heat, drought, and sudden downpours. Redbuds and Mexican plums bring bursts of color in spring, while Texas mountain laurels add that signature purple bloom and sweet scent people always stop to admire.
A well-placed native tree doesn’t just look good, though. It can cool your home naturally, reduce energy bills, and increase property value without demanding much upkeep. These species evolved to survive here, so they don’t throw tantrums when the summer sun hits triple digits. With native trees, your yard grows into something that looks more effortless each year instead of something you have to fight to maintain.
Partnering with a Local Arborist
Even the most self-reliant yard sometimes needs a little expert care. That’s where calling a reputable arborist in Dallas becomes worth every penny. Arborists familiar with native species know exactly how to prune, shape, and monitor for local pests without over-treating or causing stress to the tree. They also know how to help newly planted trees establish strong roots, critical in a city where soil compaction and inconsistent rainfall can challenge even hardy species.
An arborist who understands local conditions can advise on spacing, canopy management, and long-term health in ways that a quick YouTube tutorial never could. It’s the difference between having a yard that looks decent for a few years and one that matures into a genuine landscape.
Creating a Low-Maintenance Landscape
A yard full of native plants and trees practically runs itself once established. These species don’t require the endless watering cycles or chemical treatments that imported plants do. They’ve adapted to the dry spells, the heavy rains, and the sticky humidity that define the Dallas area. That means your weekends become less about dragging hoses and more about enjoying the space you built.
Mulching around native beds helps retain moisture, prevent weeds, and regulate soil temperature. Local compost can provide any nutrients the soil lacks. Over time, the yard begins to balance itself as native ground cover fills in naturally, birds return, and the lawn starts to feel more like an ecosystem than a chore list.
There’s also something quietly rewarding about a yard that doesn’t rely on shortcuts. When you use plants that belong here, everything just works better. You’re not fighting nature. You’re working with it.
The Neighborhood-Wide Benefits
There’s a community benefit, too. Native plantings help stabilize soil, prevent erosion, and reduce water runoff that can overwhelm city drainage systems. When multiple homes in a neighborhood embrace native landscaping, the entire area becomes more resilient to heat waves and dry spells. Pollinators like bees and butterflies thrive when they can move from yard to yard without finding invasive or nonflowering plants blocking their path.
On top of that, it simply looks better. A neighborhood with healthy, mature oaks, vibrant native grasses, and seasonal wildflowers feels grounded in place. It stands out from developments that look identical from one lot to the next. Homebuyers notice that kind of character, which means native plantings can add curb appeal without raising maintenance costs.
Bringing It All Together
Native landscaping isn’t a trend. It’s a return to common sense. Designing a yard that suits its surroundings instead of working against them. With a mix of well-chosen native plants, a few resilient trees, and guidance from local professionals, a Dallas yard can be both beautiful and sustainable. The best part is how natural it all feels once it settles in.
The most beautiful yards aren’t the ones that look perfect. They’re the ones that fit their environment like a favorite pair of boots. Native plants and trees bring that sense of belonging to your Dallas property. They make your yard sturdier, more vibrant, and easier to live with year after year. Sometimes the smartest landscaping move isn’t adding more, it’s choosing what was meant to grow there all along.
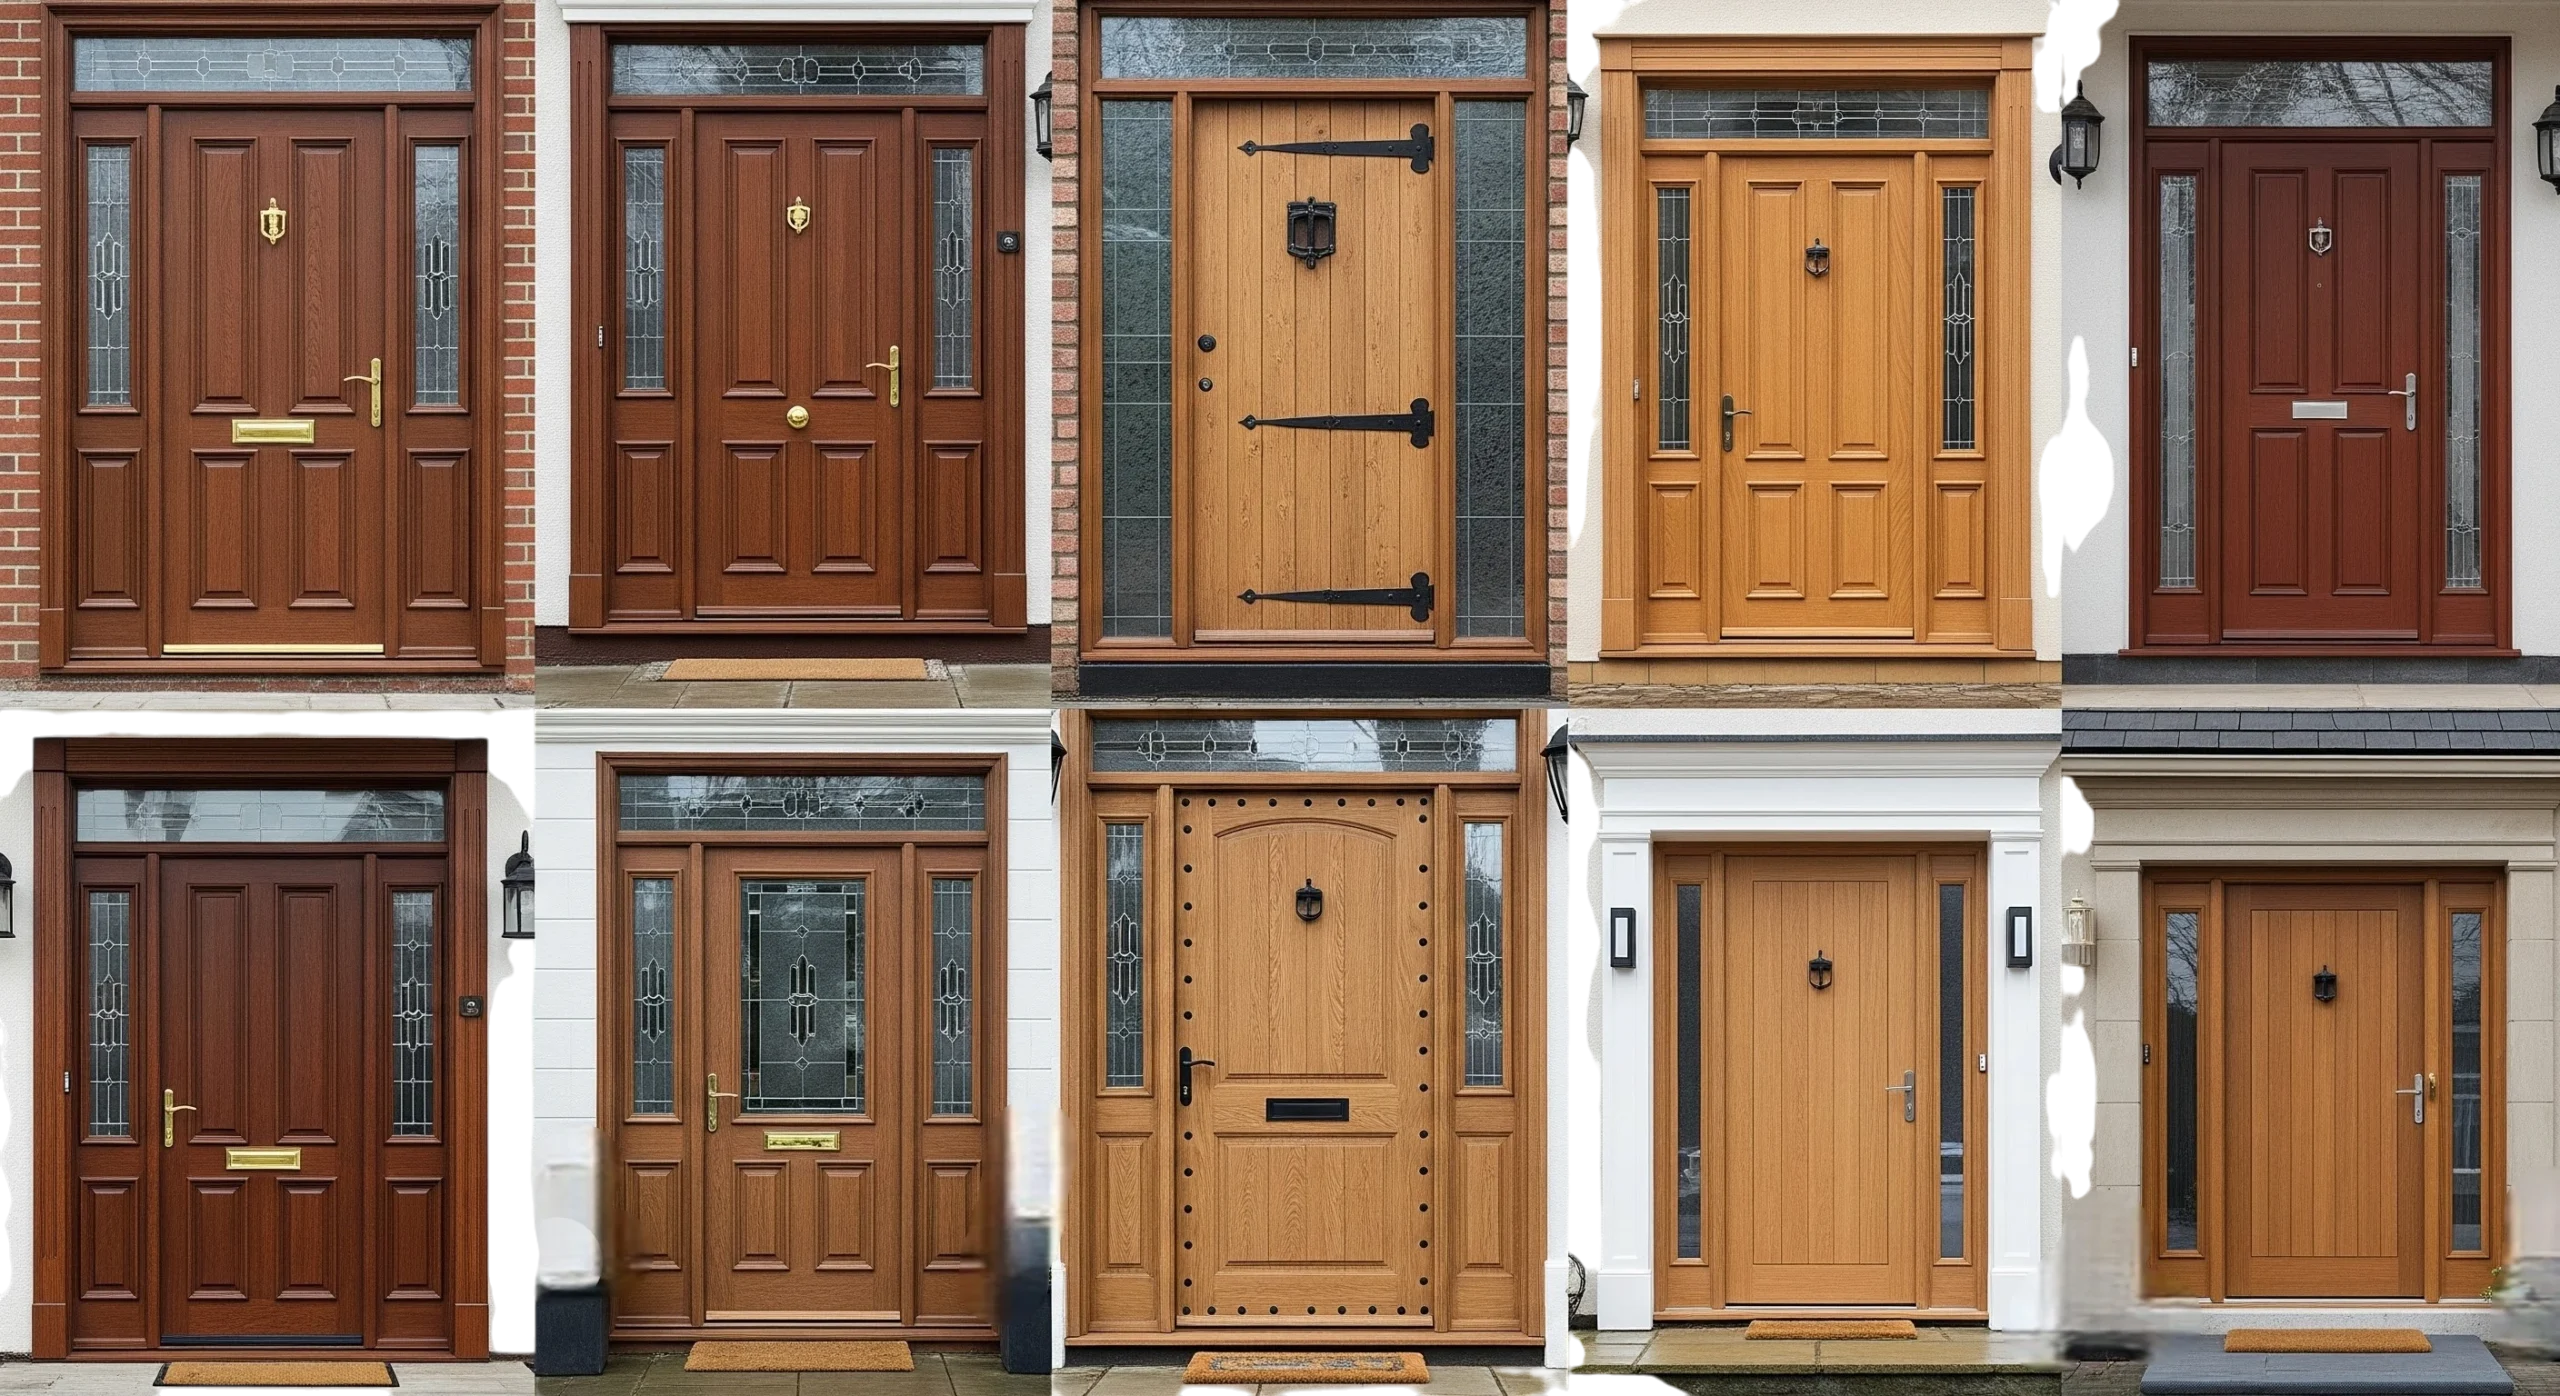
When you plan a renovation, a new door sounds simple. It is not. A solid wood door changes how your home feels when you walk in, how quiet your rooms are when they close, and how finished everything looks. In fact, solid wood doors are an investment that offers long-lasting beauty, security, and energy efficiency. If you want an upgrade you can see and touch every day, this one earns its spot near the top of your list.
What makes a solid wood door different
You are getting one piece of architecture, not just a barrier. The door has heft, real grain, and a profile that takes stain beautifully. Pick from familiar species like oak, cherry, mahogany, or walnut, then match the finish to your floors, trim, or cabinetry for a pulled-together look. If you like a clean, modern vibe, a flat panel reads sleek. If your place leans traditional, a classic 3-, 5-, or 6-panel design feels right at home.
Everyday Differences You’ll Feel
Quieter rooms. The mass of solid wood helps dampen sound between bedrooms, offices, and the main living area. That extra weight is what gives you the satisfying “thunk” when the latch engages.
Better comfort. A well-built wood slab with proper weatherstripping limits drafts at exterior openings and helps your HVAC hold temperature more evenly room to room. When you are weighing inspection punch-lists on a home purchase, this type of fit and finish is one of those small things that supports the bigger goal of a tight, well-maintained house.
Repairable and refinishable. Nicks, kid gear, pet life. Solid wood can be sanded, spot-repaired, and re-stained. Over time, you refresh the door instead of replacing it outright.
Security you can feel. Dense wood, strong hinges, and a solid jamb work together with quality locks. The door resists flexing and is harder to breach than a light, hollow-core panel.
Where They Add Real Value
If you are planning to live in the home for a long time, quality doors become part of your everyday comfort. If you may sell, they are part of the first impression. Buyers and inspectors look closely at fit, finish, operation, and maintenance, and doors are on that short list along with flooring, cabinetry, and windows. Clean operation, no rubs, no daylight where there should be weatherstripping, and a consistent stain or paint read as pride of ownership during walk-throughs and inspections.
If you are selecting finishes in a new build, put doors on the same decision tier as counters and flooring.
Style Moves That Work at Home
Warm oak or white oak fits almost any style, from coastal to craftsman.
Rich walnut adds depth in a study or media room where you want a quieter feel.
Clear or seeded glass lites bring natural light down a hallway without giving up privacy.
Oil-rubbed bronze or unlacquered brass hardware pairs nicely with wood grain and ages well.
You can mix interior and exterior looks while keeping a consistent profile and rail layout so your home feels cohesive.
Practical Notes That Keep the Project Smooth
Sizing and swing. Confirm rough opening, slab size, and swing direction before you order. If you are replacing an exterior door, take a snug look at the threshold and sill condition so installation goes in cleanly.
Finish. Seal all six sides, including the top and bottom edges, and follow with your stain or paint system. This is what keeps out moisture and helps the door stay true over time.
Hardware. Heavier slabs deserve heavy-duty hinges and strike plates. If you want a keyless deadbolt at the entry, pick the model now so your bore prep matches.
Inspection moments. If you are under contract on a home, your general inspector will test operation, look for rubbing, and note issues like daylight at the perimeter or missing weatherstripping. You can use that feedback to ask for repairs or a credit before you close.
New construction timing. When you are making selections with a builder, plan door choices along with cabinetry and flooring. Upgrades are often easier to negotiate as part of the package rather than à la carte later.
Sustainability and Sourcing
Wood is a renewable material when harvested responsibly. A solid wood door can be maintained and refinished for decades, which helps you keep materials out of the waste stream. At end of life, wood is easier to recycle or repurpose than many composites.
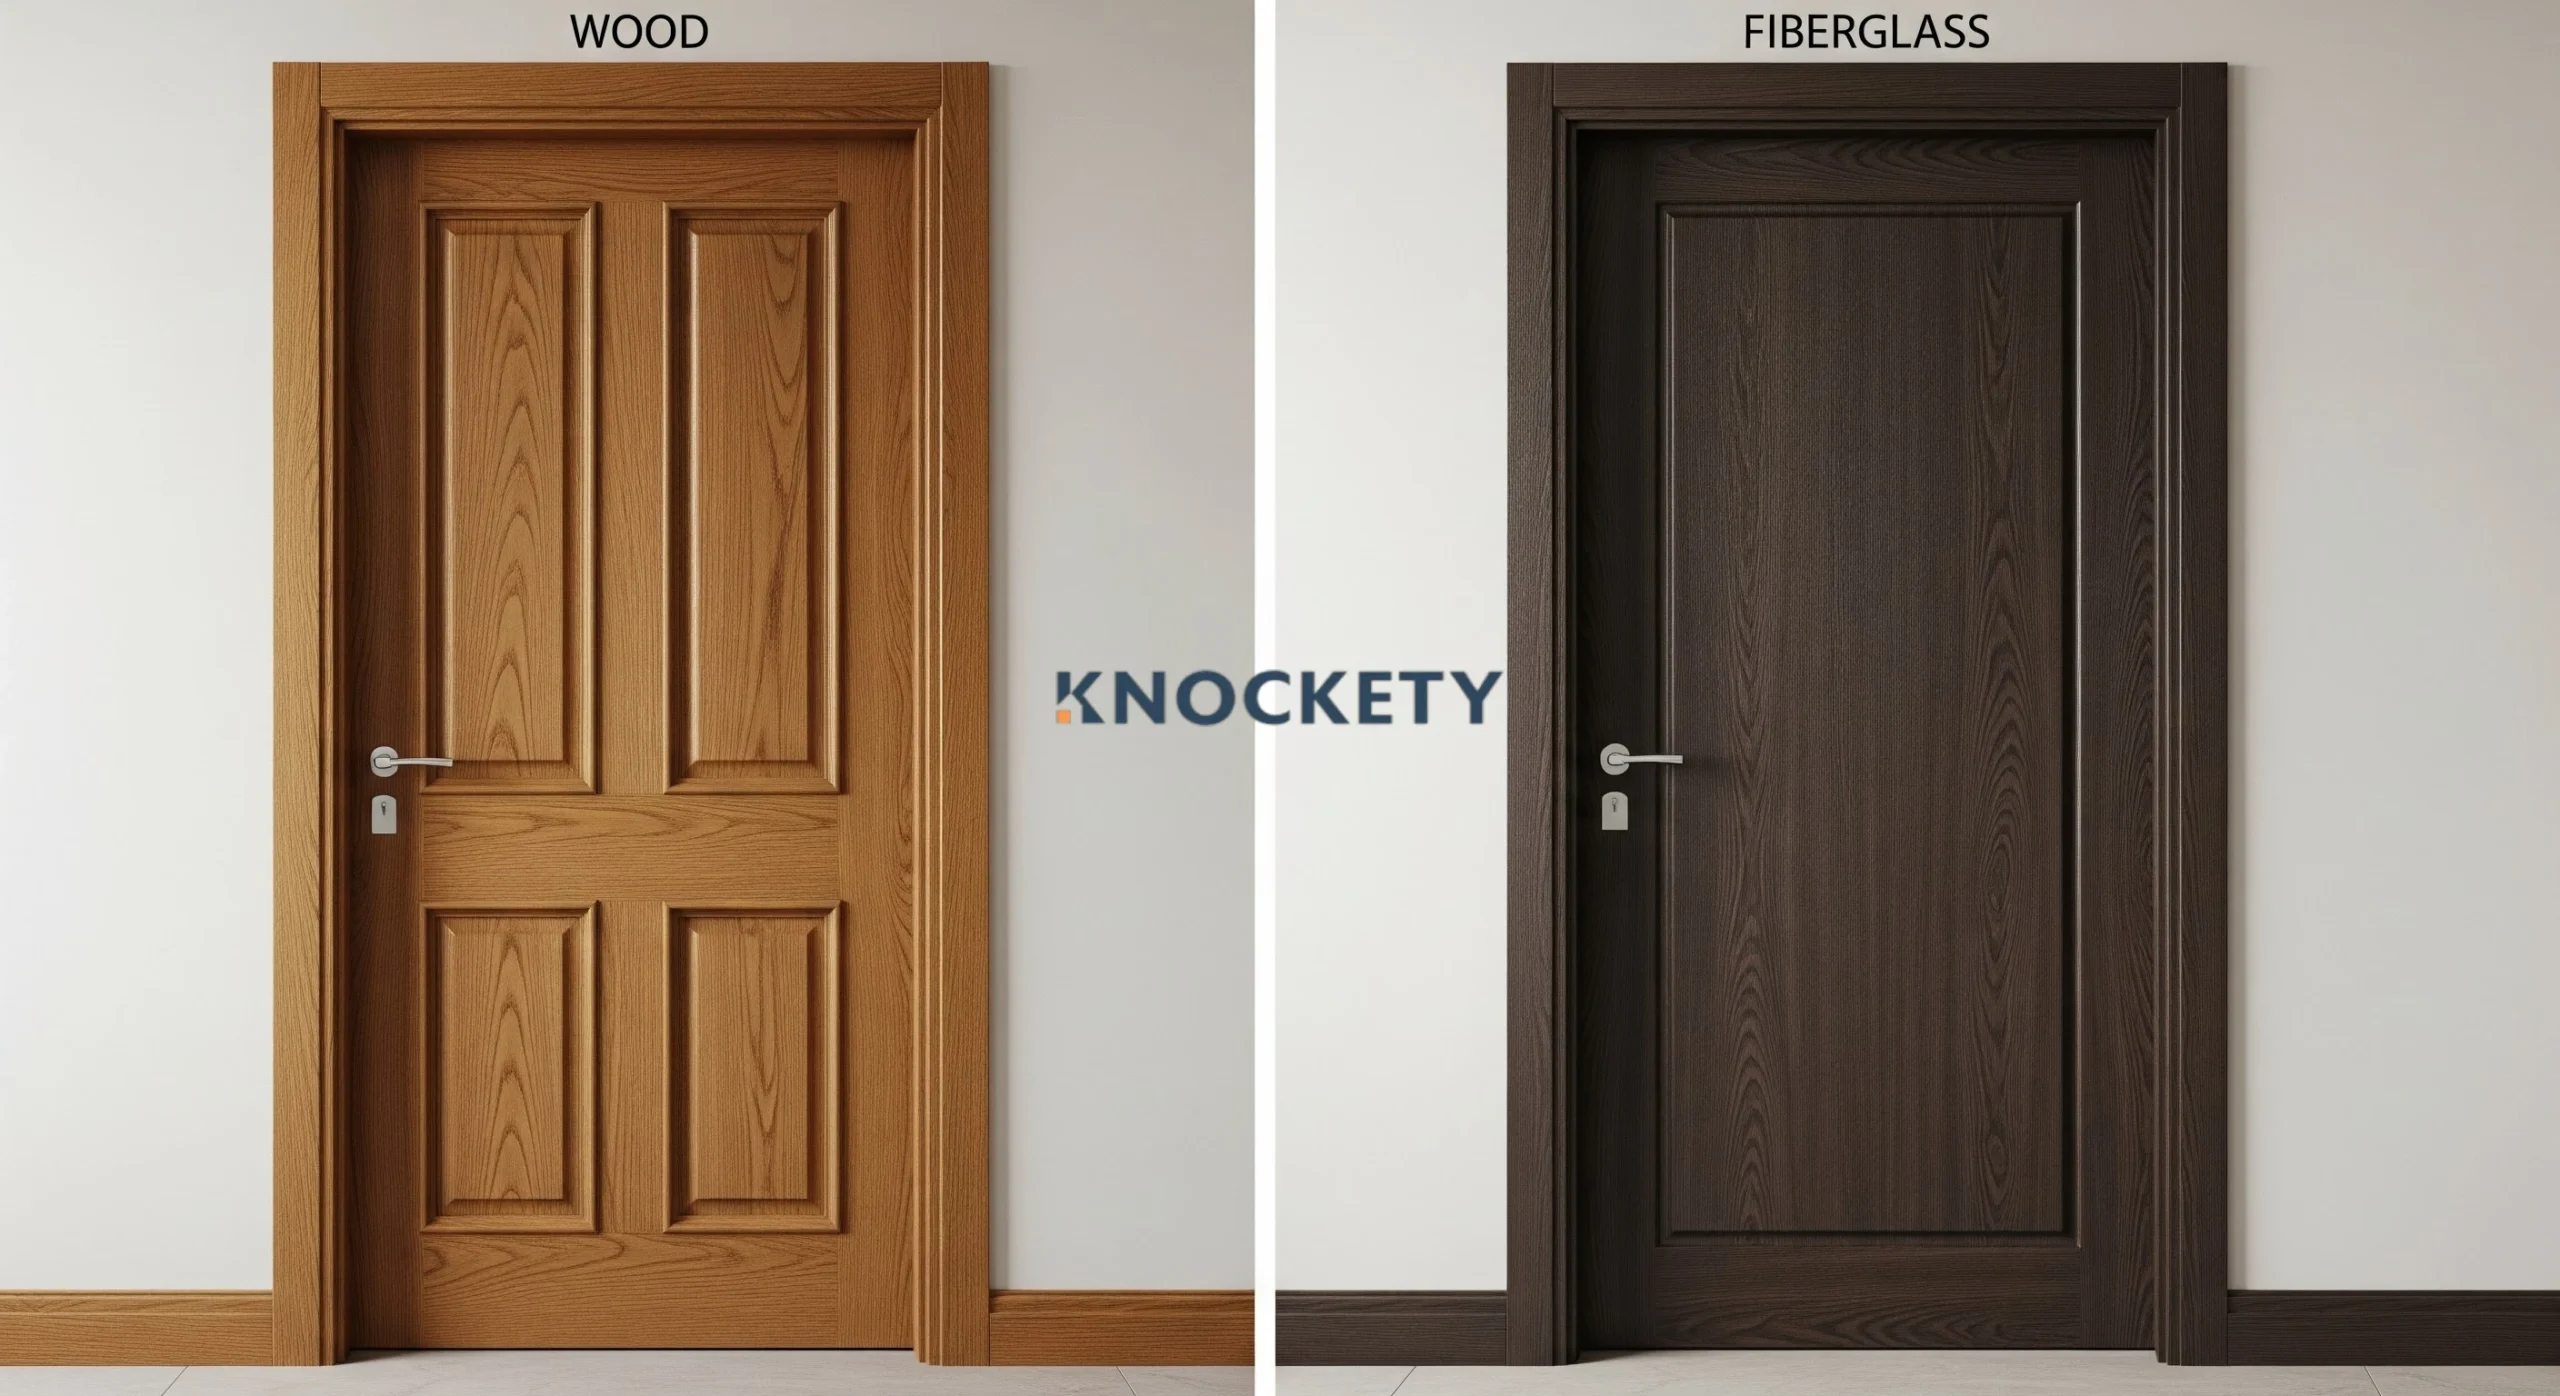
When Another Material Fits Better
If an exterior opening in a high-exposure spot takes direct weather with limited overhang, you might consider a fiberglass entry that mimics wood grain. If you still want wood inside, you can keep the interior package solid wood and use fiberglass for that one exterior exposure. Keep the profiles consistent so the house still reads as one design story. You can evaluate these side by side in a builder showroom.
How to Choose the Right Solid Wood Door for Your Home
Decide the role. Entry, bedroom, office, pantry, or pocket. Each has different privacy, glass, and sound needs.
Pick the panel style. Flat panel for modern, raised or shaker for traditional, glass lites for borrowed light.
Choose the species and finish. Line this up with floors and trim so your eye reads one palette.
Match the hardware. Hinge type, lever set, backplate size, and finish.
Plan installation and timing. If you are mid-purchase, align any door asks with your inspection window, then handle credits or repairs before closing so there are no surprises later.
FAQs
Are solid wood doors worth it?
Yes. You get daily function, a quieter home, better perceived quality, and a finish you can refresh over time. Those benefits show up during showings and inspections when it is time to sell.
How long do they last?
With proper sealing and routine care, decades. The ability to repair and refinish extends the life of the door far beyond a basic hollow-core panel.
Do they help with insulation?
A solid slab with tight weatherstripping reduces drafts and helps your system keep a steady temperature, which supports overall comfort and operating costs. During due diligence on a purchase, this type of detail often comes up as part of repair requests or credits.
Can you repair dents or scratches?
Yes. Light sanding and spot staining usually blend small marks. Heavier damage can be patched, then re-finished to match.
At Knockety, you can shop styles that fit a craftsman bungalow, a modern farmhouse, or a clean contemporary home. Pick your species, panel layout, and glass, then line up the hardware to match. If you are building or under contract, bring those decisions to the table early so they are part of the package rather than an afterthought.
When you’re looking at ways to add value to your Dallas home while cutting down on those sky-high heating bills, installing a wood stove might just be the smartest move you make this year. But here’s where most homeowners get sticker shock: the installation costs.
Professional chimney installation can easily run $3,000 to $5,000 or more, turning what should be a money-saving upgrade into a major expense. Installing your own chimney system might sound complicated, but it’s actually a lot simpler than you think. With the right guidance and quality materials, you can tackle this project yourself and pocket thousands of dollars in the process.
Why Dallas Homeowners Are Going DIY
The Texas housing market has been red-hot for years, and with that comes higher costs across the board. Contractors are busier than ever, which drives up installation costs. Meanwhile, energy prices keep climbing, making alternative heating sources more attractive than ever.
A quality wood stove can slash your heating bills by 50% or more during those chilly North Texas winters. When you factor in the money you’ll save by doing your own installation, you’re looking at a payback period of just a few seasons instead of several years.
But beyond the financial benefits, there’s something satisfying about completing a project like this yourself. You’ll know exactly how everything is installed, which components were used, and how to maintain the system properly. That peace of mind is worth plenty on its own.
Understanding Chimney System Basics
Before diving into installation, it helps to understand what you’re working with. A modern wood stove chimney system consists of several key components that work together to safely vent combustion gases outside your home.
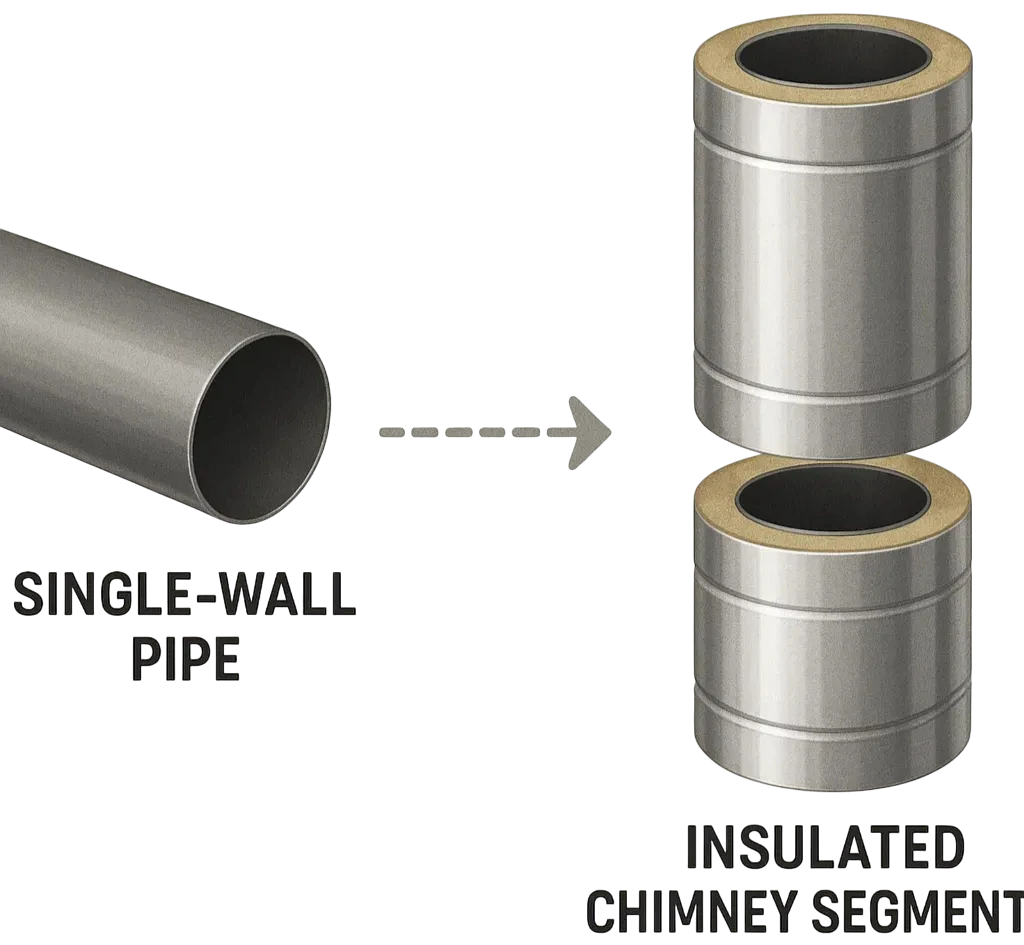
The stove pipe connects your wood stove to the chimney system. This is typically single-wall or double-wall pipe that runs from the stove outlet to where it meets the insulated chimney pipe. The diameter matters here – most residential installations use 6-inch pipe, though some larger stoves require 8-inch systems.
Once you transition from the living space to areas where the pipe passes through walls, ceilings, or the roof, you’ll switch to insulated chimney pipe. This double-wall or triple-wall pipe is designed to maintain safe clearances from combustible materials while keeping the flue gases hot enough to maintain proper draft.
Manufacturers have standardized connections, included detailed instructions, and engineered systems that don’t require specialized tools or extensive construction experience.
Planning Your Installation
Every successful installation starts with proper planning. Begin by determining the best location for your wood stove, keeping in mind both heating efficiency and installation requirements. You’ll want to minimize the number of turns and horizontal runs in your chimney system, as straight vertical runs provide better draft.
Measure carefully from your proposed stove location to where the chimney will exit through the roof. This helps you determine exactly what components you’ll need and avoid costly delays while waiting for additional parts.
Local building codes do apply to chimney installations, even DIY ones. While requirements vary by municipality, most areas require permits for new chimney installations. The good news is that most building departments are familiar with modern chimney systems and the permitting process is usually straightforward.
Don’t forget about clearances to combustible materials. Modern insulated chimney systems have specific clearance requirements that are much less restrictive than older masonry chimneys, but they still need to be followed exactly. Your installation instructions will spell these out clearly.
Selecting Quality Components
This isn’t the place to cut corners. Your chimney system is a critical safety component, and quality materials are essential for safe, reliable operation. Look for UL‑listed chimney systems that are tested and listed by recognized testing laboratories.
When shopping for the best chimney pipes for wood stoves, you’ll find systems designed specifically for different applications. Class A chimneys are required when passing through or near combustible materials, while connector pipe is used in the living space from the stove to the wall or ceiling penetration.
A 6-inch stove pipe diameter is standard for most residential wood stoves, though you should always verify what your specific stove requires. Using the wrong diameter pipe can create dangerous draft problems and void your stove’s warranty.
Many suppliers offer wood stove chimney kit packages that include all the components you need for a typical installation. These kits take the guesswork out of ordering and ensure all your components are compatible.
The Installation Process
Modern chimney systems are designed to go together logically, almost like a sophisticated set of building blocks. Most installations follow a similar sequence, starting with the stove pipe connections and working upward through the house to the roof termination.
You’ll typically start by connecting the first section of stove pipe to your wood stove outlet. From there, you’ll run pipe to your wall or ceiling penetration point, where you’ll install the appropriate thimble or support box.
The transition to insulated chimney pipe happens at this penetration point. This is where the single-wall connector pipe ends and the double-wall or triple-wall chimney pipe begins. This transition point is critical for both safety and proper system function.
Once you’re in the insulated chimney section, installation becomes a matter of assembling sections as you work your way up through the house. Most systems use a twist-lock connection that creates both a mechanical joint and an airtight seal.
The roof penetration requires careful attention to weatherproofing. A quality roof flashing system will keep water out while allowing the chimney to expand and contract with temperature changes. Take your time here – a small leak can cause big problems down the road.
Getting Expert Guidance When You Need It
Even with detailed instructions and quality components, questions come up during installation. Maybe you’re not sure about a specific clearance requirement, or you need advice on the best way to route your chimney through a particular part of your house.
This is where having access to experienced technical support makes all the difference. The specialists at Flue-Pipes understand that DIY installers need a different kind of support than contractors. They can walk you through specific installation challenges over the phone, helping you work through problems without requiring an expensive service call.
Having this kind of backup gives you confidence to tackle the project yourself while knowing help is available if you need it. It’s like having an experienced installer looking over your shoulder, ready to offer advice when you need it.
Cost Savings That Add Up
A typical professional installation might cost $4,000 to $6,000, while the same chimney system purchased directly costs $800 to $1,500 depending on height and complexity.
Even factoring in tools you might need to purchase and the value of your time, you’re looking at savings of $2,500 to $4,000 on a typical installation. For many homeowners, that’s money that can go toward other home improvement projects or simply stay in your pocket.
Safety Considerations
Working on roofs and handling chimney components require attention to safety. Take your time, use proper safety equipment, and don’t hesitate to get help when you need it. A helper makes many parts of the installation easier and safer.
Follow all manufacturer’s instructions exactly. These systems are engineered to work safely when installed according to specifications, but shortcuts or modifications can create dangerous situations.
When in doubt, consult with experts. A phone call to technical support can answer questions and ensure you’re on the right track. It’s much better to ask questions during installation than to discover problems later.
Maintenance and Long-Term Value
A properly installed chimney system should provide years of trouble-free service with minimal maintenance. Annual cleaning and inspection are typically all that’s required, and these are tasks you can handle yourself once you understand your system.
Regular maintenance protects your investment and ensures safe operation. A clean, well-maintained chimney provides better draft, burns more efficiently, and lasts longer than a neglected system.
The value added to your home by a quality wood stove installation often exceeds the cost of the materials, especially when installation costs are minimal. Energy-efficient heating options are attractive to buyers, particularly in areas where heating costs are significant.
Taking the Next Step
Installing your own wood stove chimney system represents both an immediate cost saving and a long-term investment in your home’s value and comfort. With quality components, proper planning, and access to expert guidance when needed, it’s a project that’s well within reach of most homeowners.
The key is starting with quality materials from reputable suppliers who understand the DIY market and can provide the support you need for a successful installation. Don’t let installation costs prevent you from enjoying the benefits of efficient wood heat in your Dallas‑area home.
Your heating bills will thank you, your home’s value will benefit, and you’ll have the satisfaction of completing a significant home improvement project yourself. In today’s economy, that combination of practical benefits and personal satisfaction makes DIY chimney installation a smart choice for Dallas homeowners looking to maximize their investment.
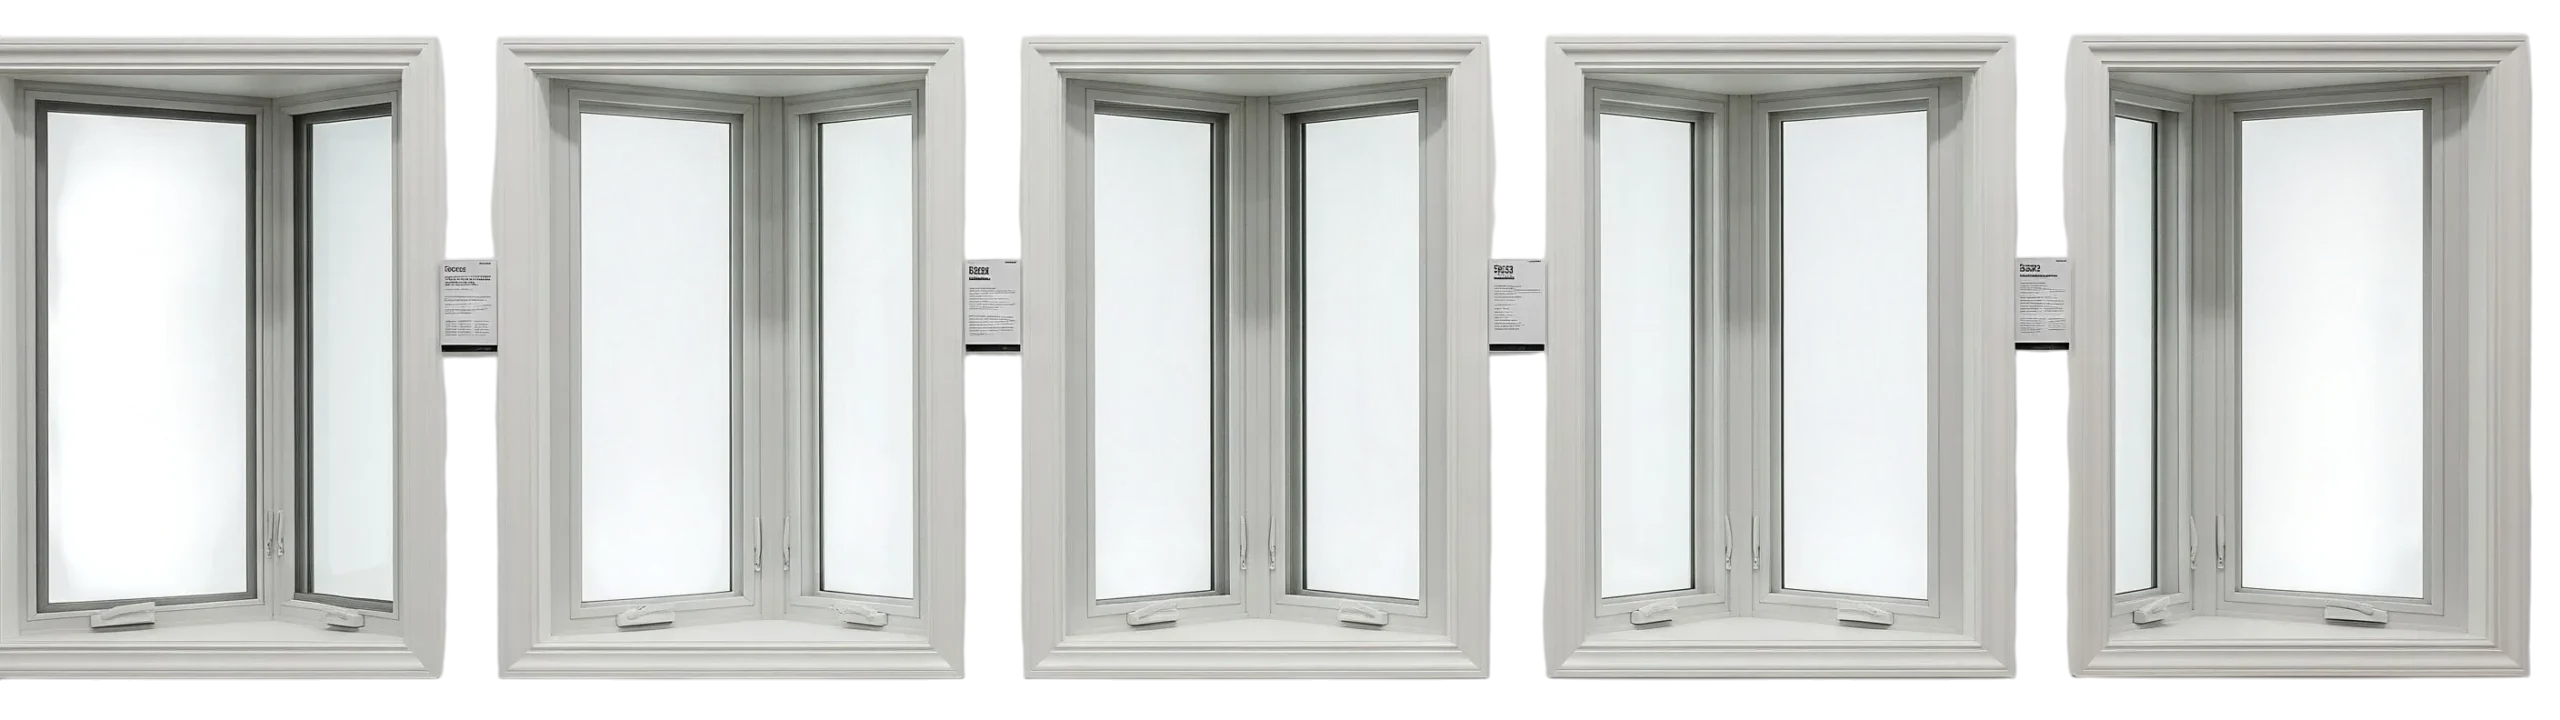
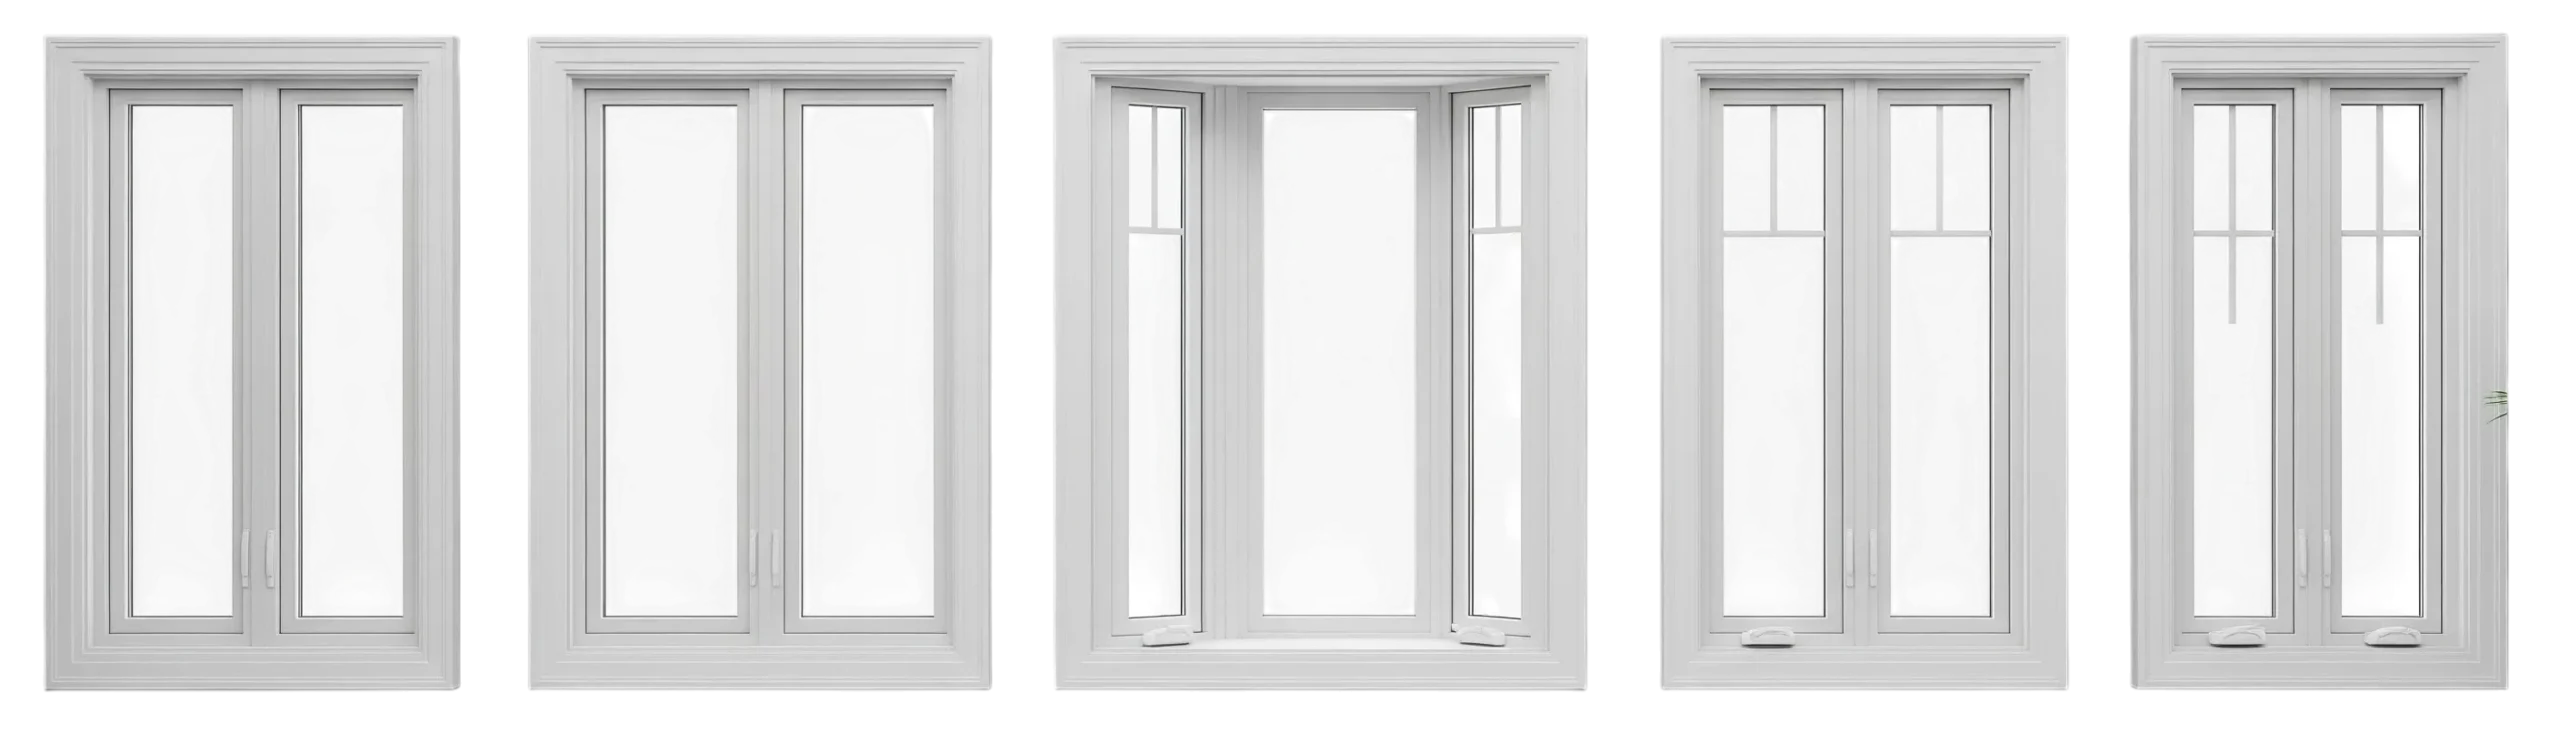
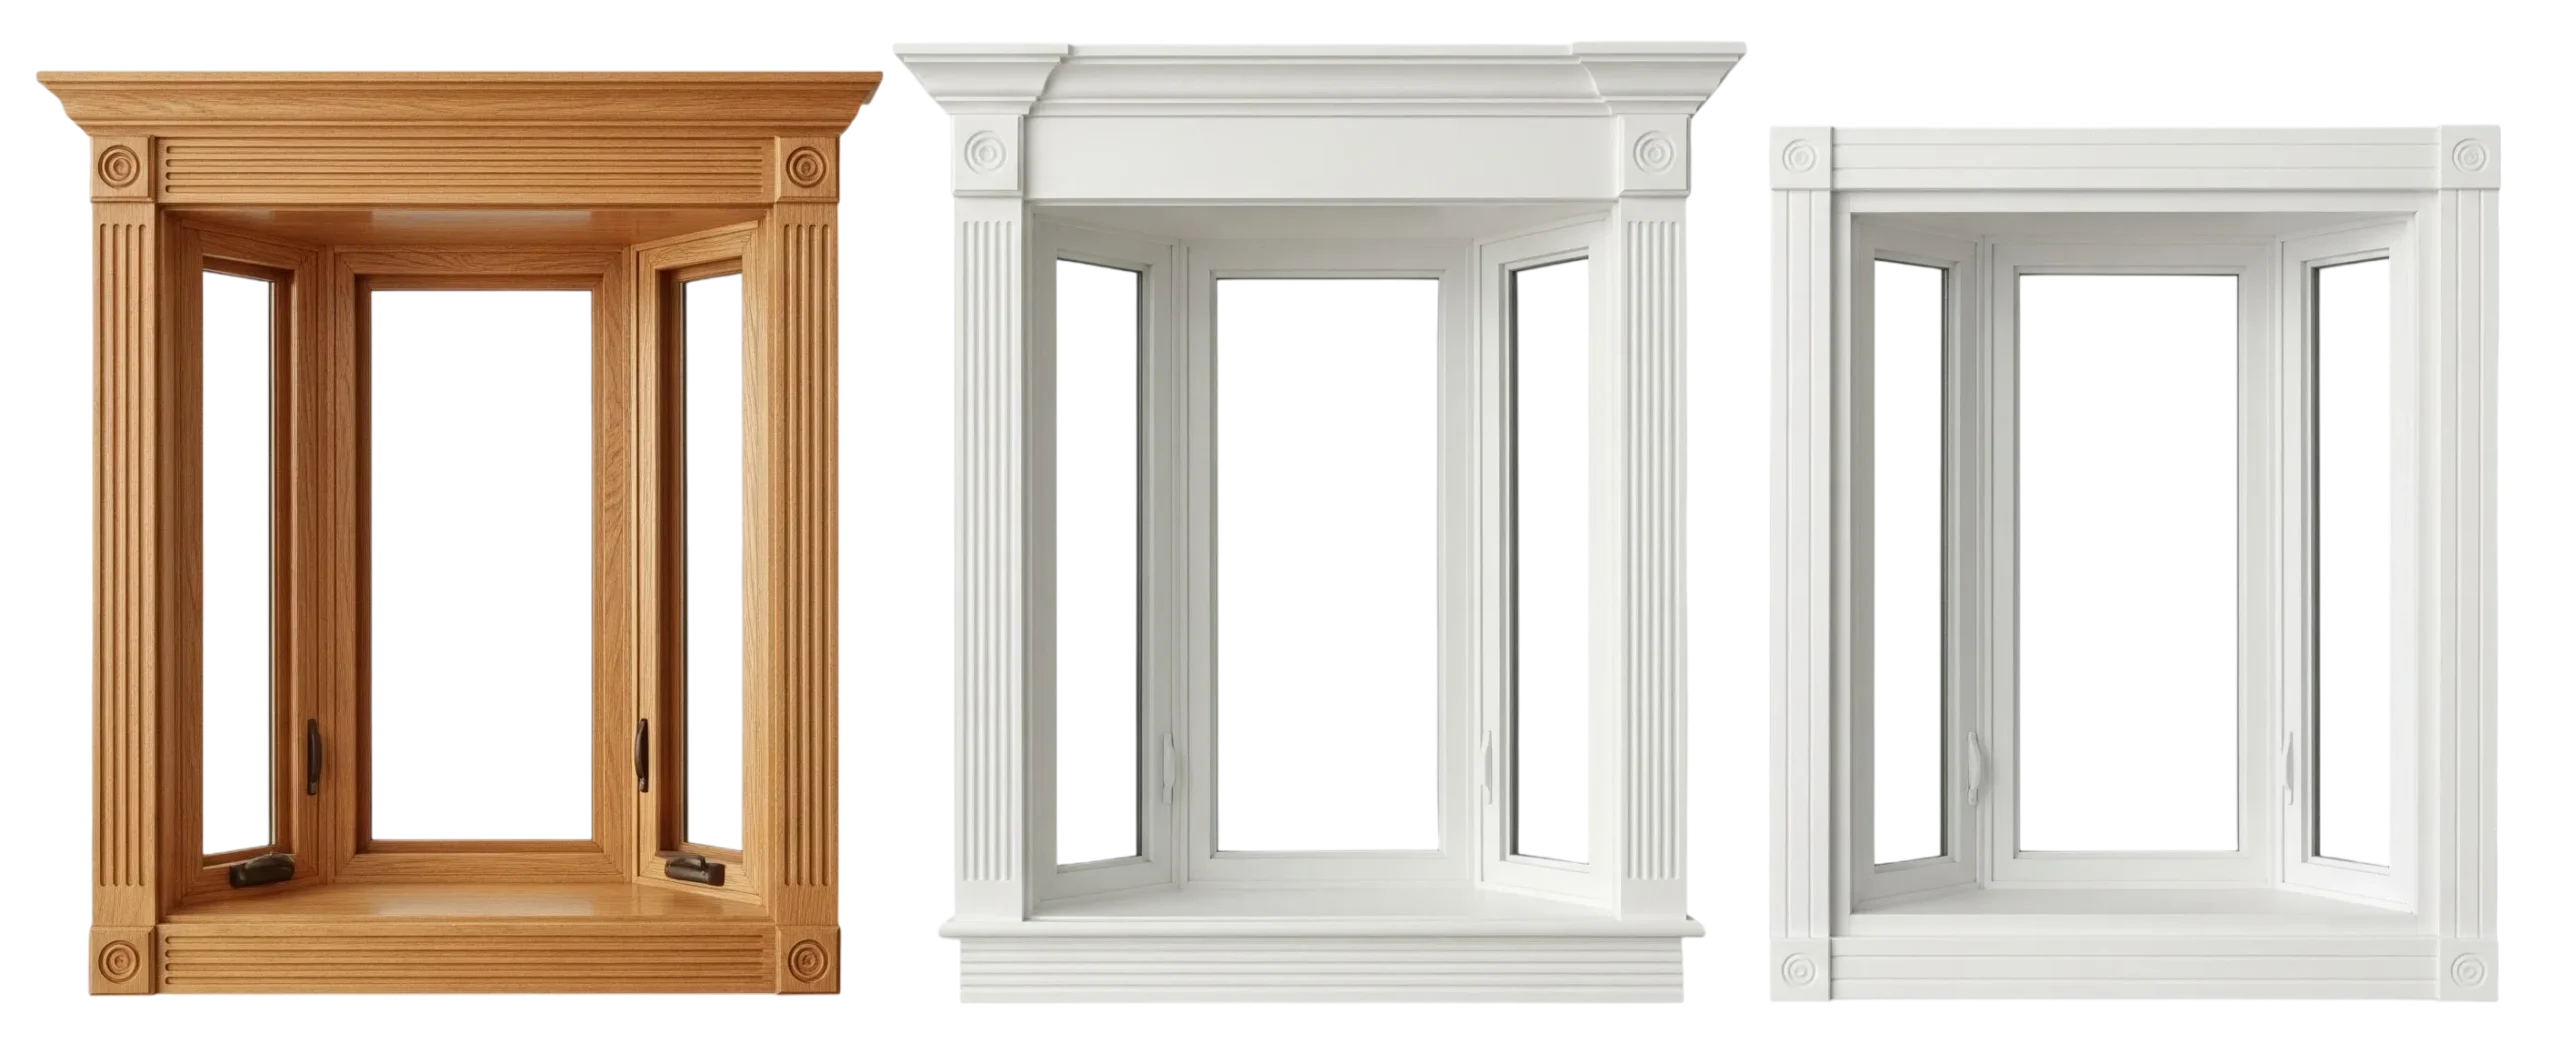
A bay window is more than a functional addition. It’s a design feature that immediately transforms a room, projecting outward from the wall to create an alcove that feels made for a cushioned bench, a reading chair, or low built-ins. Angled side panels invite daylight from different directions, so the room brightens through more hours of the day. When the flank units open, you also get steady airflow. Once installed, the unit is a permanent improvement that becomes part of your real property, not a removable accessory.
Homeowners choose this style to get curb appeal from the outside and extra square inches inside, without adding a full addition. Bay configurations commonly use 30‑, 45‑, or 60‑degree angles, and you can pair fixed or operable flank windows with a larger center picture panel. In living rooms, kitchens, and bedrooms, that combination adds seating, storage, or a sunny spot for plants with a clean, built‑in look.
You can order wood, fiberglass, or vinyl frames. Wood delivers warmth and a furniture‑grade finish. Fiberglass offers crisp lines and strong thermal performance. Vinyl keeps maintenance light and pricing accessible. Finish choices range from stained interiors to color‑matched exterior cladding. Grilles, factory‑installed blinds between the glass, and screens round out the look. Energy‑saving low‑E glass and argon fills help control heat gain and loss, which supports lower utility costs and can make your home more attractive when it is time to sell.
Bay Window Cost Comparison: Pella, Andersen, and Vinyl
Pella bay window cost
For a typical replacement, a Pella bay window often lands between $2,000 and $5,500. Size, the projection angle, wood or fiberglass construction, upgraded glass packages, and options like between‑the‑glass shades move the number. Custom sizing and factory staining add to the total. Labor varies by region and by whether your opening needs structural reinforcement, so it makes sense to gather a few written quotes before you decide.
Andersen bay window cost
Andersen is known for long‑running product lines and its Fibrex composite frames. An Andersen bay usually ranges from $2,500 to $6,000 depending on configuration and options. Fibrex resists warping and takes darker exterior colors well, which keeps the look consistent on modern and traditional homes alike. As with any premium brand, glass, finish choices, and size influence the final amount.
Vinyl bay windows
If you want the most budget‑friendly route, vinyl bays generally price in the $1,200 to $3,000 range. Vinyl trims routine upkeep and stands up well to moisture. The tradeoff is a simpler, more utilitarian look compared to stained wood interiors or composite exteriors. For rentals, secondary living spaces, or refresh projects where cost control matters most, vinyl often makes the short list.
Energy‑efficient and custom builds
Energy‑efficient packages with insulated glass and upgraded weather seals increase the bid up front and help rein in energy spend through the seasons. Bespoke units with unique dimensions, deeper seatboards, or color‑matched trims command more at install and give you a tailored fit that reads as part of the architecture long term. Those upgrades support comfort and operating savings in day‑to‑day living, which is why many owners prioritize them.
Replacement timing and long‑term value
When to consider replacement Drafts you can feel, fog or moisture between panes, soft or discolored wood, or flank units that no longer open and close cleanly are all signals. A new bay improves comfort, trims hot‑and‑cold spots near the opening, and refreshes the elevation you see from the street.
What you’ll likely spend Bay window replacement often falls between $2,000 and $6,500+ depending on size, brand, frame material, and installation scope. Structural work, exterior roofing over a deep projection, and interior trim carpentry influence labor.
Budgeting for upkeep Set aside a small portion of your home budget each year for maintenance like exterior caulking, paint or finish touch‑ups on wood interiors, and hardware tune‑ups. Many homeowners use a simple 1% to 3%‑of‑purchase‑price rule of thumb for annual home maintenance to stay ahead of surprises, which keeps projects like window care manageable.
Installation basics that affect price
Opening type Insert replacements slide into the existing frame and can shorten labor. Full‑frame replacements remove the old frame and add new interior trim, exterior cladding, and insulation around the seatboard and headboard, which raises the bid and often yields better performance.
Support and weatherproofing Installers anchor the head, seat, and jambs, then tension overhead support cables so the unit carries its weight cleanly. Insulation under the seatboard, pan flashing, and careful exterior cladding keep out water and air.
Local codes and details Tempered safety glass, egress rules in bedrooms, and exterior projections over sidewalks are examples of items your contractor will review so the new bay meets local requirements. A clear scope and timeline in your contract helps everyone align on milestones and what is included, which is the same mindset you bring to a smooth real estate closing.
How to shop and compare quotes
See products in person Showrooms help you compare frame profiles, interior finishes, and hardware side by side. It is the easiest way to decide whether you prefer a stained wood interior, a low‑gloss composite, or a clean white vinyl. Visiting a model space also helps you visualize seat depth and projection before you order.
Ask for line‑item proposals Request written bids that separate product, labor, disposal, and carpentry. Confirm the glass package, grille pattern, screen type, and projection angle in writing. Ask about lead times, whether interior painting or staining is included, and how your exterior will be finished.
Check warranties and references Look for a manufacturer warranty on glass and frames and a separate workmanship warranty from the installer. Ask to see one or two recent bay installs nearby and look for clean exterior cladding and tight interior trim.
Plan your walk‑through Build in a final walk‑through with your installer to confirm operation of operable units, verify even reveals, and review exterior sealing. Clear timelines for selection, ordering, installation, and punch‑list items keep the project moving and reduce rework. That same approach works in real estate transactions where defined timelines help both sides reach the finish line.
A bay window changes the way a room looks and feels. Pella and Andersen deliver higher‑end materials and finishes with cost ranges to match, and vinyl keeps the project simple and economical. Energy‑efficient glass, careful installation, and a clear scope support comfort today and value tomorrow.