North Texas weather rarely stays predictable for long. A home can deal with triple-digit heat in August, severe hailstorms in spring, long dry stretches in early fall, and sudden freezes in winter. For homeowners, investors, and buyers in the Dallas-Fort Worth real estate market, these weather swings can raise repair costs, shorten the life of major home systems, affect insurance costs, and influence resale value.
Extreme Heat and Its Impact on Structural Stability
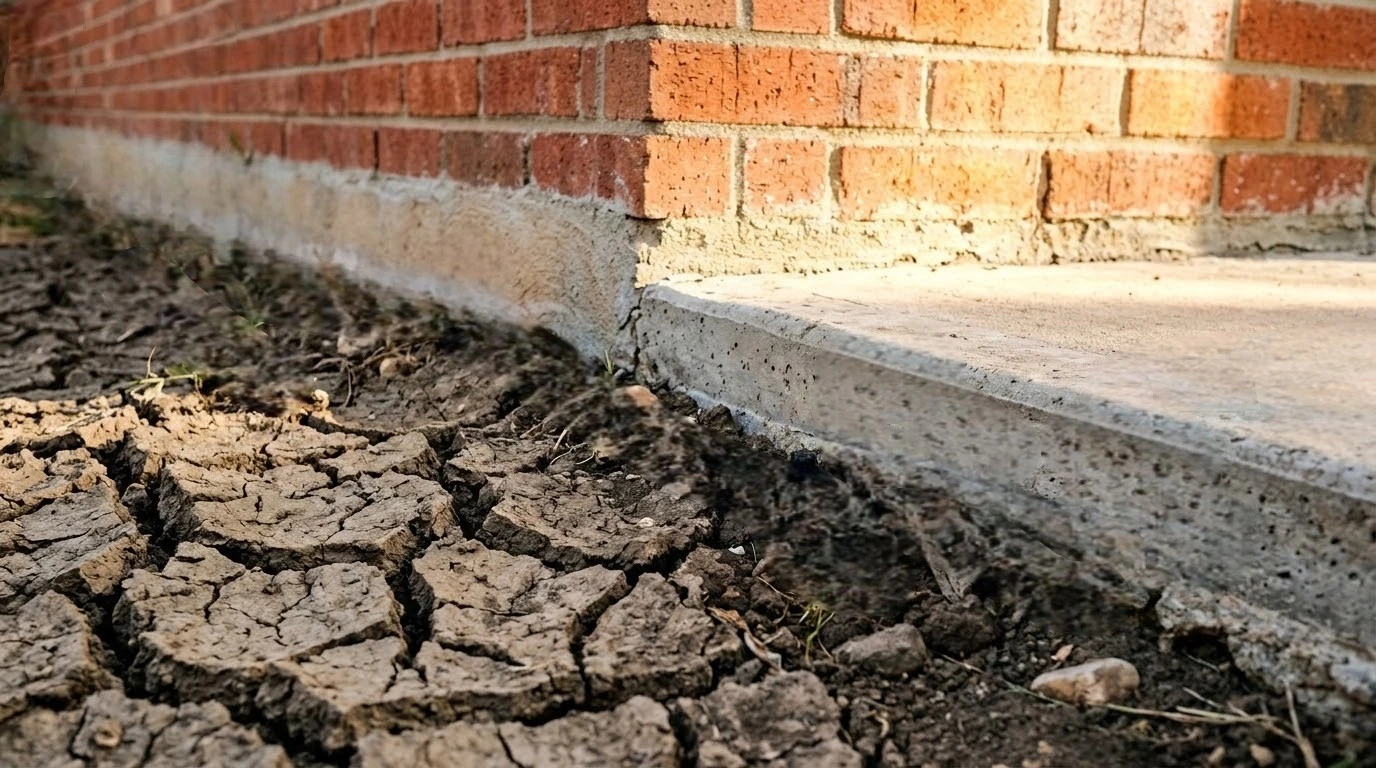
Summer in North Texas can be hard on homes, especially when high heat lasts for weeks. Prolonged heat does more than just increase cooling costs; it directly impacts the soil under your foundation. Much of North Texas has expansive clay soil, which expands when wet and shrinks when dry.
When that clay soil dries out, it can pull away from the foundation and leave parts of the home with less support than others. Over time, this can lead to cracks in walls, sticking doors, uneven floors, and gaps around windows or trim.
This movement usually happens slowly, and many homeowners mistakenly treat the symptoms as cosmetic concerns when they are actually tied directly to the soil beneath the property. That means preventive maintenance requires a climate-specific approach, such as consistent foundation watering, targeted moisture management, and reflective roofing materials.
Storm Systems Create Long-Term Exterior Damage
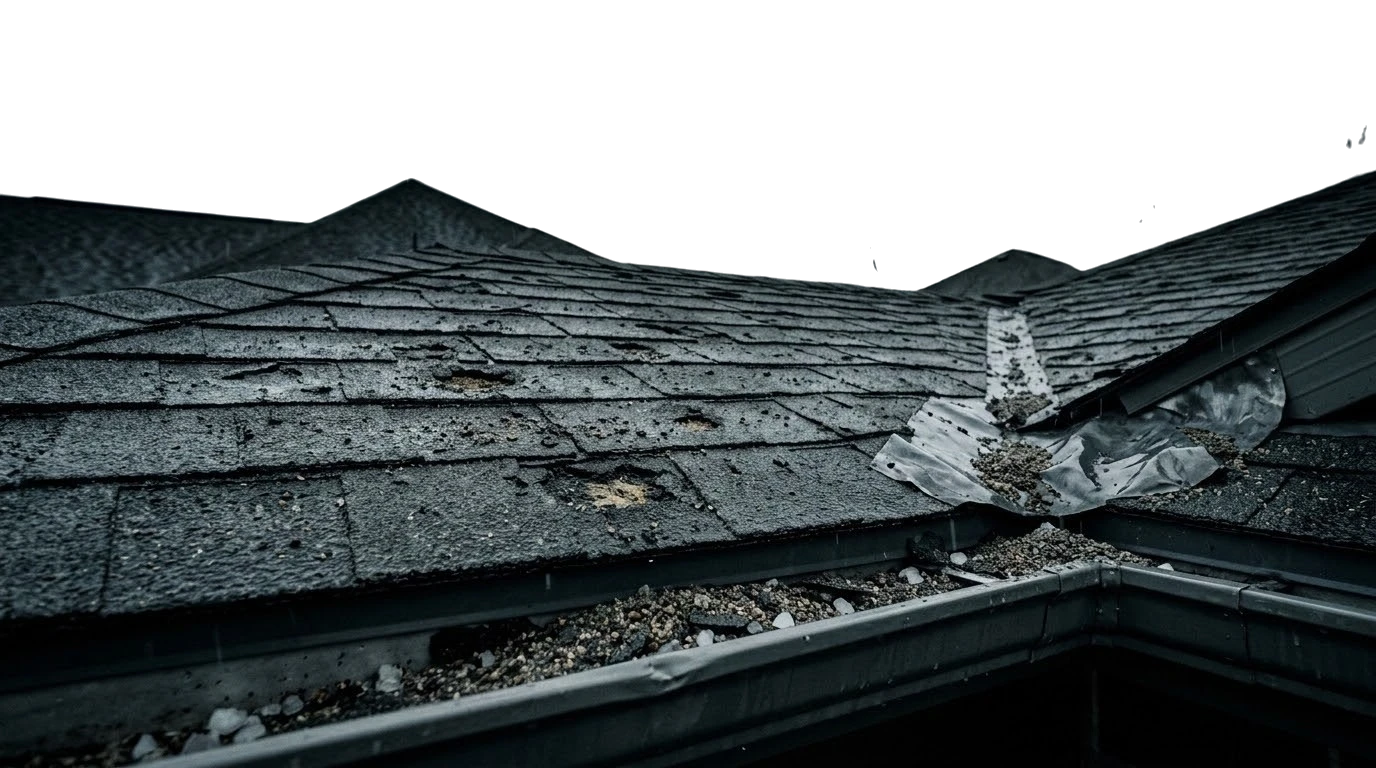
Severe weather remains one of the biggest maintenance challenges across North Texas. Spring and early summer storms often bring hail, heavy rain, strong winds, and sudden temperature shifts that damage the outside of a house in ways homeowners may not immediately notice.
Roofs usually take the most damage. Even moderate hail can knock granules off shingles, making the roof more vulnerable to leaks. Wind can also loosen shingles, flashing, gutters, and trim.
The costly part is that storm damage often gets worse over time. A small roof issue after one storm may not show up indoors until months later, when water stains, wet insulation, or mold become visible.
Humidity and Moisture Create Problems Beyond Mold
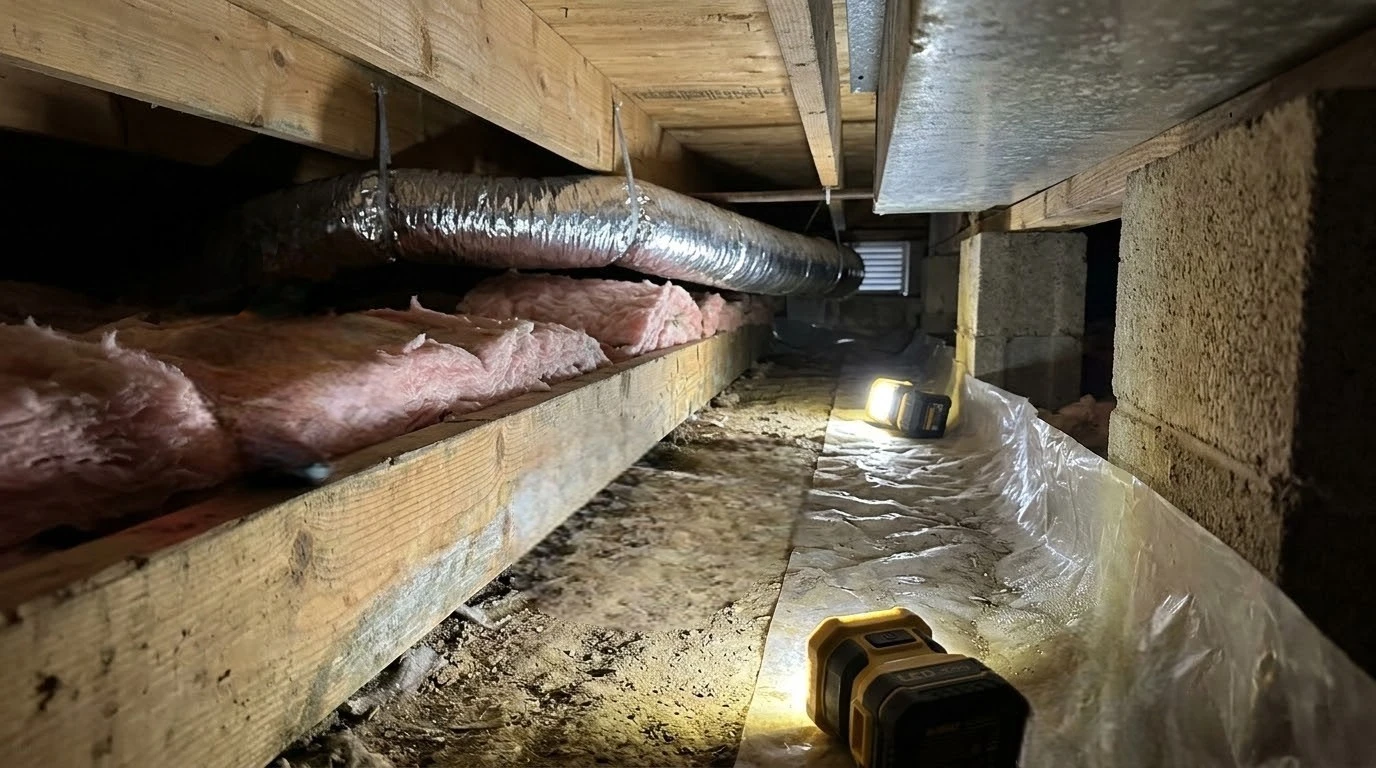
North Texas may not feel humid year-round, but moisture can still create real maintenance problems. After storms or during changing seasons, humidity can build up in poorly ventilated parts of the home.
Bathrooms, attics, crawl spaces, and garages are often the first places to show problems. Trapped moisture can lead to mildew, soft wood, damaged insulation, musty odors, and poor indoor air quality.
The outside of the home matters too. Shrubs, vines, or thick landscaping planted too close to the house can hold moisture against siding and foundation areas. Over time, that can create a better environment for pests, mold, and wood damage.
Drainage Design Has Become a Property Value Issue
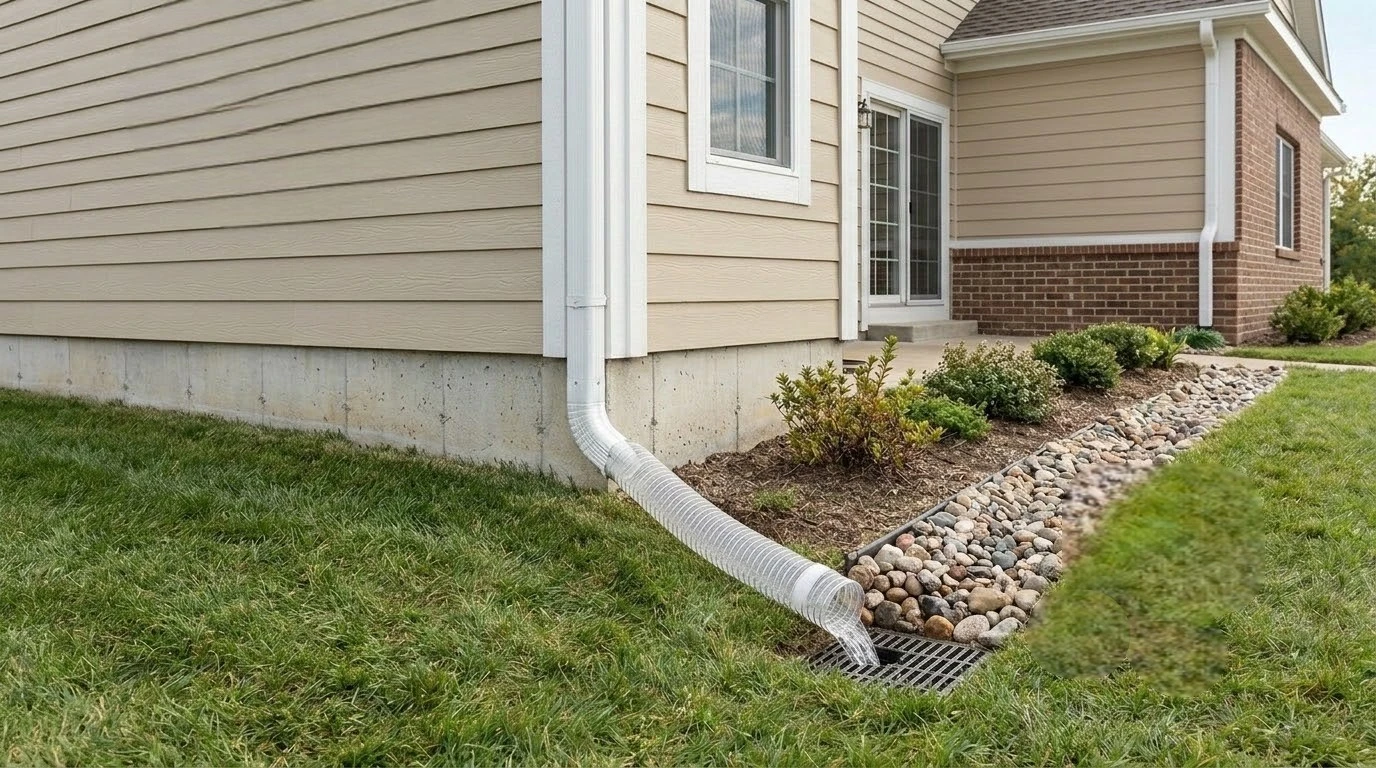
Heavy rain events have become more intense in recent years, exposing weaknesses in grading, runoff management, and neighbourhood drainage systems. Improper drainage rarely remains isolated to landscaping problems. Water pooling near the foundation increases hydrostatic pressure against structural walls and accelerates soil instability.
Over time, standing water can compromise patios, driveways, fencing, and underground utility systems. Smart property owners now treat drainage improvements as long-term investments, as buyers have become more attentive to drainage patterns during property evaluations, particularly in neighborhoods with known flooding histories.
Outdoor preparation also extends beyond water management. Seasonal maintenance plans should address pest activity that intensifies after periods of rainfall and heat. Homeowners can prepare for mosquito season in Fort Worth while simultaneously protecting outdoor living spaces and improving overall property sustainability.
Endnote
In North Texas, home maintenance has to match the climate. Heat can affect soil stability, storms can damage exterior materials, humidity can speed up deterioration, and poor drainage can create long-term structural problems.
Homeowners who stay ahead of these issues are more likely to protect both the condition and value of their property.
While touring a home, the bathrooms that truly stand out are rarely the most dramatic.
Instead, they are the ones who feel clean, updated, and easy to live with through targeted wellness upgrades. The three essential fixes for a comfier bathroom include layering ambient and task lighting, upgrading to high-CFM ventilation, and installing hygiene-focused fixtures.
That feeling of comfort is not accidental, and it does not require a full renovation budget to recreate. Most of it comes down to a handful of well-chosen improvements that make everyday routines feel easier.
Here are three fixes worth making to optimize the space for daily enjoyment.
1. Upgrade Comfort From the Ground Up
Image from: Premium Bidets – Bathroom with natural light and premium bidet toilet fixture
A successful bathroom upgrade doesn’t announce itself right away. It simply makes the space feel more livable the moment you walk in. These improvements register as modern and convenient without requiring a single contractor.
Ceiling fixtures provide overall illumination, but you should also place task lighting in areas where better visibility could prevent accidents. Warm-white LEDs strike the right balance, producing less heat during Texas summers.
Install a Toilet Bidet Combo
Of all the home comfort improvements available, the shift to a bidet is one of the most impactful. Bidets can arguably be considered more sanitary than traditional bottom-cleaning methods.
Premier Bidet’s toilet bidet combo installation elevates the daily hygiene routine effortlessly. The practical benefits include warm water cleansing, heated seats, and a meaningful reduction in toilet paper use.
Improve Ventilation for Moisture Control
North Texas humidity is not something to ignore, especially in enclosed spaces. Without proper ventilation, moisture accumulates on walls and grout lines, creating conditions where mildew thrives.
For bathrooms up to 100 square feet, an exhaust fan must provide 1 CFM per square foot to properly ventilate the bathroom. Humidity-sensing models handle this automatically, making it one less thing to remember on busy mornings.
2. The Wellness Side of Your Bathroom
Rolled towel, soap, and succulent on marble surface.
The bathroom is one of the most personal spaces in any home. It is where the day begins and ends, and where small physical discomforts tend to quietly surface. Transitioning the focus from home comfort to personal comfort acknowledges that wellness plays a critical role in our private spaces.
Addressing Personal Wellness Intentionally
Many individuals experience changes in intimate health over time that feel vague but persistent. These concerns are common across different life stages, including postpartum recovery and perimenopause. They are frequently left unaddressed because it is not always clear where to start. A well-designed bathroom supports daily routines, but true comfort supports the person living those routines.
Utilizing Simple Self-check Resources
One useful starting point for understanding these physical changes is taking the NeuEve’s vaginal health quiz. It helps users identify symptoms and understand what natural, hormone-free options might be available.
This functions as a helpful, low-pressure educational resource rather than a medical diagnostic tool. It points toward relevant information and encourages individuals to find a solution that actually works when navigating intimate wellness concerns.
3. The Ultimate Bathroom Checklist
Good lighting, better ventilation, and a moment of personal wellness awareness are meaningful improvements. However, what keeps real estate-ready bathrooms consistently impressive is the maintenance layer underneath all of it. Establishing a baseline checklist ensures the space remains inviting for years to come.
Choose Finishes That Age Well
Soft, neutral palettes continue to perform incredibly well in Dallas-area resale markets. Warm whites, greiges, and muted earth tones read as clean and timeless. For tile, natural-look porcelain in stone or wood tones tends to outlast fleeting fashion cycles. Hardware consistency matters too, as uniform metals look highly intentional.
Master Storage and Clutter Control
A clear countertop signals cleanliness more effectively than almost any other single visual change. Drawer organizers, under-sink baskets, and wall-mounted storage keep everyday products accessible without creating visual noise. One small habit worth building is rotating out expired or unused products regularly to free up space. This takes just five minutes, and the difference is immediately visible.
Value Added Daily Upgrades
Water-efficient faucets and showerheads are easy swaps that appeal to eco-conscious buyers. A towel warmer or heated floor mat adds a comfort-forward touch that genuinely improves daily life. Keep any smart fixtures clean and functioning seamlessly to retain their value.
Keep surfaces organized and completely clutter-free.
Install layered, energy-efficient lighting with dimmer flexibility.
Ensure proper ventilation is in place and running as intended.
Add a hygiene-forward fixture that is clean and fully functioning.
The Bottom Line
The bathrooms that stay with you on a home tour are rarely the ones with the highest square footage. They are the ones where everything feels considered, where the air is clean, and where the fixtures do something useful. That profound feeling of home comfort is highly achievable with consistent care.
A thoughtful bathroom upgrade adds real, lasting value to your property. At the same time, maintaining personal wellness supports the person who uses the space every day. Start with one simple fix, notice how it improves your daily routine, and build a space that truly supports your total comfort.
If you own or manage property in Dallas, you already know the climate doesn’t do you any favors. With average humidity levels hanging above 60% year-round and heavy storms rolling through regularly, mold finds a comfortable home in local buildings. Both homes and commercial buildings face this challenge. Once water gets into a building, mold can spread rapidly within just 24 to 72 hours. That’s why fast, professional help matters.
Texas has strict rules about this work. Under the Mold Assessors and Remediators Occupational Code, testing and removal must be done by separately licensed professionals. You’ll want to know if you need an assessment company, a remediation contractor, or both.
Older office towers with large HVAC systems, multi-family housing, retail centers, and single-family homes each face different mold threats.
This guide walks you through five Dallas-area providers who handle both residential and commercial mold inspection, testing, and remediation.
How to Choose the Best Mold Removal Services
We reviewed these companies in early 2026 using Texas TDLR licensing records, IICRC certification databases, BBB filings, HomeAdvisor and Angi ratings, and customer reviews covering both home and business projects. Here’s what we looked at:
Texas TDLR Licensing: Testing companies need a TDLR Mold Assessment Consultant MAC license, while removal contractors need a Mold Remediation Contractor MRC license. Both are legally required in Texas.
Residential and Commercial Capability: We preferred firms serving both property types, since commercial jobs typically demand bigger containment setups, industrial-grade tools, and regulatory paperwork that home-only providers don’t always handle.
Response Time and Availability: Speed counts. We checked scheduling responsiveness and emergency or 24/7 availability, since waiting even one extra day widens the damage zone.
Client Reputation Across Property Types: We read HomeAdvisor, Angi, Google, and BBB reviews from homeowners, property managers, and commercial clients.
The Best Mold Removal Services in Dallas
Here are five mold removal services in Dallas that handle both residential and commercial properties:
In Business Since: 2009 operating under 24/7 Water Damage Restoration
Certifications: IICRC Certified for Water Damage, NATEC Mold Technician
Services: Mold testing, mold inspection, mold removal, full mold remediation for homes and businesses
Property Types: Residential properties including pre-purchase, pre-sale, single, and multi-family homes, as well as commercial buildings
Availability: 24/7 emergency response; same-day appointments available
Company Overview: Active since 2009 through parent company 24/7 Water Damage Restoration, this team carries both IICRC water damage credentials and NATEC mold technician status. They don’t just test. They manage the full scope: collecting air and surface samples, sending them to accredited third-party labs, setting up HEPA containment, physically removing contaminated materials, and completing post-remediation clearance checks for homes and businesses alike. Same-day appointments and around-the-clock emergency service make them one of the most reachable options in Dallas when time is tight.
Best For: Property owners seeking one provider to handle mold testing and complete physical remediation without juggling multiple contractors.
Standout Feature: 24/7 emergency availability with same-day scheduling, offering continuous response for both residential homes and commercial buildings.
Experience: 7 years in mold testing, detection, and remediation protocol writing
Services: Mold assessments, written reports, remediation protocols, post-remediation clearance testing, air sampling with Zefon bio-pumps and Air-O-Cell Cassettes, surface sampling using tape lift, bulk, or swab methods, testing only with no remediation
Compliance: Operates under EPA and OSHA guidelines and Texas TDLR rules; testing and remediation performed by separate licensed parties
Certificate: Issues Certificates of Mold Damage Remediation CMDR upon successful post-remediation clearance
Company Overview: Dallas Mold Inspection Group DMIG holds Texas licensing, insurance, and bonding as a MAC firm serving residential and commercial clients across the DFW Metroplex. They stick strictly to testing. Using Zefon bio-pump equipment with Air-O-Cell Cassettes for air collection and tape lift, bulk, or swab techniques for surfaces, they send every sample to a third-party Texas-licensed lab for species identification. DMIG writes assessment reports and remediation protocols, then issues Certificates of Mold Damage Remediation once work passes clearance testing. This certificate is required for Texas property sales to prove past mold issues were properly handled.
Best For: Residential and commercial property owners needing legally compliant, unbiased mold documentation that’s fully separate from any remediation business interest.
Standout Feature: Issues legally transferable Certificates of Mold Damage Remediation CMDR, which are required for Texas property sales and commercial transactions involving prior mold remediation.
3. Biotex Mold Inspections
Owner/Operator: Kyle Reist with over 15 years of combined construction and mold consulting experience
Services: Mold assessment and inspection, air sampling using a Zefon bio-pump, surface sampling including ERMI dust, tape, swab, bulk, and wall cavity, moisture readings, mold protocols, post-remediation clearance; residential, commercial, and litigation clients; testing only with no remediation
Rating: 5.0/5 on Angi with multiple verified reviews
Company Overview: Kyle Reist started Biotex Mold Inspections after building over 15 years of combined experience in construction and mold consulting. He holds TDLR MAC License No. MAC1742 and keeps the business strictly testing-only to avoid any conflict of interest. Reist personally conducts every residential, commercial, and litigation inspection, using a multi-method testing strategy that includes ERMI dust collection, Zefon bio-pump air sampling, and wall cavity sampling. These techniques catch hidden mold that standard surface methods miss. Independent lab analysis follows every inspection, and Biotex holds a verified 5.0/5 rating on Angi.
Best For: Residential and commercial clients including litigation cases who want a licensed, owner-operated inspector with a strong construction background and zero remediation ties.
Standout Feature: Multi-method sampling, including wall cavity and ERMI dust testing, offers a more thorough inspection than standard air and surface approaches. Plus, everything is handled personally by the licensed owner.
4. DCG Environmental
Founded: 2016 as a family-owned, husband-and-wife led business
Offices: Dallas located in Lancaster, TX at 211 W Pleasant Run Rd, Suite 111, Austin, and Houston
Licenses: All inspectors hold current TDLR MAC licenses; multi-licensed team covering mold, asbestos, and lead
Services: Mold inspection and testing, asbestos inspection, lead testing, indoor air quality; residential, commercial, industrial, institutional; testing only with no remediation
Rating: 5.0/5 on HomeAdvisor; 63 years of combined team experience; on-site within 24 to 48 hours
Company Overview: Started in 2016 by a husband-and-wife team, DCG Environmental runs offices in Lancaster near Dallas, Austin, and Houston. They use full-time salaried inspectors rather than commission-based contractors across residential, commercial, and institutional projects of any scale, including schools, airports, and public facilities. The team holds multi-discipline licensing in mold, asbestos, and lead, which fits pre-renovation environmental surveys on older commercial buildings. With on-site scheduling in 24 to 48 hours, lab results in 24 to 36 hours, and a verified 5.0/5 HomeAdvisor rating, DCG meets tight commercial and residential project deadlines.
Best For: Contractors, developers, commercial property owners, and facility managers needing rapid, multi-discipline environmental testing for mold, asbestos, and lead under tight project schedules.
Standout Feature: Full-time salaried, multi-licensed inspectors rather than commission-based contractors across Dallas, Austin, and Houston offices. This team structure is built to eliminate upsell pressures and deliver consistent, unbiased results.
5. Air Quality Testing by AirMD
Founded: 2008; headquartered in Boca Raton, Florida; serving Dallas and Texas with local consultants
Team Credentials: Scientists, engineers, and certified industrial hygienists; accredited network of environmental consultants
Services: Mold testing and inspection, asbestos testing, lead testing, radon, VOC and chemical testing, allergen testing, formaldehyde, LEED certification support, post-remediation clearance; residential, commercial, governmental, healthcare, and institutional; testing only with no remediation
Contact: 1-888-462-4763 or 1-888-GO-AIRMD
Specialty: Multi-industry commercial experience including hospitals, schools, government buildings, and LEED-certified construction projects
Company Overview: Started in 2008 and based in Boca Raton, Florida, AirMD places local accredited consultants across Texas including the Dallas metro area. These consultants work under a nationally standardized testing protocol managed from corporate headquarters. This setup keeps quality consistent across all engagements. The company works exclusively in testing and consulting, with no remediation side business. AirMD draws from fields like industrial hygiene, building science, environmental science, mycology, and aerobiology. Their work covers far more than homes. They’ve completed thousands of mold inspections in commercial buildings, government facilities, schools, healthcare properties, and LEED certification projects that require documented indoor air quality data.
Best For: Commercial property owners, facility managers, healthcare administrators, and real estate developers needing multi-discipline environmental testing backed by industrial hygiene know-how and national consistency.
Standout Feature: A nationally standardized testing and consulting platform with local Dallas consultants, giving commercial and institutional clients corporate oversight paired with on-the-ground skills.
What to Look for in a Dallas Mold Removal Service
Testing vs. Remediation Licensing: In Texas, mold assessment testing and mold remediation removal on the same project must be performed by separate licensed parties. Verify whether the company you hire holds a TDLR MAC license, an MRC license, or both, and confirm you know which services you need.
Residential vs. Commercial Experience: Make sure the firm has clear experience with your property type. Commercial mold projects often need larger containment zones, HVAC system reviews, regulatory reporting thresholds, and multi-contractor coordination that differs a lot from residential work.
Response Time: Ask how quickly a provider can arrive on-site and deliver lab results. Mold doubles its coverage area within 24 to 72 hours of moisture exposure, so faster scheduling directly cuts down the eventual scope of remediation.
Multi-Contaminant Risk: For buildings built before 1980 or undergoing renovation, pick a firm that also tests for asbestos and lead alongside mold. Disturbing those materials without prior testing creates serious legal and health liability.
Documentation Quality: Request a sample report before booking. A professionally prepared mold assessment should include photos, moisture data, identified mold species and hazard class, a mapped contamination extent, and a clear remediation protocol suitable for submission to insurers, contractors, or regulators.
The Bottom Line
Before hiring any mold company, verify they hold the correct Texas TDLR license for the service they’re providing. Check MAC for testing and MRC for remediation, and confirm their license is current at tdlr.texas.gov before any work begins.
Match the provider to your project scope. A residential post-flood inspection, a commercial pre-renovation survey covering asbestos and mold, and a litigation case each need different firm types and documentation standards.
Don’t wait. Dallas’s heat and humidity make mold grow fast after water intrusion, and each day of delay widens the remediation scope and increases costs for both residential and commercial properties.
Protecting your home is about more than just curb appeal and smart technology. It’s also about keeping the structure safe and your family healthy. Your home is often your biggest investment, and like any valuable asset, it needs regular maintenance. We usually pay attention to repairs that we can see, like a broken window or a leaky faucet. However, some of the biggest threats to our homes are the ones we can’t see.
As a homeowner, it helps to remember that preventing problems is always cheaper than fixing them. This is especially true when it comes to pest control.
Why Pest Control Matters
People often think of pests as just a nuisance, but if they aren’t dealt with, they can cause serious problems. Besides being unsanitary, common pests like mice, cockroaches, and termites can put your family’s comfort and your home at risk.
Structural Integrity: Termites and carpenter ants are known for hollowing out wooden supports without anyone noticing until major damage has already been done.
Electrical Hazards: Rodents chew on wires to keep their teeth sharp. This is a common cause of short circuits and can even lead to house fires.
Health and Hygiene: Pests are known to carry a number of germs. Keeping your home free of pests is important for your family’s health. Pests can trigger allergies, while rodents and ticks can spread more serious diseases.
Building a Multi-Layered Defense
Integrated Pest Management (IPM) is a modern, practical way to keep your home free of pests. This plan doesn’t rely on heavy chemical sprays as the main solution. Instead, it focuses on long-term prevention through a mix of physical barriers, cleaning, and targeted treatments.
Sealing the exterior of your home is the first step in any successful defense. Pests are opportunists. A small hole in a foundation or a worn-out weatherstrip is an open invitation for them. You can greatly lower the chance of an infestation before it starts by carefully checking the outside of your home and sealing off any entry points with caulk or steel wool.
When to Call a Professional
Even the most careful homeowner may one day have a problem that needs the help of a professional. finding a quality provider is important in a city like Toronto, where the dense population and changing seasons put unique stresses on homes. This is where a specialized service like Pest Control Plus can be a real help for homeowners.
When you work with a dedicated team, you can be sure that you’re not just treating the signs of an infestation but also the root cause. Professionals in this field have the expertise that DIY solutions just can’t match.
They have the tools to find hidden nesting sites and the know-how to use eco-friendly products that are safe for kids and pets. Also, a professional service gives you service records that are becoming more and more important for insurance and future property appraisals.
Seasonal Pest Checklist
It’s important to remember that pests are more active at certain times of the year. Every season has its own problems that need to be dealt with in a certain way:
Spring: When the ground thaws, ants and stinging insects start to move around more. Now is the time to clean out your gutters and make sure water doesn’t pool around your foundation.
Summer: Many bugs are most active when it’s hot and humid. Make sure your window screens are in good shape and pay attention to how you handle your trash.
Fall: As the weather gets colder, mice and spiders start looking for warm places to live in your attic and basement. This is the best time to seal up any gaps around utility lines.
Winter: Use the colder months to clean out your storage spaces. Pests can’t stay in your home for long if you declutter the quiet, dark corners.
Protect Your Investment
In the end, taking care of your home is about maintaining its value and keeping your family comfortable. When you include pest control in your regular home care routine, you’re not just getting rid of bugs. You are protecting the value of your home and the health of the people who live there.
A home that is well cared for is a strong one. These small steps will help keep your home a safe, clean, and healthy place for your family to enjoy for years to come, whether you check your pantry once a month or call in the experts for a full inspection.
I want to talk about something that affects every New Zealand home: the gap between how a space looks and how it actually feels to live in. Many of us have walked into beautifully designed rooms that somehow feel cold, damp, or just uncomfortable. The good news is you can have both style and genuine comfort without breaking the bank.
BRANZ research found that 84% of Kiwi bedrooms drop below 18°C overnight. That statistic hit home for me because I’ve shivered through enough Auckland winters to know exactly what that feels like. This guide gives you measurable targets, quick wins under $200, and a practical room-by-room plan suited to our humid summers and mild winters.
Understanding What Comfort Actually Means
Comfort isn’t just about cranking up the heater. It’s how warm you feel based on air temperature, air movement, and surface temperatures combined. The World Health Organisation recommends at least 18°C for most people and 20-21°C for vulnerable groups. I aim for 18-21°C in my living areas year-round.
Humidity matters just as much as temperature. Keep relative humidity between 40-60% to minimise mould and dust mites. Grab a cheap hygrometer and place it in your bedroom and living room. Note where condensation forms and whether you smell anything musty. This 60-second audit tells you exactly where to focus your efforts.
Your One-Week Tune-Up
Add door snakes and adhesive window seals to stop draughts, saving roughly $100 annually
Close curtains before dusk to trap heat inside
Run kitchen and bathroom extractors during use and for 10 minutes afterwards
Wipe window condensation daily in winter
Track humidity readings and adjust ventilation accordingly
Fix Your Thermal Envelope First
Before buying new heating gear, reduce what you’re losing. Up to 30% of heating energy escapes through single-glazed windows. Upgrading to double glazing can cut this to 20% or less, but there are cheaper interim steps.
DIY shrink-wrap window film costs very little and reduces heat loss almost as effectively as double glazing in some cases. Combine this with full-length, lined thermal curtains featuring pelmets, and you’ll notice immediate warmth. Seal gaps around skirtings, service penetrations, and pet doors while you’re at it.
Insulation Basics Made Simple
MBIE’s H1 update raised minimum window R-values to R0.46 in most climate zones
Prioritise ceiling insulation first, then underfloor, then walls
Pair envelope tightening with proper ventilation to avoid trapping moisture inside
Controlling Moisture at the Source
Damp causes more comfort problems than cold alone. Target the steam and moisture where it starts. Cook with lids on and use an outside-vented rangehood. In bathrooms, your extractor should deliver at least 25 litres per second and vent outdoors.
Healthy Homes standards require openable windows covering at least 5% of the floor area per room. Kitchen extractors need a 50 litres per second capacity. Keep laundry drying outside when possible, or use a vented dryer. Move large furniture slightly away from cold external walls to prevent condensation buildup.
Kitchens That Work Hard and Look Calm
A functional kitchen beats a fashionable one every time. Well-planned kitchen and scullery designs focus on flow, safety, and everyday efficiency rather than visual trends alone. Separate prep and cleanup zones so multiple people can work comfortably without bumping into each other. Aim for 600–900mm of clear bench space between the sink, hob, and prep surfaces to improve speed and reduce accidents.
Consider an appliance garage or compact scullery for messy tasks and bulk storage. Include power points inside for toasters and mixers. Choose a quiet, outside-vented rangehood and specify low-VOC finishes for better air quality.
Hiding the Mess, Showing the Style
Keep frequently used items in easy-reach drawers. Park infrequent and messy tools elsewhere so the main benchtops stay clear.
Allow at least 900mm clear landing zones beside the fridge and oven. Main walkways need 1,000-1,100mm clearance so cooks and kids can pass safely.
Bathrooms That Stay Dry and Beautiful
Water management determines whether your bathroom ages gracefully or grows mould. Zone your wet area properly and slope floors toward drains so water moves away from entries and storage. Specify compliant waterproofing membranes and run extractors for at least 10 minutes post-shower.
Planning Your Waterproofing Layers
Use licensed applicators for membrane work where required
Select drains matching your expected water flow rates
Detail upturns at walls and niches carefully
Confirm ventilation meets 25 litres per second exhausted outdoors
If you’re mapping a shopping list for DIY or a chat with your tiler, this walkthrough answers a common question in plain language: What do I need to waterproof a bathroom?
Choosing Heating and Cooling Systems
Pick your system once and pick it right. Electric heat pumps typically deliver 3-5 times more heat than the electricity they consume, making them the lowest cost-to-run option for most Kiwi homes. Set and forget at 18-21°C rather than constantly adjusting.
Dehumidifiers use less energy than heat pumps and help heat pumps work better by drying the air first. In Auckland’s humid conditions, this combination makes a real difference to perceived comfort.
Auckland-Specific Climate Solutions
Our warm, humid summers and mild winters mean planning for quiet cooling and humidity control rather than extreme heating. Set summer cooling around 24-26°C with humidity at 40-60%. Run a night purge when the outdoor air is cooler and drier.
Choose a single split system for small to medium spaces or a ducted system for multi-room comfort. Place outdoor units away from bedrooms and service filters quarterly. If you’re in Auckland and want a rightsized, quiet system that handles our specific conditions, get a local quote from Airmc via this residential air conditioning Auckland.
Seasonal Maintenance Playbook
Small routines improve comfort without big bills. In summer, open early for cross-breezes, shade windows, and run dehumidifiers on muggy nights. Use ceiling fans for perceived cooling without dropping actual temperatures.
In winter, pre-heat living spaces to 18-20°C before you need them. Close curtains before dusk and wipe condensation each morning. Year-round, clean heat pump filters quarterly and check door seals regularly.
Conclusion
The path to a warmer, drier, calmer home starts with measurement, quick envelope fixes, and moisture control. Then move to right-sized heating and cooling. Auckland’s climate makes ventilation and dehumidification as important as heating. Keep humidity under 60% and temperatures at or above 18°C. For complex work, use licensed professionals and check local councils for rebates.
FAQs
What temperature should I set my heat pump to in winter?
Set between 18-21°C for living spaces. WHO recommends at least 18°C for the general population. Avoid frequent changes as set-and-forget maintains comfort better and prevents condensation.
How do I know if my extractor fan is strong enough?
Kitchens need 50 litres per second, and bathrooms need 25 litres per second minimum, vented outdoors. Hold tissue to the grille to test suction. If steam lingers, upgrade or add a longer run-on timer.
Do plants clean indoor air enough to skip ventilation?
No. Research confirmsthat typical houseplants don’t meaningfully improve indoor air quality. Use plants for aesthetics and wellbeing, but prioritise source control and proper extraction.
What’s the cheapest window upgrade right now?
DIY shrink-wrap window film is your best budget option, reducing heat loss significantly. Combine with tight, lined curtains and pelmets for maximum quick-win performance.
If you have been looking for ways to make your home more energy efficient, the attic is probably not the first thing you imagine. Most people immediately think about windows, a new air conditioning system, or smart thermostats. However, the attic often plays a quiet but decisive role in whether your home keeps its temperature or allows it to escape.
Because of that, an attic retrofit often delivers results sooner than many homeowners expect. This is not because of anything mysterious. It happens because a large amount of heat is commonly lost or gained through the top of the house.
Why Attic Insulation Matters
To understand why the attic is so important, it helps to think about what insulation does in simple terms. Insulation slows down heat transfer. During winter, it helps prevent warm air from rising and escaping. During summer, it limits how much heat from the roof enters the living space below.
Many homeowners are surprised to learn that insulation does not need to be completely missing to cause problems. It may be too thin, compressed, uneven, or full of gaps around wiring, ductwork, recessed lighting, and attic access points. These weak areas allow energy to leak steadily, which forces heating and cooling systems to run longer than necessary.
An attic retrofit is not only about reducing energy use. It can also solve everyday comfort issues, such as an upstairs bedroom that always feels warmer than the rest of the house.
Common Types of Attic Insulation
When planning an attic retrofit, it is smart to compare the main insulation options instead of choosing the cheapest one by default. Every attic behaves differently, especially in older homes.
1. Fiberglass batts
This option is affordable and easy to find. It works best when the attic layout is simple and the batts can be placed neatly between joists. The main drawback is that small installation mistakes, such as gaps or compression, can quickly reduce effectiveness.
2. Blown in insulation
This is often a strong choice for retrofits because it spreads evenly and fills irregular spaces. It is especially helpful in attics with many hard to reach areas where batts are difficult to install properly.
3. Rigid foam boards
These boards are useful when you need a high insulation value in a thinner layer or when addressing specific trouble spots. Installation usually requires more effort, so they are typically used selectively rather than across the entire attic.
One innovative solution that has gained popularity in recent years is the use of high-performance radiant foil materials. By reflecting heat rather than absorbing it, these materials can significantly enhance your attic’s thermal performance, making them an excellent choice for retrofitting. If you’re interested in these products, consider exploring high-performance radiant foil materials by AtticFoil for insights on their benefits and applications.
The Benefits of Retrofitting Your Attic
Upgrading your attic can produce noticeable benefits fairly quickly, especially if the existing insulation is weak or full of air leaks.
Energy savings
Improved insulation and better air sealing reduce the demand on heating and cooling systems. The difference is often most noticeable during extreme weather months when energy use is highest.
Improved comfort
This is often the first benefit people feel in daily life. Temperatures become more consistent, upstairs rooms feel less extreme, and there is less need to constantly adjust the thermostat.
Environmental impact
Using less energy helps reduce emissions from power generation. While it is not the only step toward sustainability, it is one of the most practical improvements available.
Higher home value
Energy efficiency upgrades are easier to market than many homeowners realize. Lower utility bills and documented improvements can make a home more attractive to buyers.
Tools and Techniques for an Effective Retrofit
1. Evaluate Existing Insulation
Begin with a simple inspection. Look for thin areas, exposed ceiling surfaces, compressed insulation, or signs of moisture. Pay close attention to common air leak locations such as vents, plumbing openings, attic access doors, and ductwork.
2. Measure Your Needs
Calculate the square footage of the attic and review recommended insulation levels for your climate. The ideal amount depends more on regional conditions than personal preference.
3. Select Suitable Materials
The best results often come from combining methods. Start with air sealing, follow with insulation, and consider a radiant barrier if it makes sense for your climate.
4. Perform the Installation
Whether you do the work yourself or hire a professional, installation quality is critical. Even small missed gaps can significantly reduce overall performance.
5. Monitor Performance
Compare energy bills from similar months rather than week to week. Weather changes can hide real improvements if comparisons are too short term.
Potential Challenges and Considerations
1. Moisture Management
Insulation upgrades should always be paired with proper ventilation and moisture management. Making an attic tighter without addressing moisture can lead to future issues.
2. Initial Costs
Initial expenses may seem high, but returns are usually stronger when the attic starts in poor condition. It is also worth checking for rebates or efficiency incentives in your area.
3. Compliance and Codes
Local regulations vary in terms of insulation levels, ventilation, and clearances. Meeting these standards helps ensure good performance and prevents problems later.
Conclusion
An attic retrofit may not be the most exciting home improvement, but it is often one of the most cost effective. Improved insulation and air sealing reduce energy waste, stabilize indoor temperatures, and lower heating and cooling costs.
When approached as a complete system that includes insulation, air sealing, ventilation, and moisture control, the payoff often arrives faster than most people expect.
Metal roofing is becoming more popular these days. Many people like it because it is durable, looks modern, and does not require much maintenance. Compared to tiles or shingles, metal feels like a long term solution you do not have to worry about often.
However, metal has a unique characteristic that other roofing materials do not. It reacts very quickly to heat. This fast reaction is exactly why insulation for metal roofs needs a different approach.
When metal roofs are treated the same way as traditional roofs, problems usually appear later. Rooms may become hotter than expected, air conditioning systems work harder, and condensation can appear in places where it should not exist.
The Basics of Metal Roofs
Most metal roofs are made from aluminium, steel, or copper. These materials are strong, long lasting, and generally easy to maintain. The downside is how they handle temperature.
Metal heats up quickly when exposed to sunlight and cools down just as fast when conditions change. Unlike concrete tiles, metal does not warm up slowly.
On hot days, this means the roof surface can reach high temperatures very fast. That heat then moves downward into the building. In real situations, this often results in warmer upper floors, hot ceilings, or attic spaces that trap heat.
To naturally balance these thermal dynamics, insulation is paramount. However, how one approaches insulating a metal roof varies significantly from other roofing types. For instance, if you’re considering modifying only specific areas of your structure, you may want to examine the various considerations when insulating partial sections of your metal roof, such as the importance of even thermal distribution.
Why Insulation Matters
Insulation is not only about comfort. It is also about control. Without proper insulation under a metal roof, warm air can collect and remain trapped.
This trapped heat can make indoor spaces feel uncomfortable even when outdoor temperatures are not extremely high.
In areas with large temperature differences between day and night, the problem becomes more noticeable. Buildings may feel too warm during the afternoon and unexpectedly cool later. As a result, heating and cooling systems keep adjusting instead of maintaining a stable temperature.
Insulation is also important during colder seasons. If heat escapes easily through the roof, heating systems must run longer. This increases energy costs and puts more strain on equipment.
Thermal Performance of Metal
Many people believe that metal roofs solve heat problems simply because they reflect sunlight. Reflection helps, but it does not solve everything.
Once the roof absorbs heat, that heat can still pass through the metal and into the layers below. This is where insulation and ventilation become critical.
Several key factors influence thermal performance:
Conductivity
Metal transfers heat very efficiently. While this can be useful in some situations, it makes temperature control harder. Without insulation, heat moves indoors much faster compared to other roofing materials.
Solar gain
Even reflective coatings cannot eliminate solar heat gain completely. Roof color, sun exposure, climate, and surrounding shade all play a role. In hot regions, reflective insulation or radiant barriers are often used to reduce how much heat enters the building.
Ventilation
Ventilation determines whether a metal roof works well or becomes a heat trap. Poor airflow allows hot air to build up under the roof. This increases indoor temperatures and puts extra pressure on insulation. Poor ventilation also raises moisture risks, which can damage insulation over time.
Types of Insulation for Metal Roofs
There is no single insulation solution that works for every metal roof. The best choice depends on climate, building design, and whether insulation is added during construction or as a retrofit.
1. Foam board insulation
Foam boards provide strong thermal resistance and help reduce heat transfer through framing when installed properly. Performance is reliable as long as joints and gaps are sealed well.
2. Reflective insulation
Reflective insulation focuses on reducing radiant heat transfer. It is especially helpful in warmer climates where heat entry is the main concern. However, it must be combined with correct placement and proper ventilation to work effectively.
3. Spray foam insulation
Spray foam is often used to control air leakage because it expands and fills gaps. It works well in irregular spaces where other insulation types do not fit cleanly. Application quality is critical. Well applied spray foam performs very well. Poor application can cause long term problems.
Installation Techniques
Good materials alone are not enough. Installation quality makes a major difference.
Continuous Insulation
Thermal bridging occurs when heat moves through areas without insulation, such as framing. Continuous insulation reduces these pathways and improves overall performance.
Air Barriers
Air movement can significantly reduce insulation effectiveness. Air leaks allow heat and moisture to move freely. A proper air barrier combined with insulation improves real world performance and durability.
Proper Ventilation
Ventilation allows heat and moisture to escape. It is not optional for many metal roof systems. Without ventilation, insulation must work harder and may degrade faster.
Inspecting and Maintaining Insulation
Even after installation, insulation should be checked occasionally, especially after extreme heat, heavy rain, or noticeable changes in indoor comfort.
Key warning signs include:
Condensation, which often indicates ventilation problems, air leaks, or incorrect insulation placement.
Sagging insulation, which usually means moisture has been trapped. Once insulation compresses, its performance drops and nearby structures may be affected.
Conclusion
Metal roofs are not difficult to insulate, but they are less forgiving when insulation and airflow are poorly planned. Because metal transfers heat quickly, the roof system must slow heat movement, seal air leaks, and allow moisture and heat to escape.
When installing or upgrading a metal roof, focus on the entire system, including insulation, air barriers, and ventilation. If insulating only part of the roof, plan carefully to avoid uneven temperatures and future moisture problems.
Mold is a quiet problem with big consequences. It can hide behind walls, under flooring, or in any damp corner, spreading spores and lowering your indoor air quality as it grows. What looks like a small patch today can signal a much larger issue inside building materials tomorrow. Understanding the risks and knowing when to call in mold remediation services, especially in Massachusetts, Connecticut, New Hampshire, Vermont, and Upstate New York, helps protect both your health and your home.
Understanding Mold and Its Causes
Mold needs three things: moisture, warmth, and a food source. In houses, the “food” is often drywall, wood framing, carpet, or dust. Common triggers include slow plumbing leaks, roof seepage after a storm, condensation on cold surfaces, flooding, and rooms without good ventilation (think steamy bathrooms or basements).
Once spores land on a damp surface, colonies can spread quickly, sometimes deeper into materials than you can see on the surface. That’s why simply wiping visible growth often isn’t enough and why underlying moisture problems must be fixed to stop mold from coming back.
Health Risks Associated with Mold Exposure
Everyone reacts differently to mold exposure, but prolonged contact can take a real toll. Especially on children, older adults, and anyone with asthma, allergies, or a weakened immune system.
Respiratory issues. Mold spores and tiny fragments can irritate airways and trigger coughing, wheezing, shortness of breath, and asthma flare-ups.
Allergic reactions. You might start sneezing, get a runny nose or watery eyes, feel congested, or notice your skin getting itchy, and postnasal drip are common in sensitive individuals.
Chronic fatigue and headaches. Poor indoor air quality can leave you feeling worn down and headachy.
Infections and immune concerns. People with compromised immune systems face higher risks of fungal infections and other respiratory complications.
Neurological effects (in severe cases). Toxins from certain species (often referred to as “black mold”) have been linked to problems with concentration, memory, and mood.
Symptoms often build gradually. By the time you notice a pattern, feeling worse at home and better when you leave—the infestation may already be widespread. If you have health concerns, speak with a medical professional; remediation complements medical care but doesn’t replace it.
Signs You May Have Mold in Your Home
Not all mold is obvious. Watch for early clues:
A persistent musty odor, especially after rain or in basements, crawl spaces, and bathrooms
Dark specks or staining on walls, ceilings, baseboards, window sills, or around HVAC vents
Peeling paint, bubbling wallpaper, or warped trim, which often signal trapped moisture
Frequent allergy or asthma symptoms that worsen indoors
Condensation on windows or cold surfaces
Past leaks or flooding that weren’t fully dried within 24–48 hours
If you’re checking a past leak and the area still smells earthy or damp, assume there’s more going on than meets the eye.
When to Call a Professional
Well-meaning DIY can spread spores and drive contamination into clean rooms. Bring in a certified remediation company if any of the following apply:
The affected area is larger than about 10 square feet
You smell mold but can’t find the source
Water damage has been present for more than 48 hours
Anyone in the household has ongoing respiratory or allergy symptoms at home
You’ve had repeat mold growth despite cleaning
Suspected growth is in HVAC systems, crawl spaces, or wall cavities
What the pros do: They locate hidden moisture with meters or infrared cameras, set up containment and negative air to prevent spread, run HEPA air scrubbers, remove or treat contaminated materials, and most importantly, fix the moisture problem (leaks, ventilation, grading, or humidity) so mold doesn’t return. Reputable firms also provide a clear scope of work and post-remediation verification.
Don’t Wait to Take Action
Mold won’t resolve on its own. The longer it stays, the farther it can spread into drywall, insulation, framing, and flooring. Raising both health risks and repair costs. Fast, professional remediation limits damage, restores healthy indoor air, and protects your home’s structure and value. After cleanup, keep humidity in check (ideally 30%–50%), run bathroom and kitchen exhaust fans that vent outdoors, and fix leaks promptly to prevent a repeat.
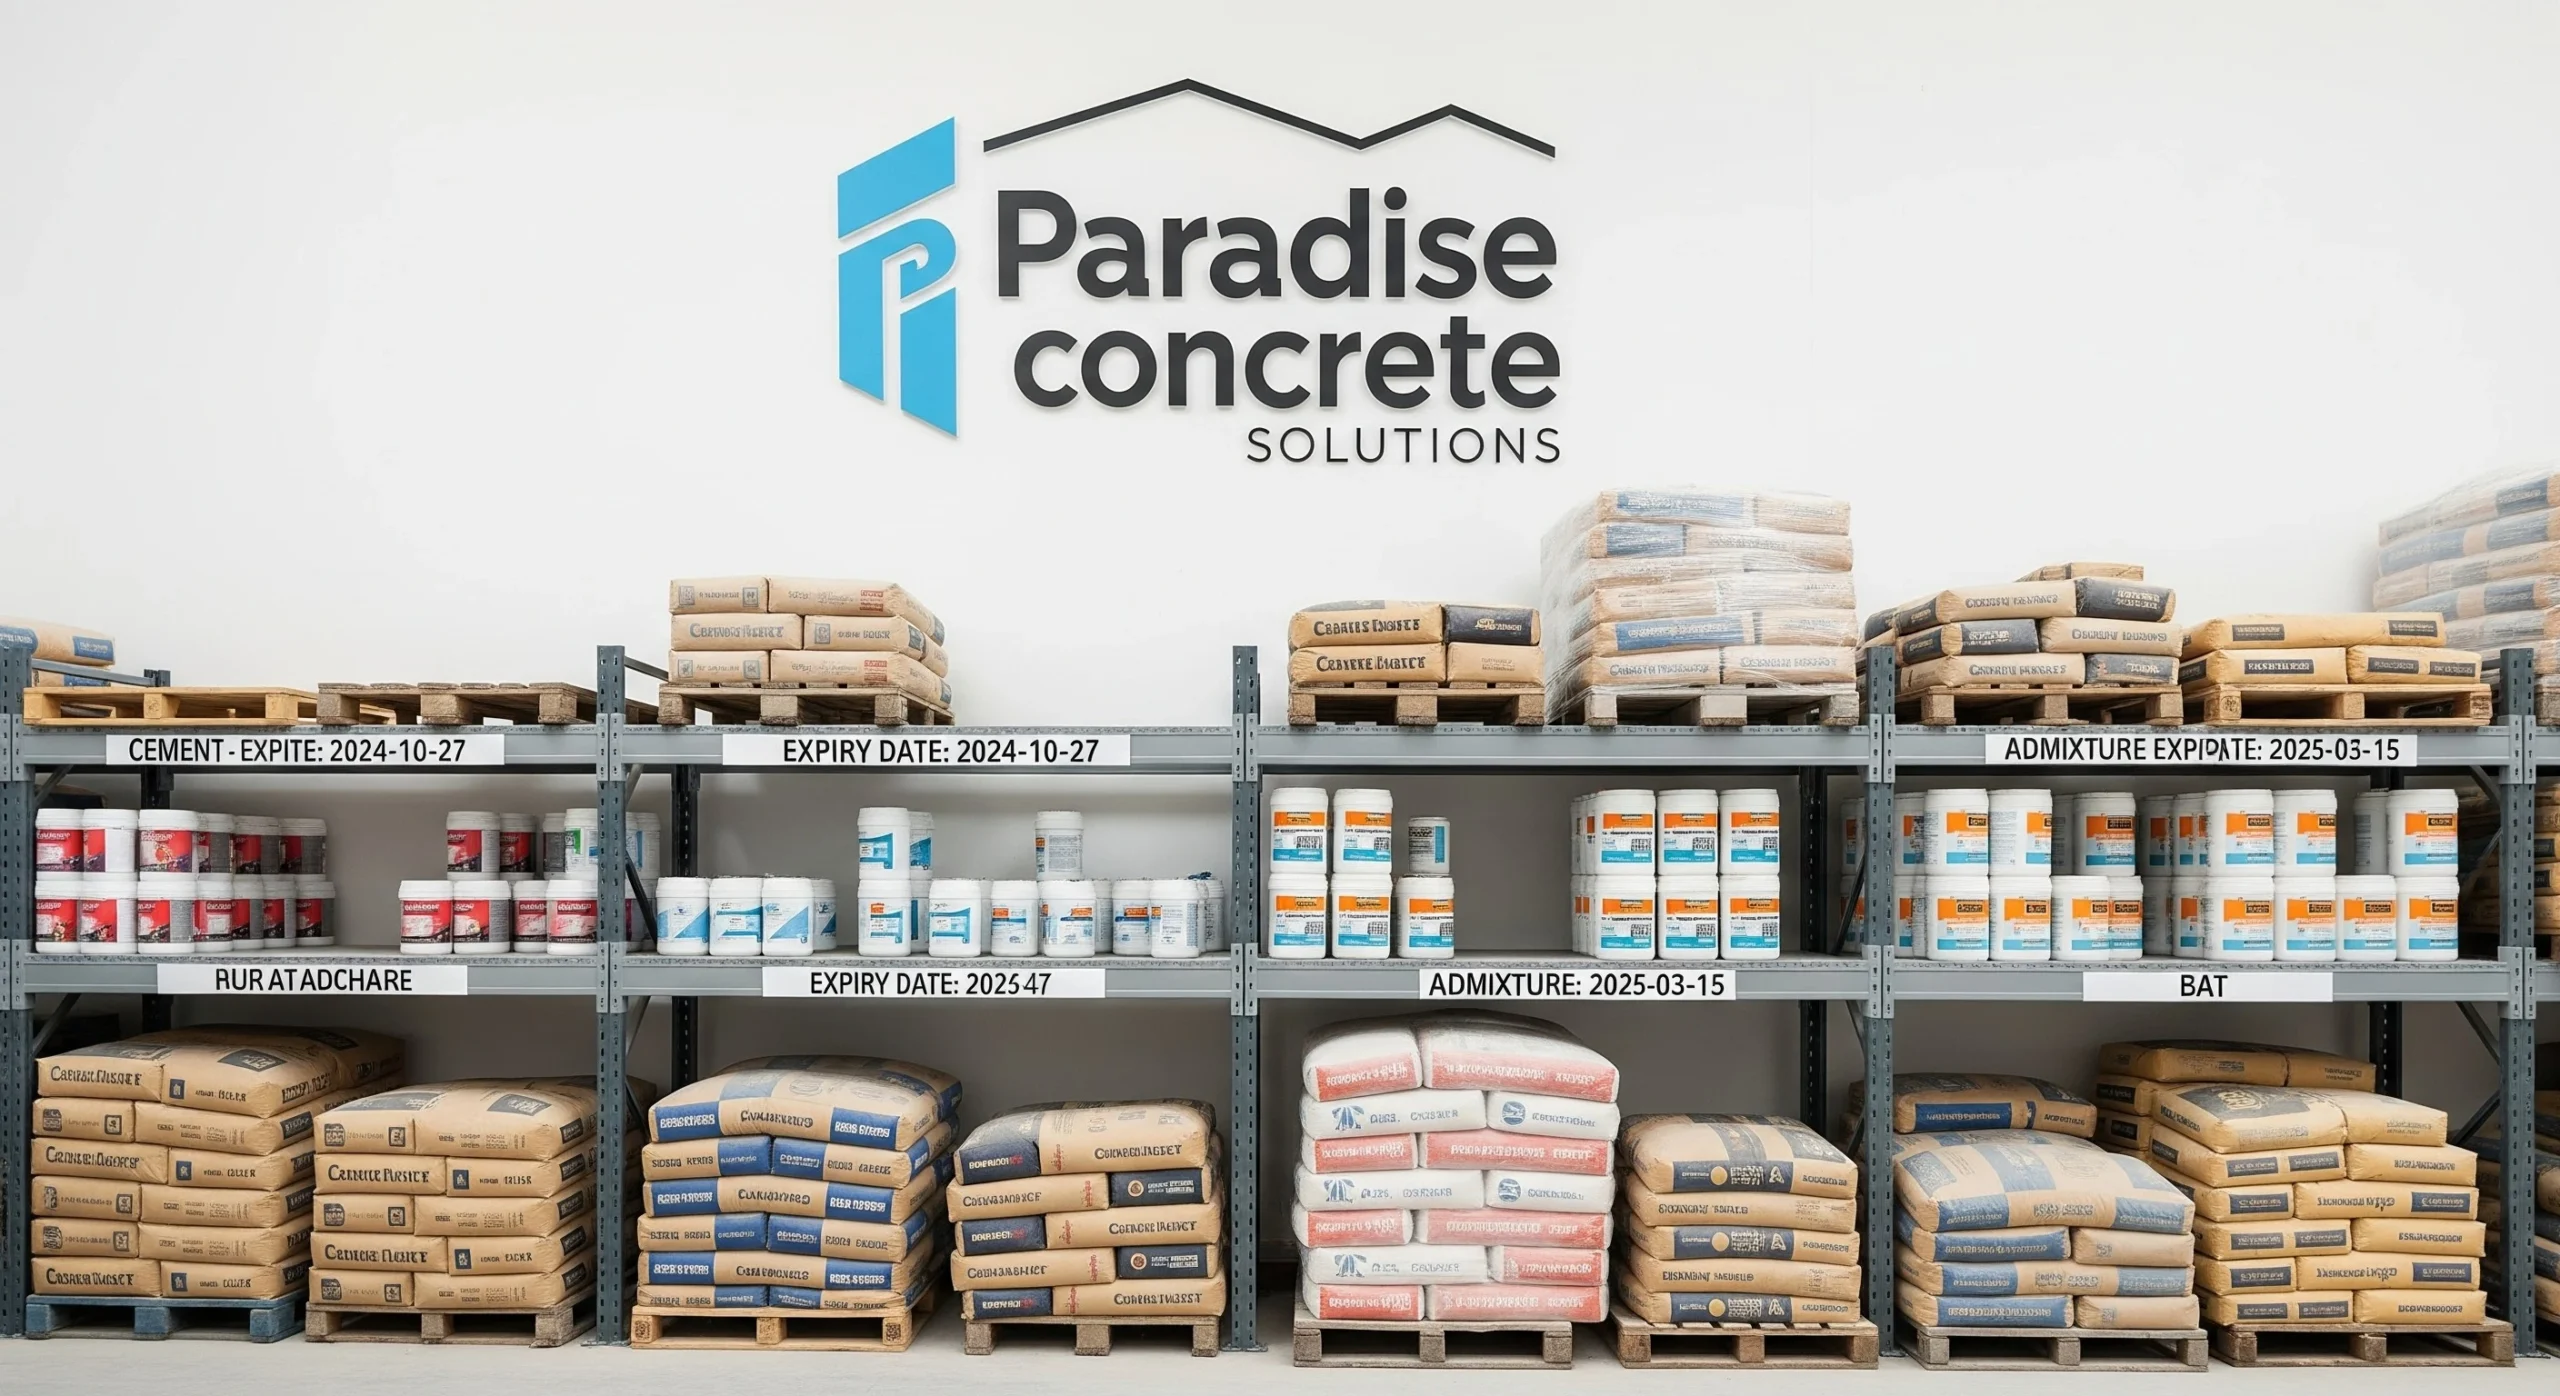
How materials are stored often gets overlooked, but it affects a lot. Concrete mix won’t stay usable if it’s left exposed too long. Moisture, dust, or careless stacking can ruin a batch before it ever gets mixed. Taking a few simple steps early on keeps things in order and avoids waste later.
Concrete materials need to be kept in a dry, sheltered space. Elevating them on platforms or pallets helps protect against ground moisture. Cement bags should not be stacked more than eight layers high. Aggregates must be separated by size and placed on a firm, well-drained surface to avoid contamination.
This general guidance serves as a starting point, but storage needs can vary depending on the type of material and local climate. Being familiar with the specific handling requirements of each component and taking steps to shield them from environmental exposure can help keep their condition stable and extend usability.
How Do Different Weather Conditions Affect Concrete Material Storage?
Hot weather can ruin cement if storage isn’t handled carefully. Humidity and heat speed up the hardening process, even before use. It’s best to keep cement in a space that gets air circulation. In places with high humidity, using a dehumidifier might be worth considering. For aggregate piles, throw a light-colored tarp over them to reflect sunlight and slow down moisture loss.
When temperatures drop, freezing becomes a bigger threat. Aggregates should stay above freezing—use heating if needed. Cement bags must be kept dry at all times. In cold, damp air, even a little moisture can make the powder clump or set too early.
What Are the Specific Storage Requirements for Each Concrete Component?
Portland cement is the most sensitive and needs the most attention. It should be placed inside a weatherproof building, with the floor raised so no moisture seeps in from below. The room needs airflow, but without drafts that might push damp air toward the bags. Use older stock first to keep anything from sitting too long.
Aggregates work best when stored on a solid surface that drains well. Keep the sizes apart using strong barriers so they don’t mix. It helps if the area has a bit of a slope, so water doesn’t pool. Avoid using the bottom layer, it often picks up dirt from the ground.
Admixtures have their own needs. Liquid types should stay sealed and out of direct heat or cold. Most will keep well between 50 and 86 degrees Fahrenheit, but always check the label.
How Long Can You Store Concrete Materials Before They Degrade?
If kept dry and sealed, Portland cement usually stays usable for up to six months. Even so, some strength may be lost over time. Past that point, it’s safer to run a quality check before using it for anything that needs high performance. In silos, cement generally holds up for about three months.
Ready-mix concrete doesn’t last nearly as long. Once it’s mixed, there’s a window of around 90 minutes before it starts setting. Aggregates are more forgiving. As long as they stay clean and covered, they can sit in storage for a long time. It’s still good practice to inspect them now and then for debris or changes in size distribution.
Admixtures don’t all age the same way. Most have a shelf life between six months and a year, depending on how they’re stored. Always check manufacturer recommendations and expiration dates provided by your concrete supply company, as using expired admixtures can significantly impact concrete performance.
What Are the Signs That Concrete Materials Have Been Improperly Stored?
Cement that has taken on moisture often clumps or forms hard spots inside the bag. Even if only part of it feels solid, it’s safer to toss the whole bag, since its performance won’t be reliable. A noticeable increase in weight can also be a clue that moisture has gotten in. Bags stored correctly should weigh the same as when first delivered.
For aggregates, warning signs include odd colors, organic debris, or an unusual amount of dust. If finer and coarser particles have started to separate, it usually means the pile wasn’t handled or protected well. Pools of water or soft ground around the storage area can also be a problem, moisture in the mix will be harder to control if the material absorbs too much from the ground.
What Safety Measures Should Be Followed When Storing Concrete Materials?
Cement dust can irritate skin, eyes, and lungs, so personal protection needs to be close at hand—gloves, masks, goggles. Don’t rely on signs alone. Keep ventilation running well, especially in enclosed sheds where dust builds up fast. If any admixtures are stored nearby, check the label. Some types are flammable and need fire extinguishers placed within reach, not just mounted near the door.
Stacking needs attention too. Lay bags in a cross pattern and keep the stacks low enough to avoid tipping. Damaged or moist bags don’t belong in storage. With silos, inspect walls and discharge systems on a schedule. Fix leaks early and clean dust traps before they clog.
Storage areas aren’t walkways. Only staff handling materials should go in, and they need space to move loads without tripping. Loose cement, wet sand, or spilled admixture can create slippery ground fast, so sweeping needs to happen regularly, not just at the end of the day.
Taking Action: Your Next Storage Steps
Before bringing in more material or starting the next pour, take a few minutes to check your current storage setup. Walk through the area and look closely at how cement is stacked, whether aggregates are kept clean and separate, and if moisture has found its way into any corner. Watch for soft ground, puddles, or damaged bags, anything that might lead to waste or delays later.
Use the points in this guide as a reference, not a rulebook. Adjust them to fit your site, your weather, and the way your team works. Fix what’s urgent, then tighten up the rest over time. A few small corrections now can save entire batches later.


