Tag: attic insulation

  • Practical Home Improvements That Slash Power Bills in Australia

    Your power bills drop fastest when you tackle heating, cooling, and hot water waste before splashing out on new gear or solar panels.

    Follow this sequence: seal, insulate, electrify, then generate. When you cut your home’s energy load first, right-sized equipment and solar deliver better comfort and lower lifetime costs.

    What Actually Moves the Bill in Australian Homes

    For most Australian homes, heating, cooling, and hot water dominate the bill, so they deserve your attention first.

    Space heating and cooling usually account for about 40 percent of household energy use, with hot water around 25 percent in a typical year.

    Reverse-cycle air conditioners are heat pumps, which means they move heat instead of generating it. They typically run at 300 to 600 percent efficiency. One kilowatt in can deliver three to six kilowatts of heating or cooling.

    The Zoned Energy Rating Label shows how units perform in hot, average, and cold climates so you can match a model to your location.

    Where Lighting and Appliances Fit

    Lighting usually accounts for 5 to 10 percent of household electricity. Swapping ten halogens to LEDs can save over $2,000 and roughly three tonnes of greenhouse gases over ten years, because LEDs use about 75 percent less energy and last five to ten times longer. Australia is phasing out inefficient lamps from October 2025, so plan your swap now.

    Plan First: Audit and Sequence Your Work

    A quick audit surfaces the major issues in your home before you spend a cent on upgrades.

    Run your hand along skirtings, door sweeps, and window frames on a windy day to feel for leaks. Check the roof space for insulation depth and gaps around downlights or hatches.

    Simple Decision Tree

    • If rooms feel draughty or uneven, do sealing and insulation first.
    • If your hot water is older, electric resistance or gas, consider a heat pump water heater next.
    • If daytime electricity use is moderate to high, rooftop solar is typically your next move.

    Roof and Site Check Before Solar

    Look for cracked tiles, metal corrosion, or soft spots that signal roof repairs before you mount panels. Map nearby trees, chimneys, and antennas that may shade your roof across seasons. If you want a fast way to map shade, roof condition, or panel layout before a solar install, consider Avian’s drone surveying services to capture accurate roof geometry and spot defects that could delay installation.

    Seal and Insulate for Reliable Savings

    Stopping air leaks and boosting insulation delivers reliable, repeatable savings in every Australian climate.

    Basic draught sealing can reduce heat loss by 15 to 25 percent and usually costs little. In Tasmania’s cool-temperate climate, aim for around R5.0 in ceilings, R2.5 in walls, and R2.0 under floors.

    Practical Sealing Steps

    • Install door sweeps and compression seals on external doors.
    • Use caulk along skirtings, architraves, and service penetrations.
    • Fit downlight covers rated for insulation contact.

    Aim for continuous insulation coverage without gaps. Ceiling top-ups usually deliver the fastest comfort gains.

    If you are unsure where leaks remain, use an incense stick near windows on a windy day. A blower-door test with an energy assessor uses a fan in an external doorway to measure leakage and pinpoint problem areas.

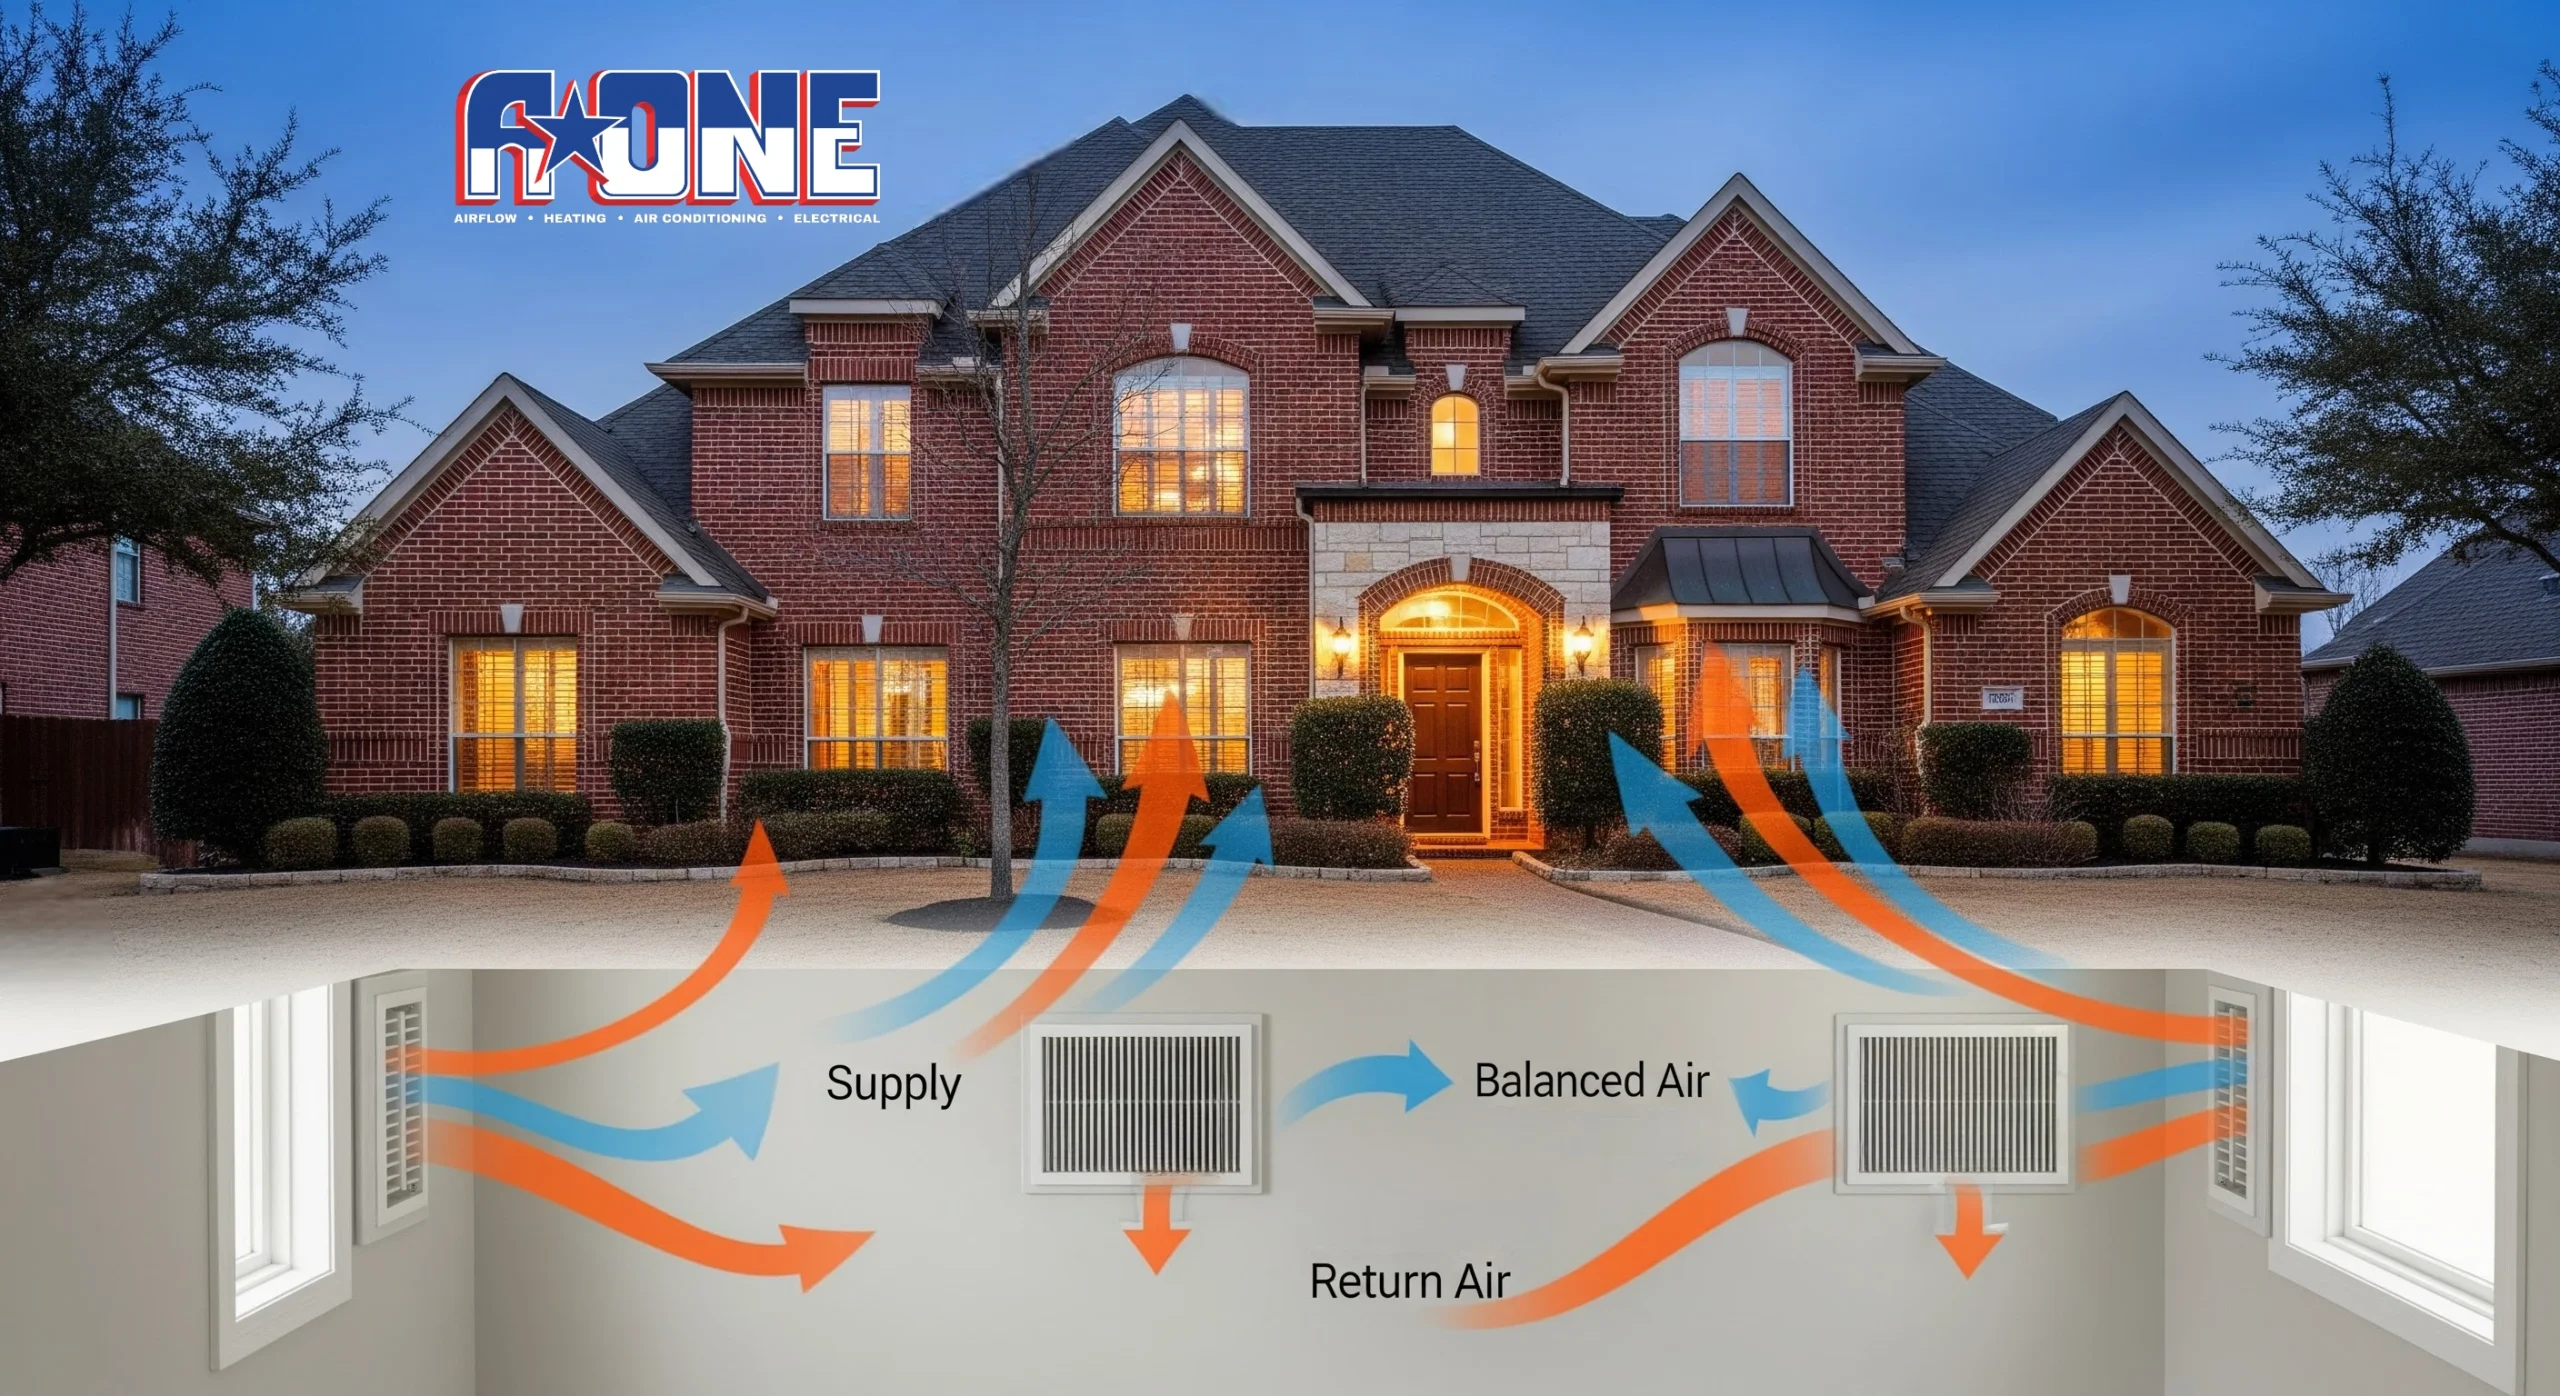
    Heat Pump Heating and Cooling That Works

    Reverse-cycle air conditioning, when sized and set up properly, is usually the cheapest way to heat and cool your home.

    Compared with resistance electric or gas units, modern heat pumps use far less input energy for the same comfort. When you compare models, use the Zoned Energy Rating Label to see how each one performs in hot, average, and cold climates.

    Tasmania Cold-Climate Setup

    Place outdoor units out of prevailing southerly winds and plan clear condensate drainage so you avoid icy paths. Ask installers to allow for defrost cycles and correct refrigerant charge, and book a preseason check so you are not caught out by the first cold snap. In southern Tasmania, book a preseason tune-up or a right-sized reverse-cycle unit with heat pump service Hobart to ensure reliable performance on frosty mornings and lower running costs.

    Hot Water That Stops Bleeding Cash

    Switching from old electric or gas hot water to a heat pump unit can quietly cut a big slice of your energy use.

    Heat pump water heaters typically use about 30 percent of the energy of a conventional electric system. Because hot water is around 25 percent of household energy, this upgrade delivers meaningful bill cuts.

    Locate units away from bedrooms for noise comfort and provide a proper condensate drain. If you have rooftop solar, schedule daytime heating cycles to soak up excess generation.

    Garage Comfort and Efficiency

    Treat the garage as a buffer zone, so fumes, heat, and cold do not leak into living areas.

    Air seal the door between the garage and the living spaces. Insulate internal garage walls or ceilings below habitable rooms. Bright, high-reflectance finishes improve visibility and can allow lower lighting wattage.

    Materials and Finishes

    Select coatings that cure fast, resist abrasion, and use light-coloured finishes to improve illuminance. Confirm slip resistance and prepare surfaces properly so the coating bonds well. For homeowners researching durable, fast-curing finishes that brighten the garage and resist hot-tyre pickup, see polyaspartic floor coating for a deeper dive on pros and cons versus epoxy.

    Rooftop Solar First, Batteries When Numbers Stack Up

    For most households, rooftop solar pays back quickly, while batteries only make sense when your tariffs and usage line up.

    A typical 6.6 kW solar system in 2025 costs about $5,250 to $8,600 installed and produces roughly 24 to 28 kWh per day. Simple payback ranges from three to seven years depending on tariffs and how much of your solar you use on site.

    From 2025, batteries receive 9.3 Small-scale Technology Certificates (STCs) per kWh of capacity, representing roughly 30 percent off typical installed costs.

    Three Questions Before Adding a Battery

    • Do you have high evening usage that solar alone does not cover?
    • Do your tariffs make storage valuable, such as high peak rates or time-of-use pricing?
    • Is your inverter ready for a battery, and would storage delay higher-return upgrades?

    Conclusion

    A clear sequence lets you stack upgrades so each one makes the next cheaper and more effective. Start with sealing and insulation, then choose right-sized reverse-cycle systems and a heat pump water heater. Add solar sized to your loads last. Use labels and price bands to filter quotes quickly and keep QA checklists handy so installs match the design.

    FAQs

    How Big Should My Solar Be?

    For most homes planning a heat pump, 6 to 6.6 kW of solar is a solid baseline.

    Will A Heat Pump Work In Frost?

    Yes. Choose models with strong cold-zone ratings on the Zoned Energy Rating Label and ensure good defrost setup.

    Do I Need Double Glazing Everywhere?

    No. Prioritise living areas and bedrooms facing the harshest orientations, and use thermal curtains plus sealing elsewhere.

    Are Home Batteries Worth It Now?

    Batteries work best where evening usage and peak tariffs are high, and otherwise install solar first and add storage later if needed.

  • The Attic Retrofit That Pays Off Faster Than You Think

    If you have been looking for ways to make your home more energy efficient, the attic is probably not the first thing you imagine. Most people immediately think about windows, a new air conditioning system, or smart thermostats. However, the attic often plays a quiet but decisive role in whether your home keeps its temperature or allows it to escape.

    Because of that, an attic retrofit often delivers results sooner than many homeowners expect. This is not because of anything mysterious. It happens because a large amount of heat is commonly lost or gained through the top of the house.

    Why Attic Insulation Matters

    To understand why the attic is so important, it helps to think about what insulation does in simple terms. Insulation slows down heat transfer. During winter, it helps prevent warm air from rising and escaping. During summer, it limits how much heat from the roof enters the living space below.

    Many homeowners are surprised to learn that insulation does not need to be completely missing to cause problems. It may be too thin, compressed, uneven, or full of gaps around wiring, ductwork, recessed lighting, and attic access points. These weak areas allow energy to leak steadily, which forces heating and cooling systems to run longer than necessary.

    An attic retrofit is not only about reducing energy use. It can also solve everyday comfort issues, such as an upstairs bedroom that always feels warmer than the rest of the house.

    Common Types of Attic Insulation

    When planning an attic retrofit, it is smart to compare the main insulation options instead of choosing the cheapest one by default. Every attic behaves differently, especially in older homes.

    1. Fiberglass batts

    This option is affordable and easy to find. It works best when the attic layout is simple and the batts can be placed neatly between joists. The main drawback is that small installation mistakes, such as gaps or compression, can quickly reduce effectiveness.

    2. Blown in insulation

    This is often a strong choice for retrofits because it spreads evenly and fills irregular spaces. It is especially helpful in attics with many hard to reach areas where batts are difficult to install properly.

    3. Rigid foam boards

    These boards are useful when you need a high insulation value in a thinner layer or when addressing specific trouble spots. Installation usually requires more effort, so they are typically used selectively rather than across the entire attic.

    One innovative solution that has gained popularity in recent years is the use of high-performance radiant foil materials. By reflecting heat rather than absorbing it, these materials can significantly enhance your attic’s thermal performance, making them an excellent choice for retrofitting. If you’re interested in these products, consider exploring high-performance radiant foil materials by AtticFoil for insights on their benefits and applications.

    The Benefits of Retrofitting Your Attic

    Upgrading your attic can produce noticeable benefits fairly quickly, especially if the existing insulation is weak or full of air leaks.

    Energy savings

    Improved insulation and better air sealing reduce the demand on heating and cooling systems. The difference is often most noticeable during extreme weather months when energy use is highest.

    Improved comfort

    This is often the first benefit people feel in daily life. Temperatures become more consistent, upstairs rooms feel less extreme, and there is less need to constantly adjust the thermostat.

    Environmental impact

    Using less energy helps reduce emissions from power generation. While it is not the only step toward sustainability, it is one of the most practical improvements available.

    Higher home value

    Energy efficiency upgrades are easier to market than many homeowners realize. Lower utility bills and documented improvements can make a home more attractive to buyers.

    Tools and Techniques for an Effective Retrofit

    1. Evaluate Existing Insulation

    Begin with a simple inspection. Look for thin areas, exposed ceiling surfaces, compressed insulation, or signs of moisture. Pay close attention to common air leak locations such as vents, plumbing openings, attic access doors, and ductwork.

    2. Measure Your Needs

    Calculate the square footage of the attic and review recommended insulation levels for your climate. The ideal amount depends more on regional conditions than personal preference.

    3. Select Suitable Materials

    The best results often come from combining methods. Start with air sealing, follow with insulation, and consider a radiant barrier if it makes sense for your climate.

    4. Perform the Installation

    Whether you do the work yourself or hire a professional, installation quality is critical. Even small missed gaps can significantly reduce overall performance.

    5. Monitor Performance

    Compare energy bills from similar months rather than week to week. Weather changes can hide real improvements if comparisons are too short term.

    Potential Challenges and Considerations

    1. Moisture Management

    Insulation upgrades should always be paired with proper ventilation and moisture management. Making an attic tighter without addressing moisture can lead to future issues.

    2. Initial Costs

    Initial expenses may seem high, but returns are usually stronger when the attic starts in poor condition. It is also worth checking for rebates or efficiency incentives in your area.

    3. Compliance and Codes

    Local regulations vary in terms of insulation levels, ventilation, and clearances. Meeting these standards helps ensure good performance and prevents problems later.

    Conclusion

    An attic retrofit may not be the most exciting home improvement, but it is often one of the most cost effective. Improved insulation and air sealing reduce energy waste, stabilize indoor temperatures, and lower heating and cooling costs.

    When approached as a complete system that includes insulation, air sealing, ventilation, and moisture control, the payoff often arrives faster than most people expect.

  • Top Benefits of Spray Foam Insulation for Homes and Businesses

    These days, property owners want more than just a building that keeps the weather out. They want consistent comfort. They want lower utility bills. And they want insulation options that really fix the hidden problems inside their walls, attics, and crawl spaces. That’s exactly why spray foam insulation services have become a go-to choice for homes and businesses of all sizes.

    Before we explore the deeper advantages of spray foam, it helps to understand how much installation quality impacts performance. Many local property owners turn to reliable home insulation experts to ensure the foam is applied correctly and delivers long-term value.

    Why Spray Foam Insulation Services Are Transforming Modern Properties

    Spray foam insulation has gained traction because people want solutions that work harder and last longer than traditional materials. Instead of fitting loosely between studs or resting like a blanket on attic floors, spray foam expands on contact and seals the smallest gaps. This creates a tight, continuous barrier against outdoor air, noise, and moisture, making a noticeable difference in how a property feels.

    With rising energy costs and growing awareness of building performance issues, spray foam is one of the most effective upgrades you can make.

    What Makes Spray Foam Insulation Different?

    Spray foam doesn’t simply add insulation; it creates a custom-fitted barrier that adapts to the shape of your walls, floors, and ceilings. That adaptability helps prevent air leaks and improves energy efficiency in ways traditional insulation rarely can. There are two primary types used across residential and commercial projects.

    Understanding Open-Cell Spray Foam

    Open-cell spray foam is known for its softer texture and high expansion rate. Because it expands more than closed-cell foam, it’s ideal for filling irregular cavities. Its sound-absorbing properties also make it a great fit for interior walls, floors, and ceilings where a quieter environment is desired.

    Understanding Closed-Cell Spray Foam

    Closed-cell spray foam is denser and more rigid, making it especially effective in high-moisture or high-humidity areas. Because its structure is tightly packed, it provides excellent moisture resistance and one of the highest R-values per inch, making it a top performer for commercial insulation and structural reinforcement.

    Key Spray Foam Insulation Benefits for Homes

    Homeowners often notice improvements almost immediately. Drafts disappear. Rooms stay at a more consistent temperature. And energy usage drops as HVAC systems don’t have to fight against uncontrolled air leakage.

    Improved Home Energy Efficiency

    Spray foam dramatically reduces energy waste by creating an airtight seal. This allows heating and cooling systems to work more efficiently year-round. As an example in Texas, many homeowners rely on experienced spray foam insulation contractors in Sumner, Texas  like 903 Spray Foam to maximize these benefits and make sure their foam insulation performs from day one.

    Enhanced Indoor Comfort and Air Sealing

    Air leaks are one of the biggest causes of temperature inconsistencies inside a home. Spray foam fills these pathways and maintains stable indoor temperatures. Fewer drafts and fewer cold spots mean a more predictable and comfortable living experience.

    Long-Lasting and Eco-Friendly Insulation Options

    Spray foam doesn’t sag, settle, or degrade over time like some traditional materials. Its longevity means property owners won’t need to replace insulation frequently. Some formulations are also made with eco-friendly materials, adding another layer of value.

    Top Benefits of Spray Foam Insulation for Businesses

    Commercial buildings demand insulation solutions that scale effectively. Spray foam not only improves energy performance, but it also supports structural durability and helps create healthier work environments.

    Stronger Building Envelope Insulation

    The building envelope, which includes the walls, floors, and roof, plays a major role in energy efficiency. Spray foam strengthens these components by reducing airflow and reinforcing structural integrity. That helps commercial buildings maintain more stable indoor climates.

    Commercial Energy Efficiency Upgrades

    Because businesses typically operate larger buildings with higher energy demands, spray foam’s impact becomes even more noticeable. Lower utility bills and more efficient HVAC systems contribute to a strong long-term return on investment.

    Moisture Control Insulation for High-Risk Areas

    Moisture can threaten commercial buildings when left unmanaged. Spray foam’s moisture-resistant nature protects crawl spaces, basements, mechanical rooms, and storage areas from developing mold or structural decay.

    Where Spray Foam Works Best in Residential & Commercial Properties

    Spray foam is extremely versatile. Whether used in new construction or renovations, it enhances some of the most important areas of a property.

    Attic Insulation Services

    Attics are notorious for energy loss. Spray foam insulation creates a continuous thermal barrier that helps regulate indoor temperature and reduces the workload on HVAC equipment.

    Crawl Space Insulation

    Crawl spaces often face moisture buildup, drafts, and pest problems. Spray foam insulation seals off vulnerable areas and provides a long-lasting layer of protection that helps preserve the rest of the home.

    Insulation for New Construction Projects

    Builders appreciate spray foam because it makes it easier to achieve airtight construction. Its performance greatly reduces thermal bridging and creates a more energy-efficient structure from the start.

    Why Professional Insulation Installers Matter

    The effectiveness of spray foam depends heavily on proper installation. The material must be mixed, applied, and cured with precision to deliver its full range of benefits.

    Ensuring Proper Application for Maximum Benefits

    A professional installer understands how to control the foam’s expansion, apply it evenly, and ensure it adheres correctly. Proper technique helps prevent issues like gaps, overexpansion, or poor sealing.

    Avoiding Common DIY Insulation Mistakes

    Spray foam requires specialized equipment and expertise. Attempting DIY installation can lead to moisture problems, inconsistent coverage, or even structural issues. Relying on experts ensures long-term performance and peace of mind.

    The True Spray Foam Insulation ROI

    Even though spray foam often costs more upfront than other materials, its performance delivers significant savings over the years.

    Insulation Cost Savings Over Time

    Better efficiency means smaller utility bills. Over time, those savings add up, making spray foam one of the most cost-effective insulation choices available.

    Improved Building Performance and Durability

    Spray foam contributes to a stronger overall structure. Its air-sealing and moisture-resistant capabilities help protect walls, floors, and foundations from long-term damage.

    Is Spray Foam Insulation the Best Choice for Your Property?

    Spray foam insulation services offer a wide range of benefits, whether your goal is improved energy efficiency, enhanced comfort, or long-term protection for a home or commercial property. With its ability to seal air leaks, strengthen structures, and reduce long-term energy costs, spray foam continues to stand out as a smart investment.

    If you’re ready to enhance your property’s performance, the next step is simple: connect with insulation professionals who can guide the process, recommend the right type of foam, and deliver precise installation. Spray foam offers the kind of long-term value that makes every season more comfortable and every utility bill more manageable.

  • How to Troubleshoot Uneven Heating in Multi-Story Homes

    A woman fanning herself due to the uncomfortable temperature of her home.

    Image Source: dreamstime.com

    If you live in a two or three-story home, you probably know how tricky it can be to keep every floor at the same comfortable temperature. It’s one of those things about home ownership that quietly drives you nuts, right?

    Now, uneven heating can be caused by a bunch of things, some simple and some not so obvious. But before you call in the pros for full HVAC or electrical services, it helps to know what might be going on. Let’s walk through how you can troubleshoot the problem and what steps you can take to make your indoor temperature balanced again.

    Why Multi-Story Homes Heat Unevenly

    A man insulating a window frame with rubber insulation

    Image Source: dreamstime.com

    Believe it or not, it’s a simple science. Heat rises. That’s it.

    So in a two-story or three-story home, warm air from your heater tends to naturally move upward. And that’s why upstairs often ends up warmer, while your downstairs might feel chilly, especially if your heating system isn’t distributing air evenly.

    But there are other reasons too, such as:

    1. Poor Airflow or Blocked Vents – Sometimes the issue is as simple as a blocked vent or a dirty air filter. If air can’t move freely through your ducts, it can’t spread heat evenly.
    2. Leaky Ductwork – If your ducts have gaps or cracks, warm air might escape before it reaches certain rooms. 
    3. Insulation Problems – Older homes often have poor insulation, especially in the attic or around windows. That means heat can escape easily, and rooms farther from your heating unit will feel it first.
    4. Thermostat Placement – If your thermostat sits near a warm area, like a kitchen or sunny window, it might think the whole house is warmer than it really is.
    5. Old or Inefficient Heating System – Sometimes, your heating unit just can’t keep up anymore. If your furnace or heat pump is over 10 to 15 years old, it might not be distributing air efficiently anymore.

    Step-by-Step: How to Troubleshoot Uneven Heating

    A homeowner adjusting her thermostat

    Image Source: dreamstime.com

    Step 1: Check the Simple Stuff First

    Go around your home and make sure all vents are open and not blocked by furniture, curtains, or rugs. You’d be surprised how often that’s the problem.

    Next, check your air filter. If it’s clogged, replace it. A dirty filter makes it harder for your system to push warm air through, and that alone can mess with airflow between floors.

    Step 2: Look at Your Thermostat

    Where your thermostat is placed really matters. If it’s in a warm part of your house, like near a big window, it might shut your system off too soon. That leaves other rooms colder than they should be.

    Try relocating it to a more central area. Or, if you have a large home, think about upgrading to a smart thermostat that can read temperatures in more than one zone.

    Step 3: Inspect Your Ductwork (or Have Someone Do It)

    Ductwork leaks are sneaky. You can’t always see them, but you can often feel them.

    If you have access to your basement or attic, turn your heat on and see if you feel warm air escaping from any ducts. If you do, sealing those leaks can help a lot.

    There’s special duct tape or mastic sealant you can use.

    But if it’s more than a few small spots, it’s better to call a pro to inspect, seal, and balance your ducts properly.

    Step 4: Add or Adjust Zoning

    Zoning means different areas of your home have their own temperature control. So instead of one thermostat for everything, each floor (or area) can have its own.

    That way, you can keep your upstairs cooler and your downstairs warmer without constantly fighting with one system.

    If you don’t already have a zoning setup, it’s a bit of an upgrade. But it’s one of the best long-term fixes for uneven heating.

    Step 5: Check Insulation and Windows

    Cold air likes to sneak in through weak spots like old windows, unsealed doors, or thin insulation. Walk around and see if you feel drafts, especially near windows and room corners.

    You can use weather stripping or draft stoppers to help.

    Attic insulation also makes a big difference since that’s where most heat escapes. Adding more insulation there can make your whole home feel more balanced and save on energy bills.

    When It Might Be More Than Just Airflow

    An electrical technician rewiring an outdoor HVAC unit

    Image Source: dreamstime.com

    Sometimes the issue isn’t about air at all. Heating systems rely on electrical parts like the thermostat, blower motor, and control boards.

    If any of those stop working right, your system might turn on and off unevenly or fail to push air to certain areas. That’s when it’s smart to bring in help.

    A skilled HVAC technician who also provides electrical services can test connections, wiring, and voltage to make sure everything is safe and working as it should.

    Companies like A-One Air do both, which makes troubleshooting easier because they can check the whole system in one visit.

    Quick Fixes You Can Try Right Away

    If you want to make things a bit better today, here are a few simple things that can help even out the heat:

    • Open doors between rooms so air can move around better.
    • Flip your ceiling fans to reverse mode (most have a small switch). This helps push warm air down in the winter.
    • Close vents slightly in the warmer rooms upstairs to push more air to the cooler rooms below.
    • Use thicker curtains to keep heat in at night, then open them during the day to let sunlight help.

    These small tweaks might not solve everything, but they can make your home a lot more comfortable while you plan for bigger fixes.

    When to Call in the Pros

    Two electrical technicians showing thumbs up against their service truck

    Image Source: dreamstime.com

    If you’ve tried all the easy fixes and your home still feels uneven, it’s probably time to bring in professionals. They can test air pressure, inspect ductwork, and make sure your system is running like it should.

    They can even use thermal cameras to spot where heat is escaping or where airflow is weak. It’s actually kind of cool to see, and it helps you understand where the problem really is.

    Getting things fixed properly doesn’t just make your home feel better. It can also lower your energy bills and keep your system running longer.

    Final Thoughts

    Uneven heating in multi-story homes doesn’t have to be a mystery. Most of the time, it comes down to airflow, insulation, or thermostat placement.

    Start with the easy stuff. Test vents and filters. Check your thermostat. Then move up to inspecting ducts or insulation if needed.

    And if it turns out to be more complicated, don’t stress. Whether it’s adjusting your duct system or calling for professional HVAC and electrical technicians like A-One Air, there’s always a solution.