Category: Home Improvement

  • Pros and Cons of Solar Panel Roofs in Texas

    A modern suburban house with solar panels on the roof under a clear blue sky.

    Solar panel roofs are becoming a popular option for homeowners in Texas due to the state’s abundant sunlight. They offer a way to reduce electricity bills and increase home value but also involve upfront costs and maintenance considerations.

    The key to deciding if solar panels make sense in Texas lies in weighing their long-term savings against installation expenses and potential limitations like weather and roof orientation. Understanding both the advantages and drawbacks can help homeowners make an informed choice.

    This article explores the primary pros and cons of solar panel roofs specific to Texas weather, energy policies, and market factors. It aims to provide clear facts that assist readers in deciding whether solar technology fits their needs.

    Benefits of Solar Panel Roofs in Texas

    Solar panel roofs in Texas offer clear financial advantages, reduce environmental impact, and provide access to government incentives. They can also boost property values by making homes more energy-efficient and modern.

    Energy Cost Savings

    According to expert solar panel installers in Dallas from Metro Express Solar, Texas receives abundant sunlight year-round, making solar panels highly efficient in generating electricity. Homeowners can significantly reduce their monthly electricity bills by producing their own power.

    Net metering programs in Texas allow users to sell unused energy back to the grid, further lowering overall energy costs. This can lead to potential savings of 50% to 70% on utility bills, depending on system size and energy use.

    Installing solar panels also provides price stability by reducing dependence on fluctuating utility rates. Over time, savings often cover the initial installation cost, creating long-term financial benefits.

    Environmental Impact

    Solar energy produces zero emissions during operation, helping reduce a home’s carbon footprint. Texas, being a large energy consumer with heavy fossil fuel use, benefits from increased solar adoption to lower greenhouse gas emissions.

    Using solar panels helps decrease reliance on nonrenewable energy sources such as coal and natural gas. This contributes to cleaner air and water quality by reducing pollutants commonly associated with fossil fuel power plants.

    Solar power also conserves water resources, as it requires minimal water for maintenance compared to traditional power generation methods. This is particularly important given Texas’ periodic drought conditions.

    State and Federal Incentives

    Texas homeowners can take advantage of various incentives to offset solar panel installation costs. The federal solar Investment Tax Credit (ITC) allows for a 30% tax credit on system costs through 2032.

    At the state level, there is no state income tax, which means no state tax rebate, but utility companies may offer rebates or performance-based incentives to encourage adoption. These vary by provider and location within Texas.

    Additional perks include exemptions from local property taxes on added home value from solar systems. Some cities also provide streamlined permitting processes to reduce upfront barriers.

    Increased Property Value

    Solar panel roofs increase a home’s market appeal by lowering future energy expenses for buyers. Studies show that homes with solar installations typically sell faster and at higher prices than comparable non-solar homes.

    The premium on resale value often ranges from 3% to 5%, reflecting the energy savings and environmental benefits perceived by buyers. This is especially relevant in Texas markets experiencing growing demand for sustainable housing.

    Solar panels also signal modern upgrades and energy independence, both attractive features to homebuyers in the state. Properly maintained systems can remain efficient for 25 years or more, adding lasting value.

    Drawbacks of Solar Panel Roofs in Texas

    Solar panel roofs involve significant financial investment upfront and require evaluation of local weather patterns. Additionally, not all roofs are suited to support the added weight and structural demands of solar installations.

    Upfront Installation Costs

    The initial expense for purchasing and installing solar panels in Texas can be high. Costs typically range from $15,000 to $30,000 before incentives. This amount covers the panels, inverters, mounting hardware, and labor.

    Although federal tax credits and some state incentives may reduce costs by up to 30%, the out-of-pocket investment remains substantial. Homeowners with limited budgets may find the upfront price a barrier, especially if they lack access to financing options.

    Maintenance, replacement parts, and possible upgrades add to long-term expenses. The payback period can stretch beyond 7–10 years depending on energy savings and system size, which might not suit all buyers.

    Performance Variability Due to Weather

    Texas climate features intense sun but also includes storms, hail, and severe weather events. Solar panels perform best in direct sunlight, but cloud cover and dust storms can reduce efficiency.

    Hail, frequent in some Texas regions, can physically damage panels despite durable designs. Regular cleaning is necessary to remove dirt and debris, particularly in dry, dusty environments, adding to upkeep efforts.

    Heat also decreases efficiency; extreme summer temperatures often exceed optimal operating ranges. This means energy production may dip when demand is highest, affecting overall returns.

    Roof Compatibility and Structural Limitations

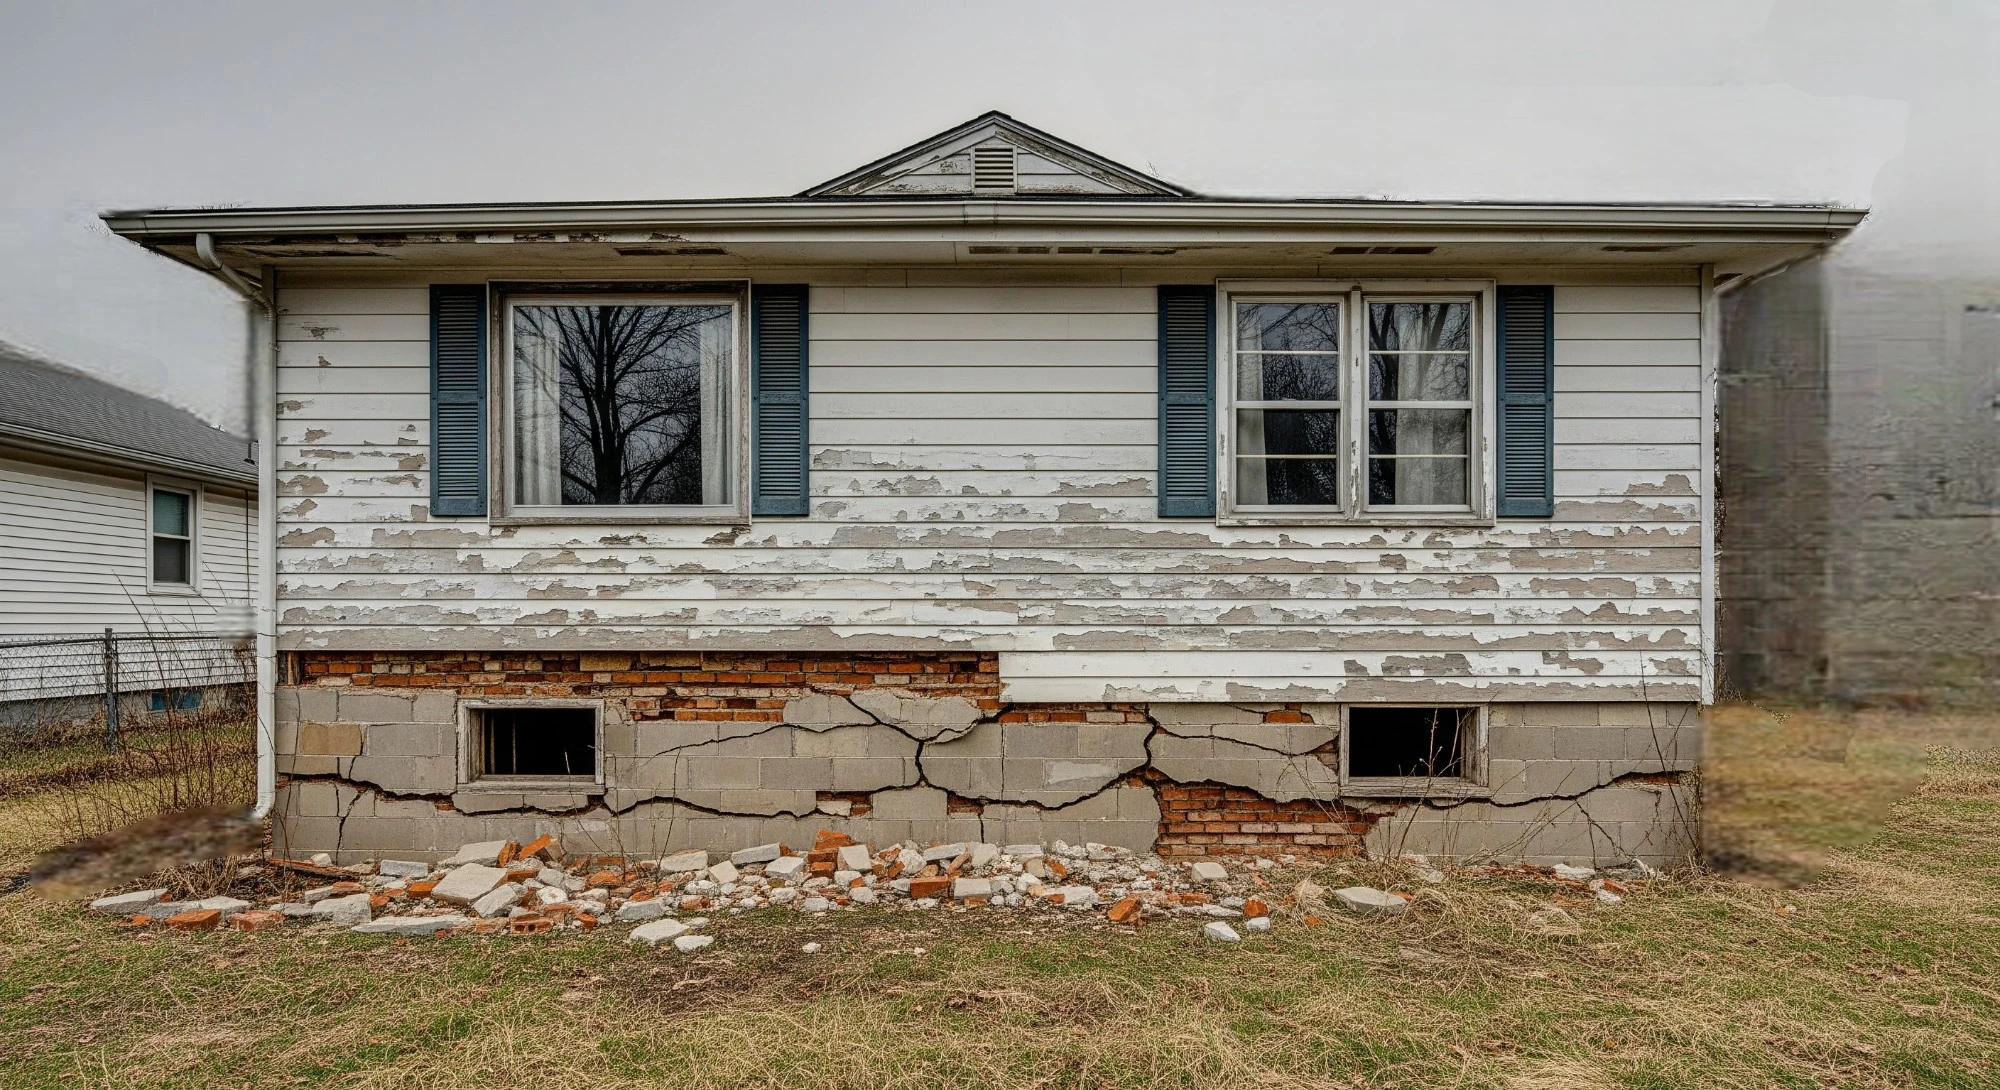
    Not all roofs in Texas can support solar panels. Factors like roof age, material, pitch, and orientation affect eligibility. Older roofs may need repairs or replacement before installation.

    Materials such as wood shakes or slate are less suited for mounting hardware, which can increase installation complexity and costs. Roofs facing north or shaded by trees produce less energy, limiting system effectiveness.

    Structural integrity is critical as panels add weight and wind load. A professional inspection is required to confirm the roof can safely bear the system, potentially leading to additional reinforcement expenses.

    Additional Considerations for Texas Homeowners

    Texas homeowners must navigate specific regulations, upkeep demands, and installation choices when considering solar panels. These factors can significantly affect the system’s cost-effectiveness and durability over time.

    Local Regulations and Permits

    Texas has varied local regulations that impact solar panel installation. Homeowners should check city and county zoning laws, which may limit panel placement or require certain aesthetic standards.

    Permit requirements differ widely. Many areas in Texas mandate electrical and building permits before installation. Failing to secure these can result in fines or costly modifications.

    Net metering policies are crucial. Texas utilities offer different compensation rates for excess energy, so understanding local programs helps maximize savings.

    Maintenance and Longevity

    Solar panels generally require minimal maintenance but should be inspected annually. Texas weather, especially dust, pollen, and occasional hail, can reduce efficiency if panels are not cleaned.

    Roof condition plays a role. Panels installed on aging roofs may need removal for repairs, increasing maintenance costs. Homeowners should ensure the roof is in good shape before installation.

    Monitoring systems are recommended. They provide real-time performance data, allowing quick identification of issues such as shading or panel malfunctions.

    Choosing a Qualified Installer

    Selecting an experienced installer is critical in Texas due to unique climate and regulatory conditions. Look for licensed and insured professionals with positive local reviews.

    Installers should offer warranties on both equipment and labor. Warranties typically cover 10-25 years for panels and 5-10 years for installation work.

    Request detailed quotes including system size, expected output, and timeline. A transparent installer will provide a clear contract and assist with permit applications.

  • 5 Essential Home Improvements That Increase Value and Buyer Appeal

    What makes a home stand out today? It’s not just square footage. Today’s buyers want clean, healthy spaces that feel safe and won’t cost a fortune to maintain.

    Whether you plan to sell or stay, these five upgrades can serve dual purposes—adding lasting value, attracting buyers quickly, and enhancing daily comfort in your home.

    Sometimes smaller updates like clean air ducts, a refreshed kitchen, or a solid front door help your home shine in a competitive market.

    1. Mold Remediation: Protect Your Home’s Health and Value

    Mold thrives in warm, damp areas, especially older homes or those with past water damage. It’s not always visible, but a musty smell, especially in basements or bathrooms, is a clear sign. Indoor symptoms like headaches, sneezing, or itchy eyes could also indicate mold.

    Left untreated, mold won’t just affect air quality—it can derail a home inspection. If discovered during a sale, it typically results in reduced offers or prolonged negotiations.

    Why It Pays Off:
    Professional remediation not only resolves the issue but signals to buyers that the home has been carefully maintained. Most remediation services treat areas to prevent regrowth, boosting buyer confidence during escrow.

    2. Air Duct Cleaning: Cleaner Air Equals Faster Sales

    Indoor air quality has become a major priority for homebuyers. Air ducts accumulate dust, pet hair, and mold spores, impacting HVAC efficiency and air freshness.

    Professional air duct cleaning clears out years of debris, enhancing air quality while improving HVAC performance, potentially lowering utility bills and reducing system wear.

    Value Beyond Comfort:
    Recent duct cleaning is a valuable, low-effort selling point. Buyers appreciate homes with well-maintained systems, especially in markets where move-in ready conditions are expected. Highlighting this service during showings sets your property apart.

    3. Kitchen Remodels: Boost ROI in the Home’s Heart

    The kitchen often becomes the deciding factor for buyers since it’s where people gather and connect. Even minor kitchen updates significantly impact both visual appeal and functionality.

    Whether you’re considering small upgrades or a full kitchen remodeling service, improvements like energy-efficient appliances, updated counters, or improved lighting create immediate, lasting impressions.

    Keys to Success:

    • Modern, open layouts
    • Stone countertops like quartz or granite
    • Smart lighting and clever storage solutions
    • Energy-efficient appliances appealing to eco-conscious buyers

    A full remodel isn’t always necessary; strategic improvements often recoup 70–80% of the investment upon resale, creating an inviting space buyers can envision themselves using.

    4. Bathroom Remodeling: Small Changes, Major Appeal

    Bathrooms don’t need to be large to boost value, but outdated finishes or poor lighting can drastically lower the appeal of the entire home.

    A modern bathroom with fresh paint, new tile, updated vanity, or a high-efficiency toilet signals meticulous home care.

    Creating a Spa-Like Atmosphere Without Major Renovations:

    • Floating vanities enlarge visual space
    • Neutral colors open small areas
    • LED mirrors and enhanced ceiling lighting provide an instant refresh

    These straightforward improvements make daily life easier and eliminate one more project for prospective buyers.

    5. Impact-Resistant Doors: Safety and Style in One Upgrade

    Your front door isn’t just about curb appeal. An impact resistance door offers security against break-ins and weather events, while also helping maintain indoor air quality and cutting energy costs.

    Today’s designs come in various styles and finishes, ensuring practical upgrades don’t compromise aesthetics.

    Buyer Benefits:

    • Reinforced entryway for peace of mind
    • Better insulation, reducing energy expenses
    • Potential homeowner’s insurance discounts
    • Enhanced overall visual appeal

    An impact-resistant door is a smart, attractive investment that quietly improves home safety and efficiency.

    Conclusion: Prioritize Upgrades That Count

    These five improvements strike the perfect balance: practicality, comfort, and buyer appeal. Whether it’s mold remediation, duct cleaning, kitchen enhancements, bathroom updates, or replacing your front door, each investment provides tangible, lasting value for both your enjoyment and future resale.

  • Synthetic Vs. Natural Turf In Texas: What Works Best For DFW Homes?

    Maintaining a green, lush lawn in Texas—especially the Dallas-Fort Worth (DFW) area—is no easy task. Intense summer heat, unpredictable rainfall, and water restrictions have made many homeowners reconsider their landscaping strategy. While traditional grass still appeals for its natural texture and environmental feel, synthetic turf has emerged as a water-wise, low-maintenance alternative. 

    Photo by Peter Burdon on Unsplash

    Each option has its strengths and drawbacks, and the best choice often depends on your priorities—durability, aesthetics, budget, and sustainability. This guide explores those trade-offs and highlights the top artificial turf installers transforming outdoor spaces in the DFW region.

    Leading Artificial Turf Installers Serving The Dfw Area

    Finding the right installer can make all the difference when switching to synthetic turf, and DFW boasts a strong market of experienced providers.

    DFW Turf Solutions

    DFW Turf Solutions serves homeowners across the Dallas-Fort Worth metroplex with high-quality synthetic grass systems that balance function, aesthetics, and sustainability. Their turf products are designed for long-term performance in local climates, with UV-resistant features that support various residential uses.

    ToughLawn

    ToughLawn specializes in pet- and kid-friendly turf systems across the greater DFW metroplex. Known for their work in Fort Worth and Arlington, they focus on turf types engineered for high activity areas such as playgrounds, dog runs, and sports courts. 

    Their synthetic grass includes UV stabilization technology to resist color fading, and their warranties offer peace of mind with up to 15 years of coverage. Their team also helps clients navigate HOA guidelines or local permits when needed.

    SYNLawn Texas

    As part of a nationwide franchise, SYNLawn brings patented turf technology and decades of R&D into local installations. Their showroom in Carrollton features everything from golf putting greens to rooftop grass systems. 

    They emphasize eco-friendly turf products that are 100% recyclable and lead-free, often appealing to environmentally conscious homeowners in neighborhoods like University Park or Highland Park. SYNLawn also partners with local architects and landscape designers to offer fully customized solutions.

    Weighing Synthetic Turf: The Pros For Dfw Homes

    With unpredictable weather patterns and increasing water bills, more North Texans are choosing synthetic turf—and for good reason.

    • Water Conservation: Artificial turf requires no irrigation, which can save thousands of gallons of water annually. For homeowners facing municipal restrictions during summer droughts, this is a major advantage.
    • Durability in Extreme Weather: Texas summers are notoriously harsh. Quality synthetic turf retains its shape and color despite long periods of sun exposure, while natural grass often wilts or browns under such conditions.
    • Low Maintenance: Say goodbye to weekly mowing, edging, fertilizing, or reseeding. Artificial turf eliminates most recurring lawn tasks and reduces the need for mowing, reseeding, and chemical treatments, saving time and lowering exposure to lawn chemicals, especially for families.
    • Cost Predictability: While synthetic turf has higher upfront costs, its long-term savings on water and maintenance are covered in more detail below.
    • Allergen Reduction: For allergy sufferers, synthetic lawns reduce exposure to pollen and mold. Families with children often find synthetic turf improves outdoor accessibility during allergy season.
    Photo by Nora Jane Long on Unsplash

    The Case For Natural Grass: Beauty And Biodiversity

    While synthetic lawns offer convenience, natural grass still holds strong appeal, especially for traditionalists and environmentalists.

    • Aesthetic Softness: Nothing quite matches the feel and scent of freshly mowed grass. It creates a sensory experience that artificial alternatives simply can’t replicate. For homes with shaded lots or efficient sprinkler systems, keeping a lush lawn is more attainable.
    • Cooling Effect: Live grass helps cool its surroundings, creating a more comfortable microclimate—especially important for outdoor play or pets during hot Texas summers.
    • Ecological Role: Natural grass supports local biodiversity, including insects, birds, and microorganisms that artificial turf displaces. For homeowners interested in pollinator-friendly gardening, a live lawn complements native plants and rain gardens.
    • Initial Cost Advantage: Installing sod is generally cheaper upfront, with prices between $1 to $3 per square foot. While it requires ongoing maintenance, it’s less of a financial hit than synthetic turf at the outset.
    • Soil Health and Permeability: Grass-covered soil promotes water infiltration and reduces runoff, helping recharge aquifers. Artificial turf can sometimes interfere with natural drainage unless specially designed sublayers are installed.

    Real Costs Of Installation And Ownership In Dfw

    Cost is one of the biggest factors in choosing between synthetic and natural turf, and understanding the true lifetime cost matters for making the right decision.

    • Synthetic Turf: As mentioned, the installation typically ranges between $8 to $15 per square foot in DFW, including site prep, base layers, and infill. A 1,000-square-foot lawn could cost $10,000 or more. However, the turf lasts up to 20 years with minimal upkeep. The absence of water bills, fertilizers, and lawn services gradually balances out the high initial expense.
    • Natural Grass: Installing new sod will cost $1,500 to $3,000 for the same area. But monthly costs add up—expect to spend $150–$300 monthly on water, fertilizer, mowing, and other care during peak seasons. If patching, reseeding, or pest control becomes necessary, that number grows. Over 10 years, natural grass can actually exceed synthetic turf in cumulative cost.

    Environmental And Safety Considerations For Texas Yards

    Homeowners today aren’t just thinking about aesthetics or cost—they also care about environmental footprint and safety, especially for kids and pets.

    • Artificial Turf: Critics argue that artificial turf contributes to urban heat islands and doesn’t biodegrade at end-of-life. However, many Texas-based providers now use recyclable, non-toxic materials and infills such as coconut fiber or walnut shell blends to reduce heat buildup. When installed with proper drainage layers, it can also mitigate runoff and flooding risks in urban neighborhoods.
    • Natural Grass: While eco-friendly in many ways, conventional lawn care often involves chemical fertilizers and pesticides that pose runoff and health risks. More sustainable practices, such as xeriscaping or integrating native grass species like buffalo grass or Zoysia, help reduce water use and pollution.
    Photo by Petar Tonchev on Unsplash

    Wrapping Up

    For homeowners exploring alternatives beyond turf, Texas native groundcovers like horseherb, frogfruit, and silver ponyfoot are gaining popularity as low-maintenance, drought-tolerant options. 

    These living carpets require less water than grass, support local pollinators, and thrive in both sun and shade. Whether you’re leaning synthetic or natural, expanding your landscaping palette could be the smartest move for long-term beauty and resilience in the DFW climate.

  • DIY Artificial Grass Installation: A Step-by-Step Guide for Beginners

    Some spaces just aren’t made for real grass. Maybe there’s too much shade, too many paws running around, or not enough time to deal with sprinklers and weeds. That’s where artificial grass quietly steps in and does its thing. It’s green all year, doesn’t care about dry spells, and somehow always looks like you just had it professionally edged.

    You’ll see it tucked between stepping stones in a small side yard, softening up a balcony in the city, or covering that awkward patch between the garage and the fence that never grew anything anyway. It’s a favorite for dog owners—easy to rinse, tough to dig through and parents like it too because there’s no mud, no mess, just clean space to run around. It’s not trying too hard, it just works, which is probably why so many people keep going back to it once they see how low-key the upkeep really is.

    You don’t always need a crew or fancy equipment to get it in place. With a free weekend, a bit of planning, and maybe a playlist that keeps the energy up, DIY artificial grass installation can actually turn into one of those surprisingly satisfying wins. It’s the kind of project that changes how your space looks and feels and once it’s done, it pretty much takes care of itself.

    Step 1 – Prep the Ground

    Getting the ground ready might not be the most exciting part, but it sets everything up to actually last. First, all the old stuff has to go. Grass, weeds, rocks, random roots, basically anything that doesn’t belong under your new lawn. A few inches down is usually enough, just enough to get a clean surface. If there’s an old sprinkler system hiding in there, now’s the time to cap it off or pull it out so nothing leaks or grows moldy underneath. And since water needs a place to go, a gentle slope away from the house helps a lot during rainy days.

    Before grabbing a shovel, always check for underground lines. and don’t forget to call 811 before digging, it’s a small step that helps avoid accidents, costly repairs, and worse..

    Step 2 – Build a Stable Base

    After clearing the area, it helps to add a border around the space. It’s not a must, but having something like bender board or weather-treated wood around the edge gives the whole thing a cleaner finish and helps hold the turf in place once everything’s down. It also makes the final edge feel more intentional instead of just sort of stopping wherever the grass ends.

    Then comes the base layer, which is basically what keeps everything feeling solid. A couple inches of crushed stone or decomposed granite works great here. Once it’s spread out, the surface needs to be as level and even as possible, with a little slope so water doesn’t just sit there. Packing it down tightly makes a big difference too—this is what keeps dips and soft spots from showing up later. Some folks like to roll out a weed barrier at this stage, just to make extra sure nothing tries to grow back through.

    Step 3 – Lay and Settle the Grass

    Once the base is set, it’s time to roll out the green. The turf usually comes tightly packed, so letting it hang out in the sun for a bit helps it relax and flatten out. It’s kind of like unrolling a giant yoga mat that’s been stuffed in a closet for too long. The warmth makes the material easier to shape and way less stubborn when it’s time to get it sitting right.

    Once it’s relaxed, the trick is to keep all the blades going in the same direction. It sounds tiny, but if some of them lean one way and others lean another, the lawn ends up looking patchy in weird lighting. Trimming around edges, stepping stones, or tree trunks takes some slow moves and a sharp blade, but once you get going, it’s oddly satisfying. If you’ve got more than one roll to work with, lining up seams can take a minute, but once they’re glued and pressed down, it all disappears like a good wallpaper pattern.

    To finish, anchor the edges so nothing shifts out of place, then give everything a good brush—nothing fancy, just something stiff enough to lift the blades so it starts to look less like packaging and more like a real backyard.

    Step 4 – Add the Infill

    This part feels a little like seasoning a big pan of something before it goes in the oven. The infill is what settles into the grass and helps everything feel grounded, literally. There are a few options to pick from, silica sand is common, rubber crumb gives more bounce, and pet-friendly blends are great if furry paws are part of daily life. The type you go with depends on how the space will be used, but either way, it’s what gives the turf weight and helps the blades stay upright.

    Once it’s spread across the surface, a stiff brush (or power broom, if you’re feeling fancy) helps work the material down into the fibers so it doesn’t just sit on top like sprinkles on a cupcake. It takes a little elbow grease, but once it’s in, the whole thing feels more finished. Also, it helps the turf look more like real grass instead of something you just rolled out yesterday.

    Step 5 – Final Touches

    With everything in place, the last step is all about tidying up and giving the whole space a once-over. Any loose bits—extra infill, stray blades, scraps from trimming, can be swept or vacuumed up to keep things looking polished. It’s also a good time to check edges one last time, make sure nothing’s lifting, and brush out any areas that got matted down during install.

    Once the surface looks clean and even, that’s when it really starts to feel like a finished yard. No muddy patches, no weird brown spots, and no mower in sight. Just a soft, green space that looks good from every angle and holds up whether it’s sunny, rainy, or somewhere in between. It’s one of those upgrades that keeps paying off over time—less work, more time to actually enjoy being outside.

    Tools and Materials

    A lot of this stuff might already be hanging out in the garage or tucked behind the broom in the laundry room. But here’s a quick list of what tends to come in handy:

    • A sturdy shovel or spade for digging out the old stuff.
    • A rake to smooth things over before and after the base goes down.
    • A plate compactor or tamper, depending on how fancy (or old-school) things get.
    • A sharp utility knife or carpet blade for trimming around corners and edges.
    • Measuring tape, because eyeballing works until it doesn’t.
    • Turf nails or staples to keep everything anchored at the edges.
    • Weed barrier fabric, totally optional but nice if you’re hoping for less maintenance later.
    • Crushed stone or decomposed granite to build that solid, level base.
    • Infill like silica sand or a pet-safe option to help the blades stay upright and soft.
    • Turf adhesive or seam tape, especially if you’re working with more than one roll.

    A Few Last Things to Keep in Mind

    There’s no need to overthink things, but a few extra details are worth keeping in mind:

    • Good drainage starts with a gentle slope and a well-packed base, especially if your yard gets hit with heavy rain now and then.
    • If seams are unavoidable, curved cuts tend to blend better than straight ones—nothing too perfect, just enough to keep things looking smooth.
    • Sharp blades mean real risks, so gloves help, and slow steady cuts always beat rushing through.
    • And if any part of the process starts to feel more confusing than creative, it’s totally okay to call in someone who’s done it before.

    No rush, no rules, just a yard that actually works for you.

  • How to Instantly Boost Your Dallas Home Value with an Outdoor Kitchen

    A granite counter top with a sink and a grill

AI-generated content may be incorrect.

    Nothing captures the feeling of Texas living quite like grilling ribs as the sun sets behind your backyard fence. In Dallas, it makes perfect sense to turn your yard into a full outdoor kitchen, since the weather is ideal for cooking outside almost all year.

    An outdoor kitchen adds much more than a nice grill or a mini fridge near your patio. With thoughtful planning, it becomes the heart of your backyard, a favorite gathering spot for friends and family, and one of the quickest ways to increase your home’s value.

    So, if you’re thinking about it, or you’re deep in a Pinterest rabbit hole already, let me walk you through everything I’ve learned (including a few hilarious missteps) to help you build the outdoor kitchen of your dreams.

    Outdoor Kitchen Design Tips

    • A well-designed outdoor kitchen can increase your home value in Dallas by up to 30%.
    • Essential features include a good-quality grill, durable countertops, a reliable refrigerator, and comfortable seating.
    • Dallas’s climate means you can use your outdoor kitchen year-round. That makes it worth investing in a design that works well for all seasons.
    • Choose a layout that flows and make sure it matches your home’s style.
    • Maintenance and materials matter. A scorched cabinet or rusty fridge won’t impress buyers or your guests.
    A barbecue grill and grill on a patio

AI-generated content may be incorrect.

    Assessing Your Outdoor Space

    Before you bust out the tape measure or order a built-in smoker, take a good look at your backyard. How much space do you really have? What direction does the wind blow during grilling season (I learned the smoky way)? And how does the afternoon sun hit your yard?

    Here in Dallas, sun exposure is real. South-facing yards can turn into frying pans. You’ll want to plan for natural shade, or install a pergola to make it usable in July. Think about:

    • Existing patio or deck space.
    • How close you want the outdoor kitchen to your indoor kitchen.
    • Where people usually gather in the yard.

    A smart layout matters more than size.

    A large outdoor kitchen with a grill

AI-generated content may be incorrect.

    Designing Your Dream Kitchen Layout

    Now we’re cooking.

    Your layout should make outdoor cooking feel just as convenient as indoor cooking. The basic principle? Create a triangle between the grillprep space, and refrigeration, just like inside.

    Here are the 3 most common layout types:

    Layout TypeBest ForPros
    Straight LineSmall patiosSimple design, cost-effective, quick to build
    L-ShapeMedium spacesMore counter space, natural prep zone separation
    U-Shape or IslandLarge yards or entertainersAll-in-one workstation with max functionality

    When you plan your layout, think about how people will move around. It’s easier to handle food and drinks when the space isn’t crowded.

    A kitchen with a grill and a barbecue

AI-generated content may be incorrect.

    Choosing the Right Appliances

    This is where I got a little too excited. Let’s just say my first outdoor fridge couldn’t even handle a mild Texas spring. It pays to choose brands known for outdoor durability like Fire Magic.

    Key appliances include:

    • A built-in grill (gas, charcoal, or hybrid, just make sure it’s weather-rated).
    • An outdoor-rated refrigerator.
    • A sink, if you have water access, to simplify food prep.
    • A warming drawer or side burner for flexibility.

    Optional upgrades people love:

    • Pizza oven.
    • Ice maker.
    • Kegerator.
    A patio with a grill and a table

AI-generated content may be incorrect.

    Selecting Durable Materials

    Outdoor kitchens may look perfect when new, but durability is what counts over time.

    In Dallas, the weather goes from scorching heat to sudden hail and back again. So choose materials that can handle these extremes:

    • Countertops: Go with granite, quartzite, or concrete
    • Cabinetry: Stainless steel, teak, or HDPE (marine-grade polymer)
    • Flooring: Textured concrete, stone pavers, or porcelain tile

    Avoid wood unless you love restaining things. Also, skip cheap stainless. It’ll rust faster than a leaky faucet.

    A barbeque with chairs and a grill

AI-generated content may be incorrect.

    Planning for Plumbing and Electrical Needs

    Not the most glamorous part but easily the most important.

    If you’re adding a fridge, sink, lighting, or anything electric, you’ll need professional installation. Trust me: that DIY extension cord you zip-tied to your pergola will not pass code. Been there, shocked that.

    Expect to:

    This step costs money but skipping it often causes bigger problems later.

    A kitchen with lights on the outside

AI-generated content may be incorrect.

    Incorporating Lighting and Heating Features

    Want to make your outdoor kitchen usable past sunset in October? Light and heat are your friends.

    Lighting ideas include:

    • LED strip lighting under countertops.
    • Pendant lights above bar seating.
    • Solar accent lights in landscaping.

    For warmth:

    • Built-in patio heaters.
    • Overhead infrared heaters.
    • Fire pits or fireplaces (adds ambience and resale appeal).

    Nights in Dallas can get chilly, so it’s worth planning ahead.

    A dining table and chairs in a room

AI-generated content may be incorrect.

    Enhancing Aesthetics with Décor

    This is where you show personality. Your space should feel intentional and inviting. Like: “Yes, I have a grill—but stay for the vibes.”

    Tips:

    • Match kitchen finishes to your home’s architecture
    • Add greenery with vertical planters
    • Use outdoor rugs to define zones
    • Pick seating that encourages long, lazy hangs

    Also: Don’t skimp on shade. A pergola with string lights creates the perfect mood for gatherings.

    A close up of a counter top

AI-generated content may be incorrect.

    Budgeting for Your Outdoor Kitchen Project

    Let’s talk money. Most Dallas homeowners spend between $10,000 and $50,000 for a quality outdoor kitchen. High-end projects can easily cost more than $75,000.

    Typical costs break down like this:

    • Appliances: $5,000–$15,000
    • Countertops & cabinetry: $8,000–$20,000
    • Plumbing/electrical: $4,000–$10,000
    • Flooring/structure: $5,000–$12,000

    To keep costs down, choose a straightforward layout and build the kitchen close to your house.

    A patio with plants growing on the walls

AI-generated content may be incorrect.

    Navigating Local Building Codes and Permits

    Yes, Dallas has specific rules for outdoor kitchens.

    You’ll probably need permits for:

    • Electrical or gas line installation.
    • Plumbing extensions.
    • Structures like pergolas or roofed kitchens.

    Skipping permits can lead to fines or being forced to redo parts of the project. Check your city’s requirements or hire a contractor who handles permits for you.

    Maintenance Tips for Longevity

    No one tells you this, but outdoor kitchens age fast if you don’t keep them in shape. I once left my grill uncovered during a Texas storm and it’s never looked the same.

    Best practices:

    • Cover appliances when you’re not using them.
    • Wipe down counters and clean the grill weekly.
    • Inspect for rust, leaks, or cracks every season.
    • Use covers or build a small shed for extra protection.

    If you treat it like an indoor kitchen, it’ll stay in great condition for years.

    A large outdoor kitchen with stainless steel appliances

AI-generated content may be incorrect.

    A Worthwhile Investment

    Building an outdoor kitchen is one of the quickest ways to add value to your Dallas home. With proper planning, the right materials, and a layout that supports both cooking and entertaining, you’ll create a space that’s both practical and fun. When you’re ready to sell, buyers often see a well-designed outdoor kitchen as a major bonus.

    If you’re ready to get started, Starfire Direct has everything you need, from grills to fire pits to expert advice. Just don’t forget to plan for shade… and maybe a backup bottle of propane, just in case.

  • Before You Buy or Sell, These Home Services Make All the Difference

    There’s nothing like the emotional whiplash of buying or selling a home. One minute it’s spreadsheets and appraisals. The next it’s staring at a crack in the wall that suddenly looks like a metaphor for your entire life. And while location and price tend to dominate the conversation, it’s often the behind-the-scenes details that quietly decide how things play out.

    These are the things that don’t get spotlighted in glossy listings but absolutely show up in how a house feels. A solid foundation. Fresh paint. Gutters that aren’t auditioning for a horror film. In a market where attention spans are short and impressions form fast, home service SEO and other professional services shift the energy of a home in real, measurable ways.

    Why Home Service Matters in Real Estate

    Before the paperwork even enters the chat, the condition of the house already has a lot to say. And buyers are listening, even if they don’t realize it. That feeling they get when a home just feels right is often the result of dozens of small decisions the seller made long before the open house.

    Neglect, even when subtle, registers. It shows up in peeling paint, warped floors, flickering light fixtures. It adds weight to the decision-making process. And weight, in real estate, usually equals doubt.

    Fixing things before they become negotiating tools is strategic.

    Start at the Bottom: Foundation Repair

    The foundation isn’t the glamorous part of homeownership. No one walks into a house and gasps over a crawl space. But ignoring it is like putting on lipstick when you haven’t brushed your teeth.

    Sooner or later, someone’s going to notice. Cracks in the walls. Doors that don’t quite close. Sloping floors. Moisture where there shouldn’t be moisture. These are the quiet red flags buyers pick up on even when they can’t name exactly what feels off.

    Hiring a professional before the listing goes live is worth it. Not only do you avoid inspection-day surprises, but you also give buyers fewer reasons to chip away at your asking price. A professional foundation repair service typically run between $2,500 and $8,000. Yes, it stings. But not as much as watching the deal fall apart after the inspection.

    The Paint Trick That Isn’t Magic

    Paint is the magic trick that isn’t magic. It’s psychology in a can. The right shade makes a space feel intentional and clean. The wrong one makes a room feel like a teenager’s bedroom from 1990.

    Light neutrals work for a reason. They don’t argue. They let buyers project themselves into the space. And when paired with trim that isn’t chipped or grimy, the result is emotional clarity. That’s why hiring professional house painters can make all the difference. People don’t want to imagine themselves scrubbing baseboards. They want to imagine Saturday mornings with coffee and no to-do list.

    Studies even back it up. Light blue bathrooms and charcoal exteriors often lead to higher selling prices. Color, like everything else, is doing quiet work in the background.

    Small Services, Big Shifts

    Sometimes it’s not the big things, it’s the thoughtful pile-up of little ones that tips the scale.

    • Roof and Gutter Reality Checks: A roof in good condition doesn’t get praise. A bad one, on the other hand, gets attention fast. Leaks, missing shingles, clogged gutters, it all reads as risk. And risk is expensive. Clean gutters aren’t sexy, but they keep water away from your foundation, which means you’re not circling back to that nightmare again.
    • Updated Systems Mean Peace of Mind: No one wants to wonder if the outlets are grounded or if flushing the toilet will cause a minor flood. Updated electrical and plumbing aren’t flashy, but they tell a story: this home has been taken care of. That message matters.
    • Clean is a Feeling, Not Just a Look: There’s clean. Grout lines, air vents, baseboards, all of it adds up to a feeling that’s hard to fake. A spotless home tells buyers the space is loved. Add thoughtful staging lighting that makes the room breathe, furniture that fits, art that isn’t just filler and the house starts telling a story buyers want to step into.

    The National Association of Realtors even confirms it: staged homes help people see themselves living there. That emotional hook means what closes deals.

    What It All Adds Up To

    These aren’t just chores. They’re investments in clarity. In buyer confidence. In fewer late-stage surprises that make everyone miserable. Whether buying or selling, these services anchor the process. They keep it from drifting into chaos and keep the focus on what matters making a house feel like home, whether you’re leaving it or just arriving.

  • The Realtor’s Checklist: Home Repairs That Close Deals Quicker

    Time is money. And nothing makes a buyer pause like a home that’s clearly still waiting on a to-do list. A cracked foundation, a musty basement, or peeling paint can say a lot, none of it good. Once trust starts slipping, so does the perceived value.

    The sellers who stay ahead of this? They knock out the critical repairs early such as foundation repair, HVAC and plumbing issues, basement waterproofing, and possible flood damage restoration. No drama during inspections. No back-and-forth over credits. Just stronger offers and smoother closings.

    This guide lays out which repairs matter most, how to prioritize without guesswork, and why having a professional on your side can make all the difference when it’s time to close.

    Why Repairs Matter Way More Than You Think

    Getting a home ready to sell isn’t just about throwing on a fresh coat of paint and lighting a few candles before the open house. If there are cracks in the walls or a soft spot in the floor, buyers notice and those red flags don’t just stay in their heads, they show up in offers (or the lack of them).

    Every scratch, leak, or outdated system invites more questions. More questions lead to longer inspections. And longer inspections? Usually mean slower sales, tighter negotiations, or deals that fall apart at the finish line.

    When a home feels cared for, buyers pick up on it instantly. It tells them the place wasn’t just lived in, it was loved. And that makes writing a serious offer feel a whole lot less risky.

    It All Starts at the Curb

    The moment someone pulls up outside, the mental checklist begins. And it’s quick. We found that curb appeal can swing a sale price by as much as 9%. That’s no small change.

    So if the walkway’s cracked or the bushes haven’t seen a trim since last spring, buyers notice. Their brains start doing the math: “If the outside looks like this, what’s waiting inside?”

    Those first impressions matter because they quietly shape the way buyers interpret everything that comes after. A tidy yard and a solid front step might not seal the deal, but they make it a lot easier to walk in with confidence instead of caution.

    Inspections and Appraisals: The Real Deal-Breakers

    Buyers might fall for crown molding and fresh tile, but inspectors and appraisers? They’re not swayed by good lighting. Their job is to dig deep behind the walls, under the floors, inside the crawlspace.

    And when buyers find moisture damage or signs of structural trouble, things can shift quickly. Issues like these almost always lower the value, which can result in price cuts, re-negotiations, or, in the worst case, a buyer who walks away.

    Taking care of problems before they show up on a report doesn’t just help the house look better, it keeps the deal on track. No last-minute scrambling. No stressed-out phone calls. Just steady momentum toward the closing table.

    Faster Sales, Higher Offers

    There’s something about a home that feels done. No to-do lists. No “we’ll fix it later.” Just unpack and live. And buyers? They love that feeling. Zillow’s 2024 Consumer Housing Trends Report found that people are willing to pay up to 4% more for a move-in-ready home. On an average house, that’s around $14,000, not exactly pocket change.

    But it works both ways. Homes that need obvious repairs? They tend to sell for up to 8% less. That’s a lot of money left on the table and it usually means fewer offers, more hesitation, and more time sitting on the market.

    So if the goal is to sell fast and walk away with a solid return, a little up-front effort can make a seriously big difference.

    The Repairs Buyers Spot First and Talk About Later

    Every home has its own personality. some charming, some… complicated. But there’s a short list of repairs that buyers, inspectors, and appraisers all notice right away. Skip them, and the red flags pile up. Handle them early, and suddenly the place feels solid, safe, and ready for someone new to move in.

    Foundation Fixes That Actually Set the Stage

    If the floors feel a little wonky, the doors don’t shut quite right, or there’s a crack running down the brick outside buyers notice. These are classic signs of foundation movement. And foundation issues are one of the top five deal-breakers in a home sale.

    Getting a pro in to evaluate and repair the foundation does more than solve a structural headache. It shows buyers (and their lenders) that the serious stuff has been handled. Add documentation to the mix, and it’s one less reason for anyone to back out later.

    Basement Waterproofing

    Basements can be sneaky. That white powdery stuff on the walls? It’s called efflorescence, and it usually means water has been coming and going for a while. Throw in some discoloration or a musty smell, and buyers start imagining the worst: mold, flooding, long-term moisture damage.

    Basement waterproofing isn’t just about sealing cracks. Done right, it protects the whole space, keeps future problems out, and reassures buyers that the home has been taken care of from the ground up.

    Water Damage Needs More Than Paint

    Not all water damage is obvious. A small leak from years ago can hide behind fresh drywall. A flooded basement might smell fine now, but the subfloors could still be warped or moldy underneath. Cosmetic cover-ups won’t cut it.

    That’s where real restoration pros come in. They’ve got the tools to track hidden moisture and the know-how to get rid of the damage for good. Having that work documented? It can turn a potential deal-breaker into a confident yes.

    A Roof That’s Ready and Gutters That Don’t Overflow

    It doesn’t take a leak to make buyers nervous. Sometimes, just spotting a few curled shingles or overflowing gutters is enough to get them thinking about future repair bills. And honestly? They’re not wrong.

    The National Association of Realtors says roof condition is high on the list of buyer concerns. Luckily, it doesn’t take much to get ahead of it. A quick gutter clean-out, a few shingle repairs, maybe some new flashing and suddenly, the house reads as “well maintained” instead of “uh oh.” It’s a low-cost way to show buyers this home’s been taken care of from top to bottom.

    HVAC and Plumbing: Quiet Systems, Happy Buyers

    It’s hard to feel good about a house if the faucet hisses or the bedroom’s freezing while the living room’s roasting. HVAC and plumbing issues send up big red flags, even if the fixes are small.

    The most HVAC repairs cost under $500, which is peanuts compared to how much value can get shaved off in a buyer’s offer. A professional once-over can sort out weak water pressure, sluggish drains, and inconsistent temps fast. And once that’s done, buyers feel a whole lot better about the guts of the house working like they should.

    Where to Start and Why It Matters

    Here’s the truth: not everything has to be perfect before you list your home. But some issues, like cracks in the foundation or signs of moisture, carry a lot more weight than others. That’s why the smartest sellers don’t try to fix everything. They fix what matters most.

    Foundation problems and water issues are the two big ones

    A sagging beam or cracked exterior wall isn’t just a cosmetic concern, it’s a red flag for buyers, inspectors, and lenders alike. The same goes for musty basements and signs of mold. These problems feel serious, because they are. And if left unaddressed, they can derail deals fast.

    Fixing these first tells buyers the hard stuff’s already been handled. It also helps eliminate the mental checklist of “what else could be wrong,” which makes your home feel safer, more trustworthy, and worth the offer.

    Choosing Trusted Local Professionals

    There’s DIY, and then there’s don’t even try. When it comes to structural or water-related issues, like flood damage restoration, buyers and lenders both want receipts. That means licensed contractors, real documentation, and work that comes with warranties and follow-up if anything goes sideways.

    Not only does this earn buyer trust, it becomes a built-in selling point. “Handled by [local reputable company]” sounds a lot better than “we patched it ourselves.” When you lean on local pros with proven track records, the house doesn’t just show better, it sells better.

    Selling Smart Means Removing Doubt

    Price matters, sure. But confidence is what really seals the deal. Buyers want to feel like they’re stepping into something solid, something that’s been cared for, not just cleaned up.

    When sellers put real effort into key repairs like the foundation, water issues, HVAC, and more. It tells buyers this isn’t just a house. It’s a place that’s been looked after. And that leads to faster decisions, fewer negotiations, and way less stress all around.

    Because in the end, selling smart is about fixing what matters and letting the rest speak for itself.

  • Got an Ugly Backyard? How to Fake Curb Appeal on a Budget

    We’ve all been there, staring out the window at a backyard that’s more meh than a masterpiece. Whether you’re planning to sell or just want to stop cringing every time the neighbors peek over the fence, curb appeal doesn’t stop at the front yard. But here’s the good news: you don’t need to spend thousands or call in a landscaping crew to give your backyard a glow-up.

    Even with a tight budget, some clever and surprisingly easy tricks can make your backyard feel fresh, inviting, and even a little Instagram-worthy. No need to rip everything out or start from scratch. A few strategic changes can fake that high-end look for way less than you’d think.

    Source: unsplash.com

    Hide the Bad, Highlight the Good

    Sometimes it’s not about changing everything. It’s about hiding what doesn’t work and making the best parts pop. Did you get an old, stained patio slab? Try an outdoor rug or a few strategically placed potted plants to hide those imperfections. Is your chain-link fence bringing down the vibe? Cover it with reed fencing, privacy screens, or even outdoor curtains for a cozy cabana vibe.

    And don’t underestimate lighting. String lights, solar garden spikes, or lanterns can distract the eye from problem areas at night while creating a warm, cozy ambiance.

    If you’ve got an eyesore like an AC unit, garbage bins, or patchy grass, think in terms of disguise. Lattice panels, faux ivy, or even a handmade wood cover can go a long way without draining your wallet. You’re not renovating, you’re cleverly redecorating.

    Budget-Friendly Greenery That Fools the Eye

    Plants are powerful. Even the roughest yard can look polished with the right greenery. But if you’re not a green thumb (or on a strict budget), don’t rush to a nursery for expensive trees and shrubs.

    Start with container plants. Grouped in different sizes and heights, they give a lush look without a permanent commitment. Repurpose old buckets, crates, or even tires with a coat of spray paint to use as planters.

    Don’t forget about fake plants, either. Quality artificial greenery when mixed with real plants can pass for the real thing and add color and fullness year-round. Hang some faux ivy on a blank wall or drape a trellis with artificial vines. It’s a trick that works.

    Grass looking patchy? Inexpensive grass seed and some patience can help, but if you’re after a quick fix, roll out a strip of budget-friendly artificial turf or use mulch and stepping stones to create defined paths and distract from rough patches.

    DIY Decor That Looks Way More Expensive

    You don’t need to splurge on designer outdoor decor. You just need a few smart DIYs. Create a cozy seating area using pallets and cushions. Add outdoor curtains using a tension rod and cheap fabric or drop cloths. Build a fire pit with a few concrete blocks or stackable stones.

    Paint is your best friend here. Spray-paint mismatched furniture in a unifying color. Add a pattern to plain concrete using a stencil and patio paint. Refresh an old fence or shed with a new color to bring the whole space together and make it feel designed.

    Add a personal touch with homemade signs, string lights in jars, or a painted mural. A backyard doesn’t need to be massive to feel charming. It just needs a little personality.

    Smart Layout Tricks That Add Style

    Even small or awkward backyards can feel pulled together with a little layout magic. Define zones: dining, lounging, gardening, and maybe even a tiny play area if you have kids. You don’t need walls, just visual cues, like rugs, planters, or even a change in ground texture.

    Use vertical space to your advantage. Hanging planters, wall-mounted shelves, or a living plant wall draw the eye upward and away from the flaws at ground level.

    Even the illusion of symmetry can work wonders. Balance out lopsided areas with a few mirrored elements, like two chairs, matching planters, or lanterns. It brings a sense of calm and order that instantly upgrades your yard’s vibe.

    Where to Find the Best Budget Materials

    Thrift stores, flea markets, and garage sales are goldmines for outdoor upgrades. Old furniture can be upcycled into plant stands or seating. Keep an eye out for baskets, pots, and lighting fixtures you can repurpose.

    Don’t overlook online community marketplaces, people often give away bricks, wood, or even patio furniture for free if you’re willing to pick it up. Your city’s bulk trash days can be hidden treasure troves.

    Also, local garden centers sometimes offer discounts on imperfect or end-of-season plants. And for structure, look into reclaimed materials: pallets, old shutters, or leftover tiles. Cheap doesn’t mean cheap-looking if you get creative.

    Plan for the Future Without Spending Today

    Even if you’re doing the bare minimum right now, it helps to think a step ahead. If you’re hoping to eventually sell your home, a well-staged backyard can boost your property’s perceived value without massive renovation costs.

    That’s where working with companies like Stillwater Properties can help you understand which improvements add value. Sometimes a few visual upgrades today are all it takes to change a buyer’s perception tomorrow.

    If you’re not selling, that same long-term thinking helps you avoid wasting money on temporary fixes that won’t last through a single season.

    You Don’t Need a Designer Yard to Impress

    Backyards don’t have to be perfect to feel good. A fresh, clean, and cleverly staged space can be just as impactful as a professionally landscaped one; if your goal is curb appeal on a budget.

    Because curb appeal doesn’t stop at the front yard, and neither should your creativity. And when the potential is packaged in a clean, cozy, and welcoming space, that’s what people remember. So don’t stress about the weeds you haven’t pulled yet or the fence you still want to paint. Focus on what you can do today. A little effort goes a long way, and a few bucks spent the smart way can completely change how you (and others) feel about your backyard.

  • From Drab to Sold: How Simple Upgrades Help Homes Fly Off the Market

    Selling a home is about more than just square footage or location. Buyers pay close attention to how a home feels the moment they walk in. The good news is, you don’t have to spend a fortune to make it stand out. A few well-chosen, budget-friendly updates can make an older space feel cleaner, brighter, and far more appealing.

    Whether you’re putting your home on the market or helping someone else do it, small, low-cost updates can make a big difference. In a competitive market, these simple changes might be all it takes to go from ‘almost’ to ‘exactly right.

    Curb Appeal Counts: First Glance, Lasting Impact

    The front of your home is like a book cover. Buyers will judge what’s inside before they step through the door. That’s why curb appeal is one of the most important (and budget-friendly) things you can improve.

    Start cleaning up by mowing the lawn, trim the hedges, and pull out any weeds in the flower beds. Give the driveway and walkway a quick pressure wash to instantly lift the overall look. A fresh coat of paint on the front door can add real personality. Swap the porch light and house numbers for something more up-to-date, and set a couple of planters near the door to make things feel more welcoming.

    Even small changes can have a big effect. One homeowner swapped out a rusting mailbox and added a welcome mat, and suddenly, the home looked ten years younger. These details signal to buyers that the rest of the house has been cared for.

    Interior Touches: The Power of Quick Fixes

    Once inside, buyers are looking for signs of cleanliness, care, and light. No one expects a showhome, but buyers do want to feel like they can move in without a long to-do list.

    Paint goes a long way. Stick with warm neutrals like beige, light grey, or soft white. These shades make rooms feel bigger and cleaner. Update light fixtures or at least switch to bright LED bulbs. Replace dated ceiling fans or entry lights with something clean and modern. You’ll find stylish, affordable options at big-box hardware stores.

    A simple way to refresh a room is to update the cabinet handles and doorknobs. Swap out worn or brass finishes for matte black or brushed nickel. These modern touches help the room feel current without any major work.

    One of the easiest ways to elevate your strategy is to work with a top realtor who understands how to position small updates to create maximum buyer interest.

    Kitchen and Bath on a Budget

    You don’t need to renovate the whole kitchen or bathroom to make them look fresh. Small, smart upgrades can change the look a lot.

    For the kitchen, start by painting the cabinets if they’re in good condition but look old. Use good paint and add new handles or knobs. You can also add a peel-and-stick backsplash to bring in some texture and a modern touch. Changing the faucet or the light fixture can make the room feel brand new without much work.

    For the bathroom, start by cleaning or replacing the grout and re-caulking the tub. Put in a new mirror or vanity light. If the vanity has scratches but is still sturdy, try repainting it. Add some fluffy white towels and a few spa-like accessories to create a clean and relaxing feel.

    Sellers who make these types of changes often see more offers, quicker sales, and better pricing. Buyers love knowing they won’t need to tackle these updates themselves.

    Small Budget, Big Results: Real Examples

    These changes don’t just look good, they get results. A seller in Toronto refreshed their condo with $2,000 worth of updates: painted walls, changed door hardware, updated the bathroom vanity light, and added neutral decor. The unit sold in five days, with multiple offers.

    Another homeowner in Seattle spent $1,200 to add curb appeal, repaint their kitchen cabinets, and install new faucets. The result? The house sold within a week for 5% above asking.

    These aren’t isolated stories. Across North America, sellers are seeing returns on smart upgrades that make homes more appealing without overspending.

    Make It Shine: Final Touches That Seal the Deal

    Once your updates are done, don’t forget the little things that make your home stand out. Clean everything well—from baseboards to windows. Clear away personal items and extra furniture to make rooms feel open and welcoming.

    Staging really helps, even if you just use what you already have. Add soft throw pillows, a bowl of fresh fruit in the kitchen, and simple, neutral artwork on the walls. Use mirrors to bounce light around and make rooms feel bigger.

    Natural light is key, so open the blinds and curtains during showings. Replace heavy drapes with sheer panels if needed. Turn on all lights, even in closets, to make the home feel bright and inviting.

    The final step is professional photos. Great pictures show off your updates online, where most buyers will first discover your home. This helps your listing stand out and attracts more interest.

  • Boost Your Property’s Value With These 9 Stunning Landscaping Ideas

    Landscaping is more than just making your yard look pretty; it can significantly boost the value of your property. It plays a vital role in how potential buyers and guests perceive your property. It’s a simple fact: curb appeal matters, and investing in landscaping can yield a fantastic return on investment.

    In this article, we’ll explore nine landscaping ideas that can transform your property and increase its value. 

    1. Create a Welcoming Entrance

    First impressions are everything, and the entrance to your home sets the tone for the rest of your property. A well-designed and maintained entryway gives off an immediate sense of warmth and care.

    • Add a Decorative Front Door: A fresh coat of paint or a unique design on your front door can immediately make your home feel more inviting. Consider bold colors that complement the rest of your home’s exterior.
    • Install Pathways and Lighting: Simple stone pathways or a paved walkway can add a charming and welcoming touch. Install lights along the path to make the entrance stand out even at night.
    • Add Potted Plants or Flower Boxes: Decorative plants at the entrance make it feel lively and welcoming. Use a mix of seasonal flowers or low-maintenance plants that add color and texture.

    2. Build A Stunning Garden Area

    A well-maintained garden brings beauty, color, and freshness to your property. Gardens add life to your space and can be a major selling point for potential buyers who enjoy outdoor activities.

    • Plant a Variety of Flowers and Shrubs: Include a variety of flowers that bloom throughout the year to ensure constant color. Pair these with evergreen shrubs to create a balance of colors in every season.
    • Use Raised Beds: Raised garden beds are a great way to add visual interest while also improving soil quality. These structures help create an organized and well-kept appearance.
    • Incorporate Native Plants: Native plants are not only beautiful but also low-maintenance. They are well-suited to the local climate and attract wildlife, such as butterflies and birds.

    3. Add Water Features To Your Landscape

    Water features are an exceptional way to create a peaceful ambiance in your outdoor space. They can add a touch of luxury and calmness to your landscape, and there are a variety of styles to choose from.

    • Install a Fountain: A fountain can bring a sense of tranquility with the soothing sound of running water. For ponds or larger water features, floating fountains add graceful spray patterns while improving water circulation and visual appeal.
    • Create a Pond: Adding a pond with koi fish or water lilies creates an elegant and serene atmosphere. Ponds are often the centerpiece of a landscape, making them a great way to attract attention.
    • Get Quality pond kits: If you’re thinking about adding a pond, consider pond kits from Your Pond Pros. These kits have everything you need to create a stunning water feature, including filtration systems and pumps.

    4. Plant Trees For Shade And Beauty

    Trees are a valuable addition to any landscape. They provide shade, improve air quality, and add long-term value to your property.

    • Plant Shade Trees: Plant trees that provide shade in your backyard. Large trees, such as oaks and maples, can help cool your home in the summer and reduce energy bills.
    • Use Ornamental Trees: Consider planting ornamental trees that bloom seasonally for added beauty. Trees like dogwoods or cherry blossoms add stunning color to your landscape.
    • Plant Fruit Trees: Fruit trees like apple, peach, or lemon trees not only provide shade but also the potential for fresh, homegrown fruit. These trees are perfect for a functional and beautiful landscape.

    5. Create Defined Outdoor Living Spaces

    Defined outdoor living spaces extend your home’s usable square footage and offer a great way to entertain and relax.

    • Build a Deck or Patio: A well-built deck or patio gives you a designated outdoor space for dining, lounging, or entertaining guests. You can personalize this area with comfortable furniture and accessories.
    • Install a Fire Pit: Fire pits add warmth and ambiance to your outdoor space. They are great for socializing and can be used year-round for cozy evenings under the stars.
    • Add Outdoor Kitchens or Bars: Consider installing an outdoor kitchen or bar if you enjoy cooking or entertaining. These features create a functional space that allows you to host barbecues and parties without leaving the comfort of your yard.

    6. Improve Lawn Care And Maintenance

    A well-maintained lawn is one of the easiest ways to enhance your property’s curb appeal. A lush, green lawn shows that you care about your property and invest in keeping it in good shape.

    • Regular Mowing And Trimming: Keep your lawn neat by mowing it regularly and trimming the edges. A manicured lawn helps create a polished look that appeals to potential buyers.
    • Fertilize And Water Consistently: Fertilize your lawn to ensure it stays healthy and vibrant. Consistent watering and proper drainage are key to maintaining a thick, green lawn.
    • Add Sod or Grass Seed: If your lawn has bare patches, consider laying down sod or seeding the area. This will help fill in any gaps and create a lush, full lawn.

    7. Use Colorful And Creative Outdoor Lighting

    Outdoor lighting doesn’t just serve a functional purpose; it also adds drama and appeal to your property. It can make your home look more inviting and highlight the best features of your landscape.

    • Install Landscape Lights: Use low-voltage landscape lighting to illuminate paths, gardens, and trees. This will not only improve safety but also enhance the beauty of your property at night.
    • Add Spotlights for Trees or Water Features: Spotlights can highlight trees, sculptures, or water features, creating a dramatic focal point after dark.
    • Use String Lights: String lights are an easy and inexpensive way to create a cozy, magical atmosphere in your yard. Hang them along fences, around decks, or over patios for a whimsical feel.

    8. Create A Sustainable Landscape

    Sustainability is more important than ever, and creating a sustainable landscape is good for the environment. However, it can also be appealing to potential buyers who value eco-friendly practices.

    • Use Native Plants: Native plants require less water and maintenance, making them perfect for creating a sustainable landscape. They’re also well-suited to your local climate and attract pollinators.
    • Install a Rain Garden: A rain garden helps manage stormwater runoff while adding beauty to your landscape. These gardens collect rainwater and allow it to soak into the ground, reducing the need for irrigation.
    • Utilize Xeriscaping: Xeriscaping uses drought-tolerant plants and minimizes water use. This landscaping technique is especially beneficial in areas with water restrictions or dry climates.

    9. Add Fencing Or Privacy Screens

    Fencing and privacy screens offer both security and aesthetic value to your property. They can also help create a sense of enclosure and privacy, which is highly desirable for many homeowners.

    • Install a Decorative Fence: A decorative fence adds charm to your property while providing privacy. Choose materials like wood, vinyl, or wrought iron that complement your landscape.
    • Use Lattice or Bamboo Screens: For a more modern look, consider using lattice or bamboo screens. These elements can add texture and style while still offering a level of privacy.
    • Create Natural Barriers with Hedges: Planting dense hedges along the perimeter of your yard can serve as a natural privacy screen. They also enhance the overall appearance of your landscape.

    Conclusion

    By implementing these nine landscaping ideas, you can make your property stand out and increase its value. Whether you’re looking to sell or just improve your outdoor space, these ideas will help you create a stunning and functional landscape that appeals to buyers and visitors alike.