Replacing or repairing your roof isn’t just another home project, it’s a major investment that protects everything underneath it. That’s why it’s worth hiring a licensed roofing contractor in Greenville, SC who knows the job inside and out. When you work with a licensed pro, you can feel confident that the work will be safe, legal, and built to last.
Trained, Tested, and Qualified
A roofing license isn’t just a piece of paper. In South Carolina, when a contractor controls work over $10,000, a general contractor license (or subclassification “Roofing”) is required.
For residential-roofing work, you should verify registration and ask for at least two years of verifiable work experience in the last five years. Licensed roofers know the local building codes, for Greenville County, that means the 2021 South Carolina Building Code (IBC/IRC with Modifications) is adopted.
They also take pride in doing the work properly, which means no shortcuts and no cheap materials. The result is a roof that looks great and holds up through Greenville’s unpredictable weather.
Safety Always Comes First
Roofing is tough, physical work involving climbing, lifting, and operating in less-than-ideal conditions. A licensed roofer is trained to handle those risks safely.
They use professional safety gear and are fully insured, so if something unexpected happens, you’re protected. Choosing a Greenville roofing company that values safety means you’re protecting not only your home but also everyone working on it.
Access to Better Materials
Licensed contractors usually work with trusted suppliers and can source high-quality roofing materials that last longer. They understand which shingles, underlayments, and sealants perform best in South Carolina’s hot summers and stormy seasons.
Good materials don’t just look better; they help your roof last for decades instead of years.
Work That Passes Inspection
Every city and county has its own construction standards. In Greenville County, roofing and structural work must comply with the 2021 edition of the South Carolina Building Code. Also, most roofing jobs will require a building permit submitted through the county’s eTrakit portal.
Hiring a licensed roofer means you’re much more likely to pass inspection on the first try, fewer headaches if you ever decide to sell your home.
Protection for You and Your Property
Hiring a licensed roofer means you’re also hiring someone who’s insured. The insurance protects your home against damage during the job, and covers workers if they get hurt. Without insurance, homeowners might end up paying out of pocket.
Always ask to see the contractor’s license status (you can verify it through the South Carolina Department of Labor, Licensing & Regulation website) and their proof of liability and workers’ compensation insurance before the project begins.
Fair Pricing and Honest Estimates
Reputable, licensed roofers value transparency. They’ll walk you through an estimate that clearly outlines labor, materials, and total costs, with no surprise add-ons halfway through the project. They’d rather earn your trust with honesty than win you over with a lowball price.
Roof Services You Can Expect
Most licensed roofers in Greenville handle all kinds of roofing needs. Here are some common services you can count on:
Roof inspections and damage assessment
Leak detection and repair
Full roof replacements
Storm and wind damage restoration
Gutter and flashing repairs
Emergency roof services
Routine maintenance programs
No matter how big or small the job, they’ll approach it with the same level of care and attention.
Long-Term Warranty Support
Another benefit of working with a licensed contractor is warranty coverage. You’ll often get both a workmanship warranty and a product warranty.
That means if something goes wrong due to installation or a faulty product, the roofer will fix it at no extra cost. It’s their way of standing behind their work.
What It All Means
Ultimately, hiring a licensed, experienced roofing contractor is simply a smart investment. You’ll get quality work, reliable service, and a roof built to last. In a city like Greenville, SC, where the weather doesn’t wait, your roof should be your strongest shield.
Creating a comfortable home is not just about furniture or paint because the right radiator keeps every room warm without wasting energy. With so many models out there, the smartest way to start is to match the radiator to your room size, your climate, and how you like your space to look.
This guide covers room size, heat output, materials, style, and controls so you can find a radiator for your living room, kitchen, or bathroom that balances comfort, style, and long‑term efficiency.
1. Understand Your Heating Needs
Before you shop, figure out how much heat each room actually needs because the right size radiator is what keeps you comfortable and keeps bills in check.
Heat demand depends on room dimensions, insulation, window area, ceiling height, and local climate. A quick rule of thumb is to aim for 20 to 30 BTU per square foot in a well‑insulated home in a mild climate, or 40 to 50 (or more) BTU per square foot in colder regions. If you prefer watts, the conversion is simple: 1 watt equals 3.412 BTU per hour.
If you are upgrading old radiators or a boiler, use a reputable BTU calculator or ask a pro to do a heat loss calculation so you get the right output for each room.
If you heat with a heat pump or plan to in the future, choose radiators that work well at lower water temperatures, as this helps the whole system run efficiently.
2. Consider Room Size and Layout
Room size and layout drive the size and placement of your radiator. Bigger living rooms usually need a higher output unit to push heat evenly across the space.
For a large living room, look for a model with enough BTUs and place it where air can flow freely so warmth spreads without cold corners.
Smaller rooms like bathrooms often do best with compact units or towel warmers that provide focused heat and give you a handy spot to dry towels.
Placement matters. Units under windows or on exterior walls help counter drafts, while vertical radiators can save wall space when furniture blocks a long wall.
If a room struggles to warm up, consider double panel or models with convector fins because they pack more surface area into the same footprint and move heat faster.
3. Choose the Right Radiator Material
Material affects how fast a radiator warms up and how long it holds heat. However, proper sizing still does the heavy lifting for comfort and efficiency.
Common radiator materials include the following:
Steel is durable, widely available, and warms up quickly, and it is a solid all‑round choice for most rooms.
Aluminum is lightweight and heats up very fast, making it great for rooms you use on and off, like kitchens or home offices.
Cast iron holds heat for a long time after the system shuts off, and that steady warmth suits older homes or rooms where you want an even, gentle heat.
Stainless steel resists corrosion in humid spaces like bathrooms and offers a clean, modern look with low maintenance.
Whatever you decide on, make sure the output fits the room because even the best material cannot make up for an undersized radiator.
4. Look for Energy‑Efficient Options
Efficiency is not only about the radiator because it is about the whole system working together with the right controls and temperatures.
Electric radiators convert electricity to heat at the point of use with essentially no losses, but the operating cost still depends on your local power rates. That’s why in many homes, a central hot‑water system or a heat pump feeding low‑temperature radiators is cheaper to run.
If you already have central heating, opt for radiators with the right output at your system’s typical water temperature because lower temperature operation saves energy and pairs nicely with heat pumps and condensing boilers.
Electric units can be a smart choice for small rooms or spaces far from pipe runs, but you should still size them correctly to avoid excess runtime and higher bills. Leading suppliers like ukradiators offer a wide range of efficient models, from standard hydronic to electric, ensuring you can find an option that works with your home’s setup without wasting energy.
5. Select the Right Radiator Style for Your Home
Radiators are now part of your decor, so find a look that fits your space and your cleaning routine.
Modern radiator styles work well in contemporary rooms and flat panel steel and slim column designs blend in cleanly without feeling bulky.
Traditional radiator styles, like cast iron columns, add character. They also hold heat longer, which keeps the room cozy even after the system cycles off.
If wall space is tight, consider a tall vertical model that tucks into a narrow spot, and in bathrooms a dual fuel towel warmer can run with your central heat in winter and on electric alone in summer.
6. Consider Smart Heating Controls for Greater Efficiency
Smart controls help most when they let your system run at the lowest temperature that still keeps you comfortable, and weather compensation or outdoor reset controls are especially effective because they match water temperature to outdoor conditions.
Room thermostats and smart valves let you set different schedules by space. Features like occupancy sensing and geofencing also prevent you from heating empty rooms.
Finding the best radiator is much easier once you size each room correctly, match the material and style to how you live, and set up simple controls that keep heat steady without waste.
If you want radiators for kitchens, bathrooms, or living rooms, work with a supplier that publishes honest heat outputs and reliable build quality. Reputable brands offer a wide range of styles and sizes so you can find a clean fit for your home.
Keep these tips in mind and you’ll build a comfortable and efficient setup that looks good and feels right all season long.
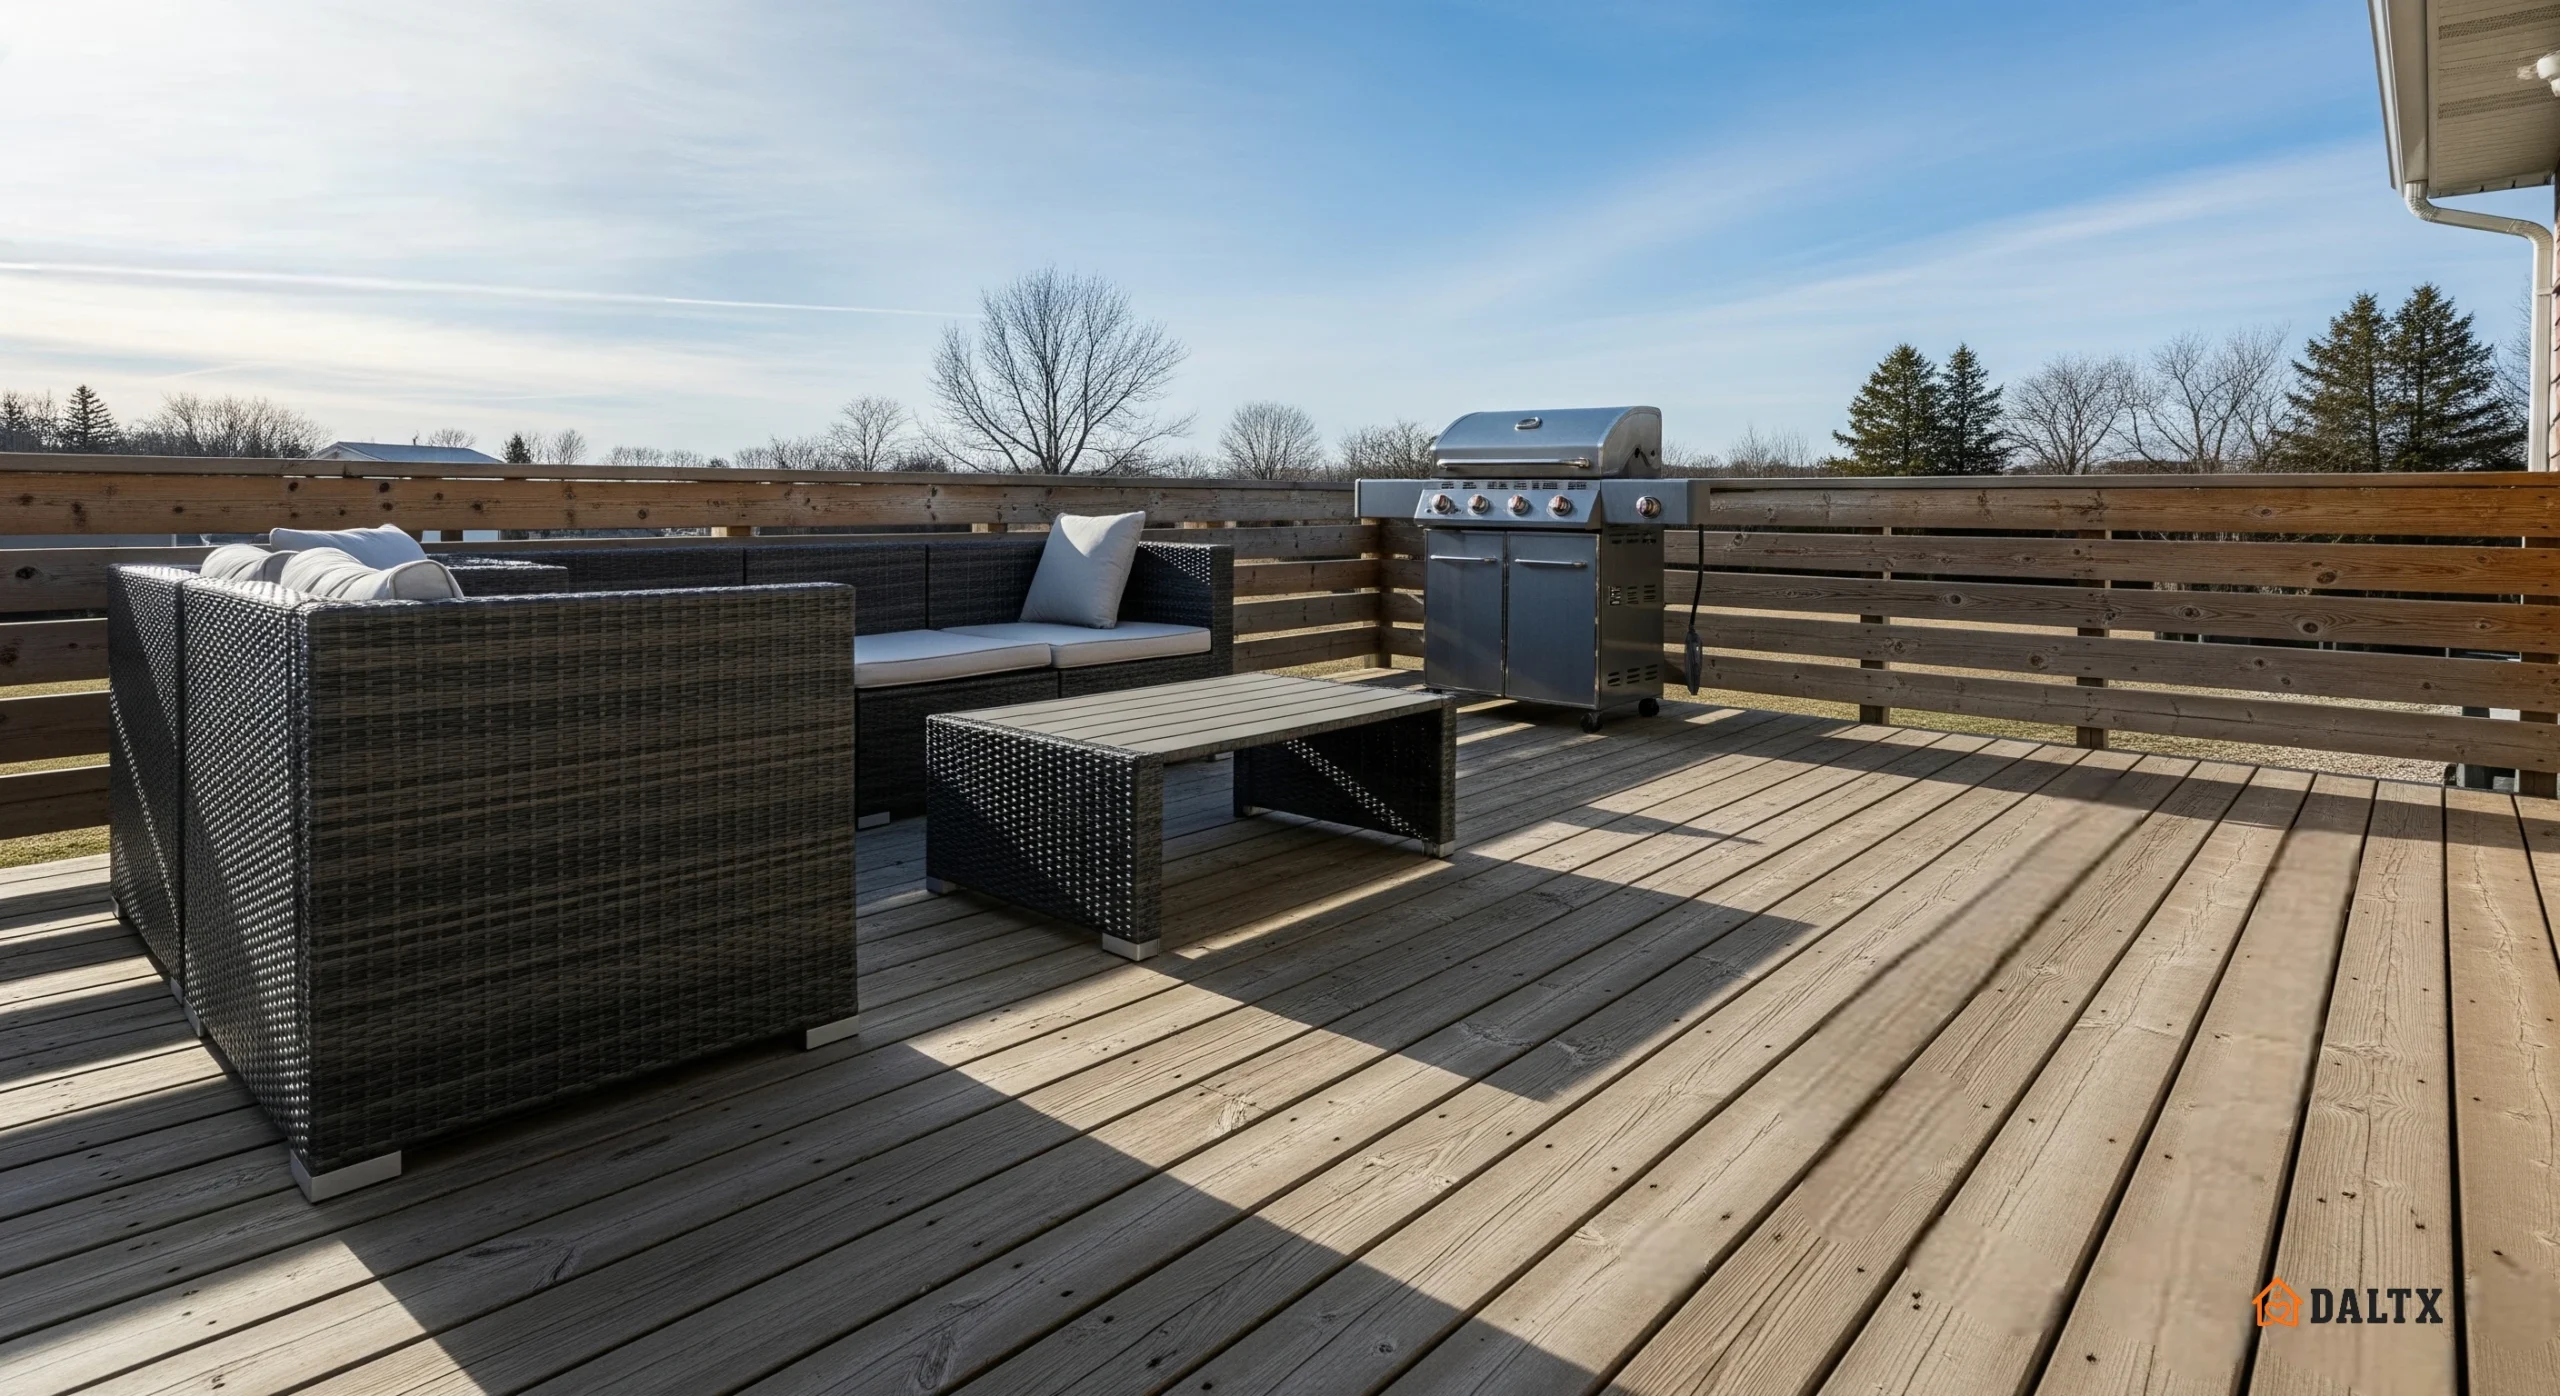
Keeping your deck in shape all year helps it last longer and keeps everyone safe. Whether you’re flipping burgers in July or bundled up in January, your deck should handle heat, rain, and cold without any drama.
From blazing sun to frosty mornings, here’s a simple plan to keep your deck ready for every season.
Why Seasonal Deck Maintenance Matters
Regular maintenance keeps your deck looking great and prevents small issues from becoming costly repairs. If you skip maintenance, you may see cracked boards, loose fasteners, and faded finishes after tough weather. Knock out a few seasonal tasks to block summer UV, fall rain, and winter snow and ice, and you will keep the surface safer underfoot.
Your deck material determines the workload, and that affects how you maintain it. Wood needs periodic cleaning and a fresh coat of penetrating stain or water repellent, while most capped composite and PVC decks only need an occasional wash. Do a quick seasonal check for loose hardware, soft spots, and wobbly rails. Those five minutes could add years to your deck’s life and save you money down the road.
Get Your Deck Summer-Ready
Summer is peak deck season, and sun and heat can be tough on bare wood and worn finishes. Use a high-quality UV-blocking stain or clear water repellent on wood when the boards are dry and the temperature is between about 50 °F and 90 °F, so the finish cures evenly. For composite or PVC decks, follow the manufacturer’s directions, since most capped boards don’t require sealing and usually just need a good cleaning.
Give your deck a deep clean before summer kicks in so the surface is ready. Scrub with a deck cleaner or use a pressure washer on low, around 500 to 1,200 PSI with a 40-degree tip. And keep the wand moving along the grain to avoid scarring the wood. Once it’s dry, check for popped screws, lifted boards, and loose posts, then tighten or replace any hardware as needed.
Choose furniture that can handle heat and sudden storms, and set protective pads under the legs to prevent dents and stains. Use breathable covers for cushions and store fabrics in a dry bin to prevent mildew. If you have a grill, place a fire-resistant mat underneath, keep it a safe distance from railings and siding, and always follow local fire regulations.
Fall Prep: Protecting Your Deck Before the Chill
When leaves start dropping, keep your deck clear because wet piles can stain wood or composite and make the surface slippery. Sweep often or use a blower, and clean out the gaps between boards so water can drain properly.
Fall is a great time to seal bare wood before winter arrives. A fresh coat of penetrating stain or clear water repellent helps block the moisture that freezes and thaws. A cycle that causes checks and splits over time. Capped composite doesn’t need sealing, and a gentle wash is all it takes to keep it looking new.
Winterizing Your Deck for Cold Weather
Snow and ice are tough on decks, especially when water sits for days without drying out. Shovel right after storms using a plastic shovel, and push along the direction of the boards so you don’t catch the edges. Avoid rock salt on natural wood since it’s corrosive, and check your manufacturer’s recommendations before using ice melt on composite. If you need traction, sprinkle sand or use an ice melt labeled safe for your deck material, such as calcium chloride for most capped composites.
For extra protection, use a breathable, fitted winter cover, since trapped moisture is the real enemy. Before the deep freeze hits, treat any exposed wood with a coat of water-repellent finish (or another water repellent), and make sure the house flashing is secure so meltwater can’t sneak behind the ledger.
Spring Deck Prep and Bring Your Deck Back to Life
Once it warms up, start with a thorough clean to wash away winter grime and pollen. Use a cleaner made for your material, rinse well, and let the boards fully dry.
Spring is the best time to restain or reseal wood if water no longer beads on the surface. Pick a dry stretch and apply thin, even coats so the finish lasts longer and cures evenly. Composite and PVC decks usually just need a wash with mild soap and a soft brush to remove chalky film or dirt.
Finish with a safety check before the season gets busy. Tighten loose rails, reset any proud fasteners, and inspect the ledger, joist hangers, and posts for rust or rot. Replace any soft or cracked boards and test GFCI outlets and lighting to make sure everything’s ready to go.
Choosing Deck Materials That Work All Year
If you’re building new or replacing old boards, choose materials that fit your climate and match how much maintenance you’re willing to do. Popular options include pressure-treated lumber, cedar, redwood, tropical hardwoods, composite, PVC, and aluminum.
Pressure-treated lumber is affordable and strong, but it needs regular cleaning and an occasional stain to keep it looking good. Cedar, redwood, and tropical hardwoods offer rich color and natural beauty and can last for years with the right oil or stain, though they still need routine care. Composite and PVC decking are low maintenance, resist rot and splinters, and aluminum is extremely durable and sheds water quickly, making it ideal for areas with wide weather swings.
Stone deck vs composite materials each have their pros and cons. Stone and paver patios also make great outdoor living spaces, but they aren’t decking since they sit directly on the ground. If you’re choosing between a raised deck and a patio, consider drainage, frost, and how you’ll use the space, then go with what best fits your site.
Make Your Deck a Year-Round Hangout
Add a few comfort upgrades so the deck works in every season. In winter, outdoor heating such as a code-compliant fire pit or outdoor heater keeps cold nights cozy, and in summer, shade from a pergola, an umbrella, or a retractable awning keeps things cool.
Finish your setup with inviting details that pull their weight. Choose comfortable seating, quick-dry outdoor rugs, and string lights that are rated for wet locations. Whether you are hosting friends or unwinding after work, these touches make the deck feel like part of your home.
Conclusion
A little seasonal care keeps your deck looking good and safe to use. With a quick checklist for summer, fall, winter, and spring, you will spend less on repairs and get more time outside. No matter what your deck is made of, steady cleaning, quick fixes, and the right finish will keep it ready for any weather for years.
Taking care of a home on the Emerald Coast in Florida is a lot to handle since surprise repairs and planned upgrades never stop. That’s why having a reliable handyman service is essential. It keeps your to-do list moving and your weekends free. Professional handymen offer quick response, quality craftsmanship, and fair pricing to keep your home comfortable and functional all year.
Comprehensive Home Services in One Place
Modern handyman teams cover a wide range of work so you do not have to juggle a bunch of contractors. From small fixes to bigger projects, they handle the details with care.
Here are the most requested services:
Interior and exterior painting that gives walls, ceilings, trim, and outdoor surfaces a clean and durable finish.
Flooring installation for laminate, vinyl, tile, and hardwood with tight seams and proper underlayment.
Fencing and gate work that installs or repairs wood, metal, or vinyl options to boost curb appeal and security.
Drywall repair and finishing with seamless patches for cracks, dents, and water spots.
Furniture assembly for dressers, beds, cabinets, and shelving with everything leveled and anchored.
Door and window installation with a precise fit for better energy savings and curb appeal.
Deck and porch construction plus maintenance so your outdoor space is strong, safe, and easy to enjoy.
Storm prep and coastal upkeep such as installing hurricane shutters when allowed by local rules, replacing weatherstripping, and fixing salt‑air damage.
Caulking, grout repair, and tile backsplash updates that freshen kitchens and baths.
Light fixture swaps and faucet replacements when the scope is allowed by local rules and permits.
Small carpentry and trim work from baseboards to built‑ins.
In Florida, larger electrical, plumbing, roofing, HVAC, structural changes, and full window or door replacements must be handled by a properly licensed contractor. A reliable handyman will tell you when a permit or licensed trade is needed and can coordinate those pros so the job stays on track.
Simple, Transparent, and Reliable Process
Booking help should be straightforward with clear communication from the first call to the final clean‑up. You know what to expect at every step and you know the price before work begins.
Getting started is simple:
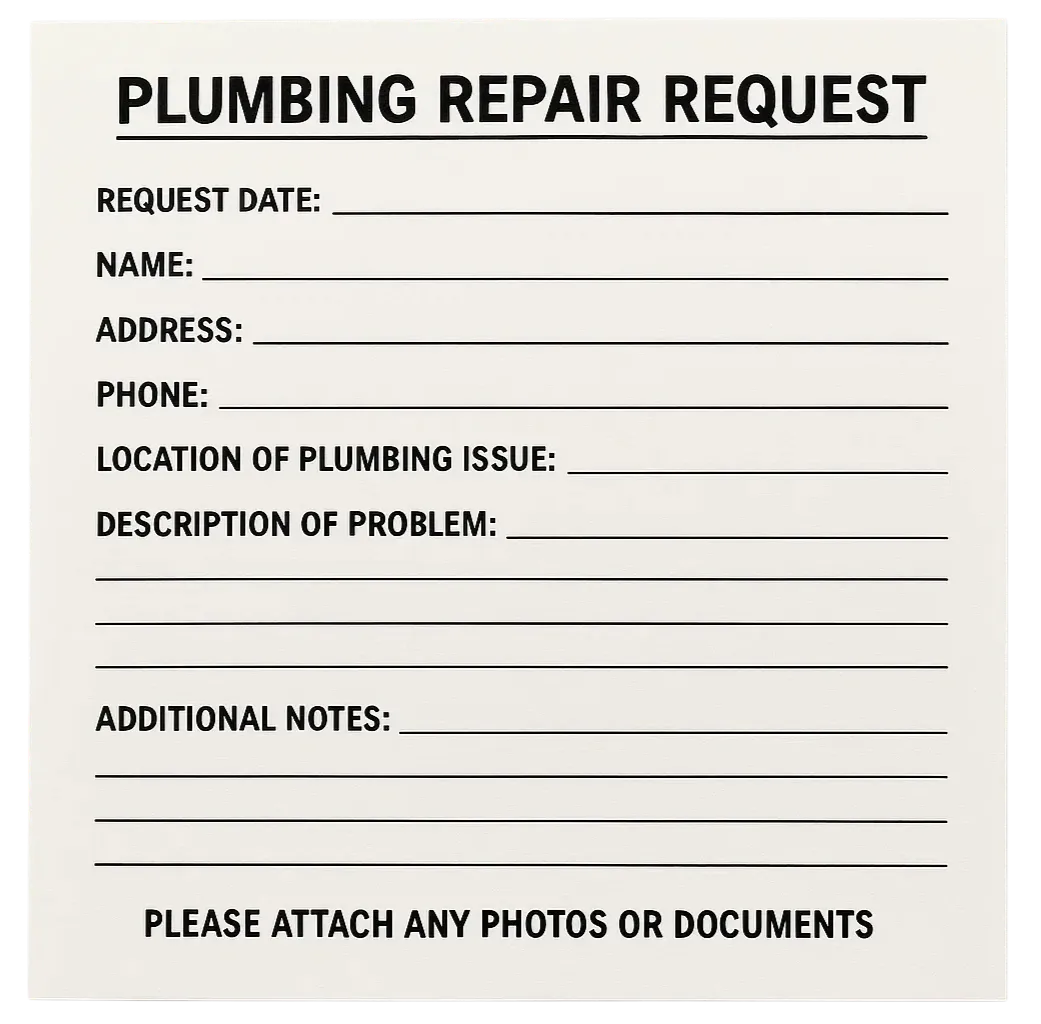
Submit a request and describe the issue, and attach a photo to speed up the estimate.
Get matched and hear from a qualified handyman who will confirm your appointment.
Work day arrives and the pro completes the job with the right tools and know‑how.
Review the results and if anything is not right the pro will make it right under the stated guarantee.
Why Homeowners Trust Professional Handymen
A reputable handyman service brings vetted techs, proper insurance, and clear pricing so you are not guessing. You get professional results and honest timelines and you avoid the stress of doing it yourself. If a job needs a licensed trade or a permit they will say so up front and handle the handoff.
Core Values Behind Every Service:
Efficiency means quick response times and easy scheduling.
Professionalism means experienced pros who respect your home and clean up before they leave.
Transparency means upfront pricing and updates as the job moves along.
Customer commitment means personalized service and follow‑through after the work is done.
Ask for a written estimate that lists labor, materials, and any travel fees. For coastal projects, request stainless fasteners and exterior‑grade materials so repairs hold up in salt and sun.
Your Partner in Everyday Home Care
Local handymen working across the Emerald Coast, FL, take care of everything from small repairs to full home makeovers. With reliable scheduling, solid craftsmanship, and fair pricing, home care stays simple and stress free.
When something breaks or needs an upgrade, count on a local pro to handle it with care and keep your home safe, functional, and looking its best.
Mold is a quiet problem with big consequences. It can hide behind walls, under flooring, or in any damp corner, spreading spores and lowering your indoor air quality as it grows. What looks like a small patch today can signal a much larger issue inside building materials tomorrow. Understanding the risks and knowing when to call in mold remediation services, especially in Massachusetts, Connecticut, New Hampshire, Vermont, and Upstate New York, helps protect both your health and your home.
Understanding Mold and Its Causes
Mold needs three things: moisture, warmth, and a food source. In houses, the “food” is often drywall, wood framing, carpet, or dust. Common triggers include slow plumbing leaks, roof seepage after a storm, condensation on cold surfaces, flooding, and rooms without good ventilation (think steamy bathrooms or basements).
Once spores land on a damp surface, colonies can spread quickly, sometimes deeper into materials than you can see on the surface. That’s why simply wiping visible growth often isn’t enough and why underlying moisture problems must be fixed to stop mold from coming back.
Health Risks Associated with Mold Exposure
Everyone reacts differently to mold exposure, but prolonged contact can take a real toll. Especially on children, older adults, and anyone with asthma, allergies, or a weakened immune system.
Respiratory issues. Mold spores and tiny fragments can irritate airways and trigger coughing, wheezing, shortness of breath, and asthma flare-ups.
Allergic reactions. You might start sneezing, get a runny nose or watery eyes, feel congested, or notice your skin getting itchy, and postnasal drip are common in sensitive individuals.
Chronic fatigue and headaches. Poor indoor air quality can leave you feeling worn down and headachy.
Infections and immune concerns. People with compromised immune systems face higher risks of fungal infections and other respiratory complications.
Neurological effects (in severe cases). Toxins from certain species (often referred to as “black mold”) have been linked to problems with concentration, memory, and mood.
Symptoms often build gradually. By the time you notice a pattern, feeling worse at home and better when you leave—the infestation may already be widespread. If you have health concerns, speak with a medical professional; remediation complements medical care but doesn’t replace it.
Signs You May Have Mold in Your Home
Not all mold is obvious. Watch for early clues:
A persistent musty odor, especially after rain or in basements, crawl spaces, and bathrooms
Dark specks or staining on walls, ceilings, baseboards, window sills, or around HVAC vents
Peeling paint, bubbling wallpaper, or warped trim, which often signal trapped moisture
Frequent allergy or asthma symptoms that worsen indoors
Condensation on windows or cold surfaces
Past leaks or flooding that weren’t fully dried within 24–48 hours
If you’re checking a past leak and the area still smells earthy or damp, assume there’s more going on than meets the eye.
When to Call a Professional
Well-meaning DIY can spread spores and drive contamination into clean rooms. Bring in a certified remediation company if any of the following apply:
The affected area is larger than about 10 square feet
You smell mold but can’t find the source
Water damage has been present for more than 48 hours
Anyone in the household has ongoing respiratory or allergy symptoms at home
You’ve had repeat mold growth despite cleaning
Suspected growth is in HVAC systems, crawl spaces, or wall cavities
What the pros do: They locate hidden moisture with meters or infrared cameras, set up containment and negative air to prevent spread, run HEPA air scrubbers, remove or treat contaminated materials, and most importantly, fix the moisture problem (leaks, ventilation, grading, or humidity) so mold doesn’t return. Reputable firms also provide a clear scope of work and post-remediation verification.
Don’t Wait to Take Action
Mold won’t resolve on its own. The longer it stays, the farther it can spread into drywall, insulation, framing, and flooring. Raising both health risks and repair costs. Fast, professional remediation limits damage, restores healthy indoor air, and protects your home’s structure and value. After cleanup, keep humidity in check (ideally 30%–50%), run bathroom and kitchen exhaust fans that vent outdoors, and fix leaks promptly to prevent a repeat.
In business, team safety is non-negotiable. Whether you’re running a construction site, a manufacturing floor or a busy office, the right personal protective equipment (PPE) and safety gear help prevent injuries, reduce downtime and keep operations moving.
If you’re looking for one partner to cover PPE and the everyday items your workplace runs on, The Safety Source is built for exactly that.
A One-Stop Shop for PPE and Everything You Need
When you’re choosing a safety supplier, breadth matters. The Safety Source focuses on wholesale and bulk safety supplies, so you can stock up in a single order:
Core PPE: gloves, respirators and face masks, eye and face protection, earplugs/earmuffs, hard hats and helmets, high‑visibility apparel, safety footwear.
Emergency & first aid: ANSI‑style first aid kits, burn care, eyewash stations and refills.
Workplace essentials: janitorial products, food service items, and office supplies.
That range means procurement teams can cut down on vendors, simplify reorders and keep every department, from operations to admin, on the same page.
Products That Support a Safety Culture
For safety is not a gadget but a state of mind.
Eleanor Everet
Gear is only part of the equation; consistency is the other. The Safety Source’s catalog is built around everyday protection that helps reduce common workplace injuries:
Hands & skin: chemical‑resistant, cut‑resistant and disposable gloves matched to task.
Head & face: hard hats, face shields and impact‑rated eyewear for jobsites and labs.
Hearing: earplugs and earmuffs that make hearing protection a habit, not a hassle.
Response: first aid and spill control that keep small incidents small.
Safety brings first aid to the uninjured.
F. S. Hughes
By pairing preventive PPE with responsive supplies, teams are better prepared—helping employers stay aligned with workplace safety requirements and internal policies.
Bulk Buying Without Compromising Quality
PPE adds up, especially across multiple locations. The Safety Source leans into best‑price, bulk and wholesale options on popular brands so you can:
Stretch the budget: volume pricing that scales as you grow.
Standardize SKUs: the same glove or respirator across sites simplifies training and reorders.
Avoid stockouts: purchase case quantities so crews aren’t waiting on critical gear.
The result: value without trading down in quality.
Brand Your Gear: Logo on PPE & High-Vis
If your team wears it, you can likely brand it. The Safety Source offers company logo customization on items like:
Hard hats and helmets
High‑visibility vests and outerwear
Select PPE and workwear
Branded gear does more than look professional—it reinforces your safety program and increases the odds employees wear the right equipment, every time.
Fewer Vendors, Less Busywork
Juggling multiple suppliers for PPE, janitorial, food service and office products creates extra approvals, extra invoices and extra chances for a miss. With The Safety Source, you get:
Consolidated purchasing for cross‑department needs
Streamlined reorders for routine consumables
Consistent stock levels with bulk and recurring order options
That frees up time for the work that actually moves your business forward.
Why Teams Choose The Safety Source
In short: variety, value and reliability. Here’s the highlight reel:
Extensive Catalog: PPE, first aid, janitorial, food service and office supplies—one cart, one checkout.
Competitive Pricing: bulk and wholesale options on top brands.
Quality & Consistency: gear designed for daily use across multiple industries.
Customization: company‑branded high‑vis and hard hats to strengthen safety culture.
Procurement Made Easy: one supplier to reduce complexity and improve efficiency.
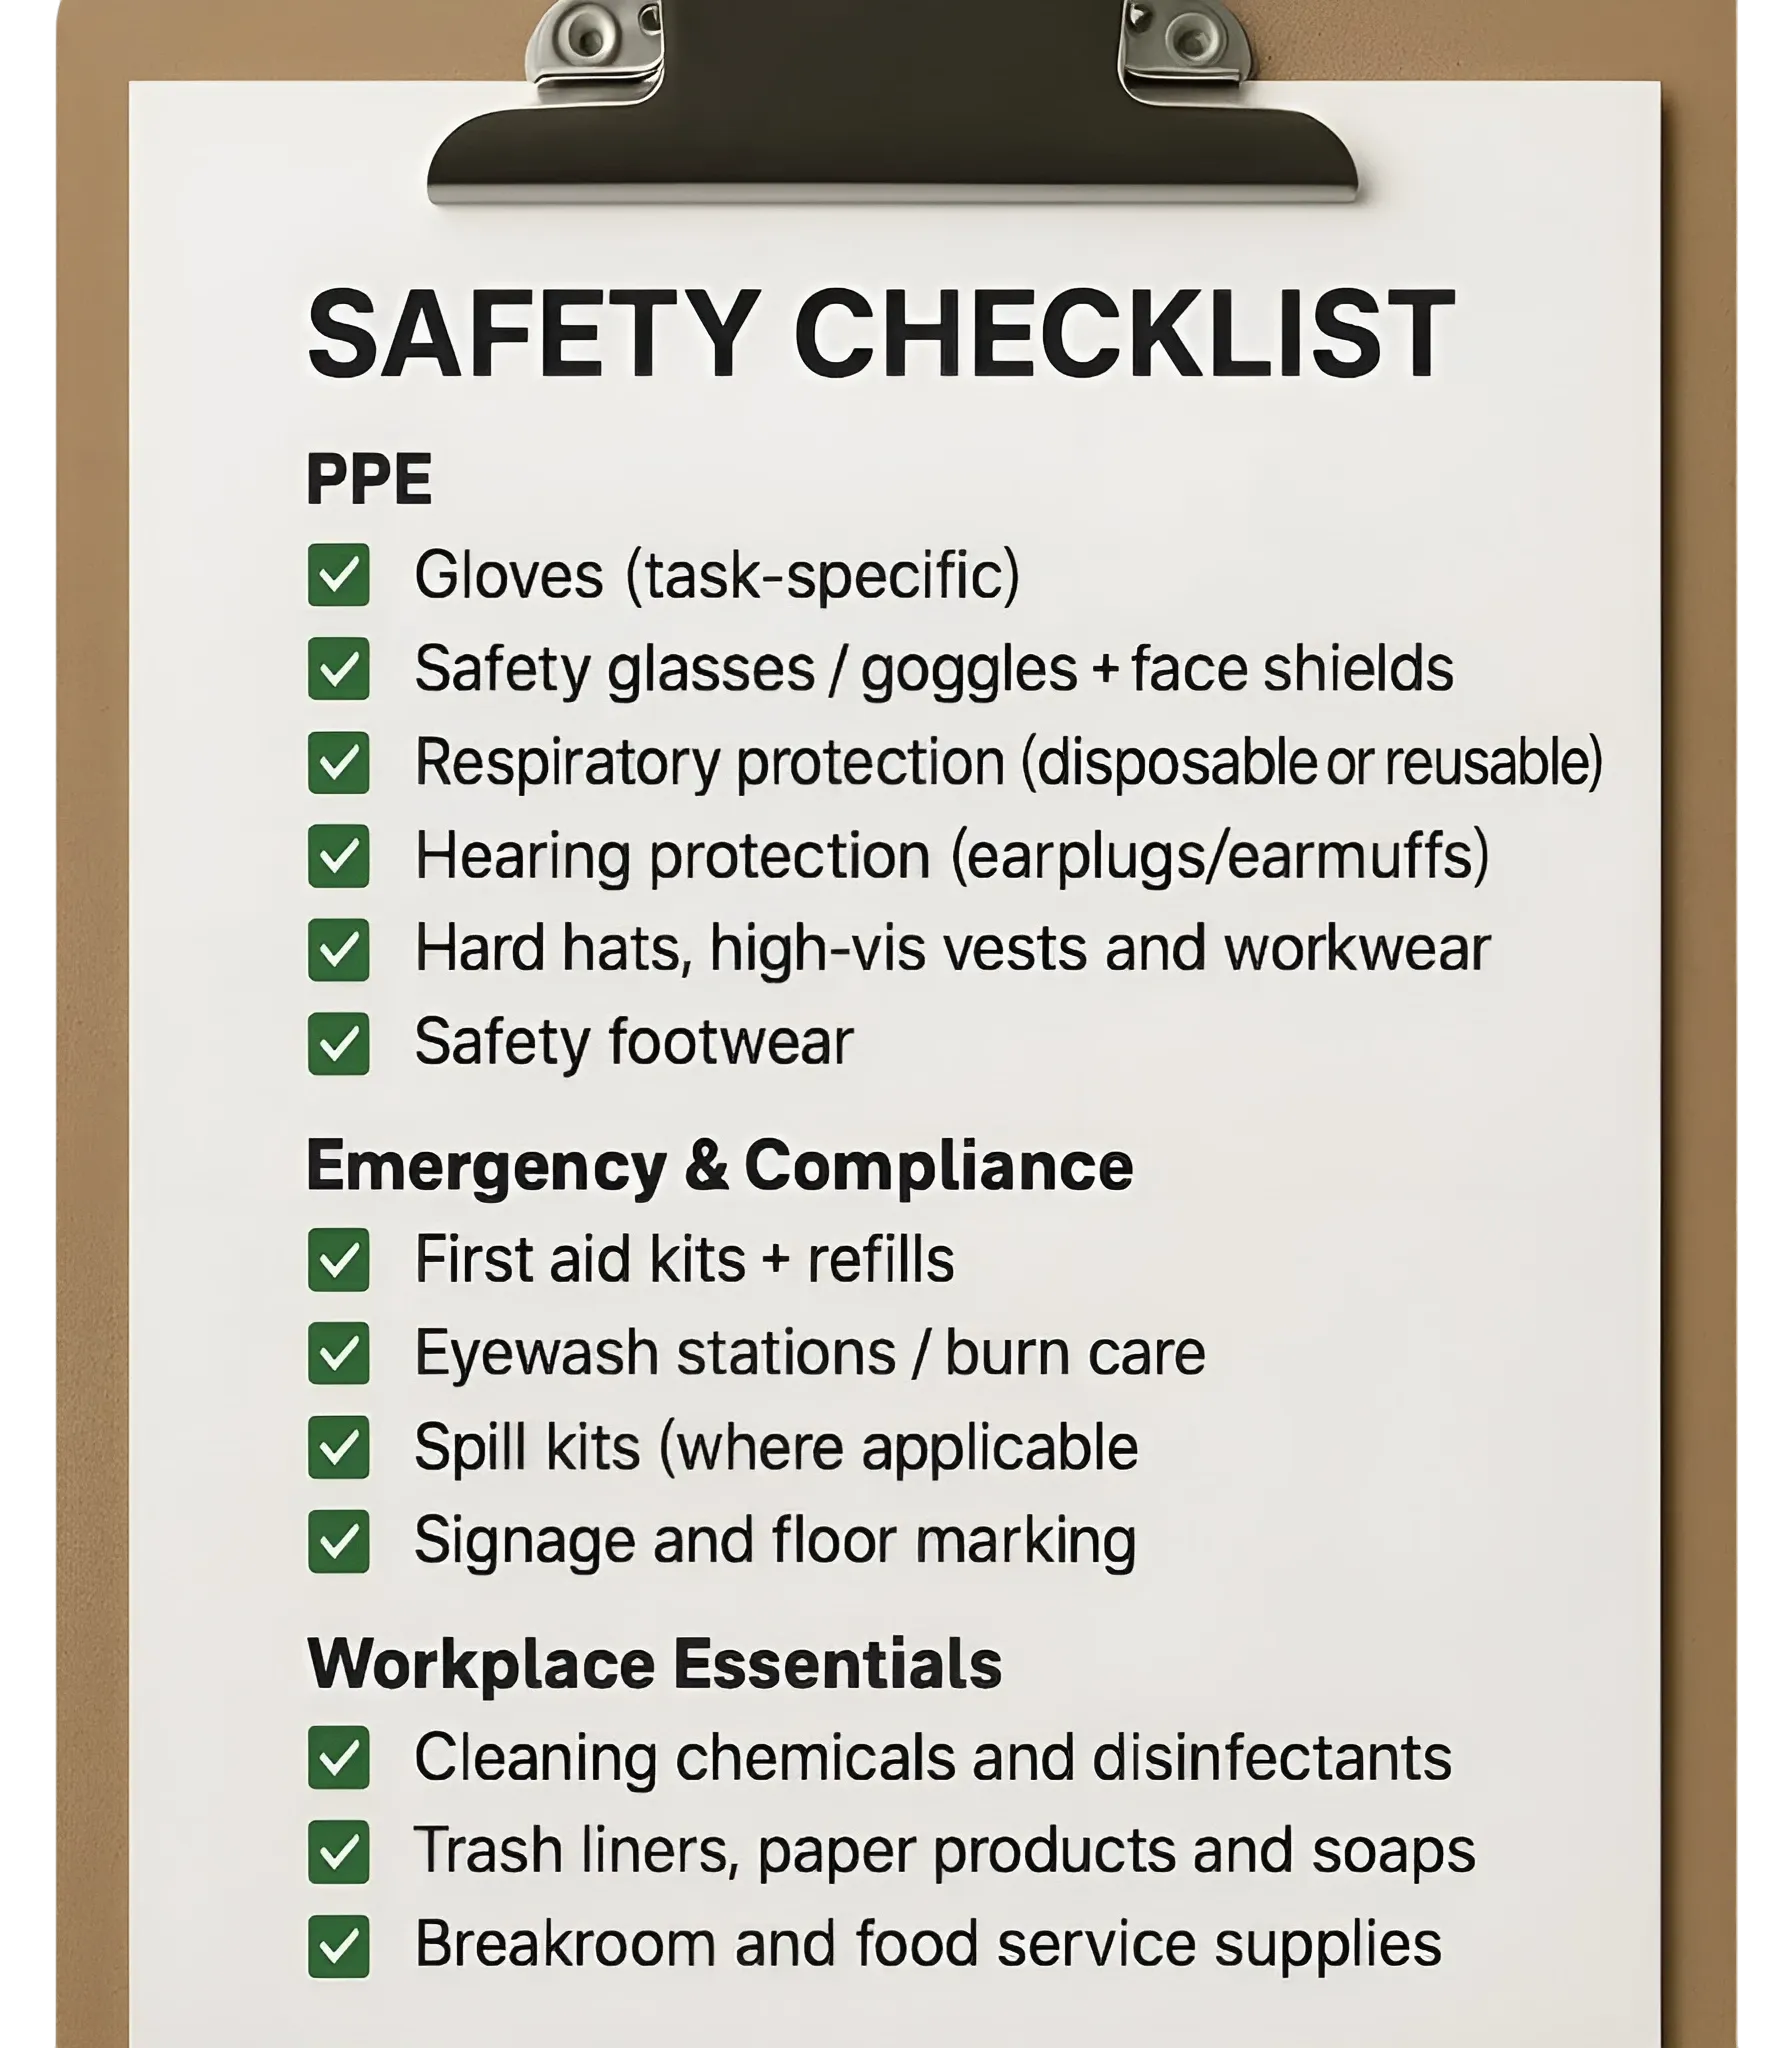
Quick Checklist: What to Order Next
Use this as a starting point for your next order:
PPE
Gloves (task‑specific)
Safety glasses / goggles + face shields
Respiratory protection (disposable or reusable)
Hearing protection (earplugs/earmuffs)
Hard hats, high‑vis vests and workwear
Safety footwear
Emergency & Compliance
First aid kits + refills
Eyewash stations / burn care
Spill kits (where applicable)
Signage and floor marking
Workplace Essentials
Cleaning chemicals and disinfectants
Trash liners, paper products and soaps
Breakroom and food service supplies
Office basics (paper, pens, batteries)
The Bottom Line
A safer workplace is a more productive workplace. The Safety Source gives businesses a practical way to protect people and property—high‑quality PPE, smart bulk pricing, logo customization and the convenience of a single, trusted supplier.
If you’re outfitting a new jobsite, restocking a facility or centralizing vendors, partnering with The Safety Source helps turn safety from a checklist into an everyday habit, exactly where it belongs.
After a home improvement, the step most homeowners skip is cleaning after renovation. That’s because the makeover’s results, like new paint, new floors, or new equipment, often overshadow the mess left behind. When that final step is skipped, the whole effort can become counterproductive.
Spaces that once looked fresh can quickly feel stuffy or dusty, and health issues such as allergies can arise. Every homeowner eventually learns that post-renovation cleaning isn’t optional—it needs to be thorough, from top to bottom.
Tackling the Hidden Mess
Even if your contractor says the crew cleaned up, post-renovation dust often spreads beyond the immediate job site. Fine dust particles can sneak into air vents, cling to walls, or hide inside drawers and in corners. Start by identifying dust-prone spots before you pull out the vacuum or mop.
Commonly Missed Areas:
Light fixtures and ceiling fans: These collect more dust than you’d expect. Use a microfiber cloth or an extendable duster to clean them with care.
Window frames and sills: Fine plaster dust often sticks here. Wipe with a damp cloth, then dry.
Cabinet interiors: Even closed cabinets can collect airborne particles. Empty the shelves and vacuum before restocking.
Behind large furniture or appliances: Move items temporarily to vacuum behind them.
Go room by room so you don’t spread dust from one area to another, and you’ll save time in the long run.
Clean from Top to Bottom
The golden rule for any renovation cleanup is to start high and finish low; that way any falling debris lands on surfaces you haven’t cleaned yet.
Wipe ceilings, beams, and moldings with a dry microfiber mop or cloth.
Gently wash walls with a damp sponge to remove the remaining fine construction residue.
Dust doors, handles, and baseboards.
Disinfect countertops, shelves, and fixtures, particularly in kitchens and bathrooms.
Don’t forget air vents and grilles: use a vacuum brush attachment to remove dust and replace filters if needed.
For carpet, vacuum twice, changing direction on the second pass, to lift dust from deep within the fibers.
Clean methodically and you’ll minimize repeat work while ensuring no area is overlooked.
Focus on Indoor Air Quality
Renovation activity stirs up airborne particles and lingering fumes that can hang in the air well after the project wraps. Such odors can be noticeable even in an otherwise clean, air-conditioned room.
Improve Air Circulation:
Keep windows open for several hours during the day so fresh air can circulate inside.
Run exhaust fans to pull moisture and odors out of the kitchen and bathroom.
Run an air purifier with a HEPA filter for at least a couple of days to draw in ultrafine dust and allergens.
Set out baking soda or activated charcoal in bowls around the house to help absorb leftover smells from paints or adhesives.
Disinfection and Sanitization of Key Areas
Once all visible dirt is gone, the job is still not over: the home needs to be safe and sanitary. Construction work may leave bacteria, mold spores, or residues from adhesives and paints.
Choose gentle cleaners to protect your fresh finishes. Diluted vinegar, a little dish soap, or non-abrasive cleaners usually do the trick for most surfaces. Avoid harsh chemicals that could hurt fresh paint or new flooring.
Bring Your Home’s Glow Back
After renovations, a space deserves more than just a superficial upgrade. It needs a deep, thorough cleaning. Taking the time to work from ceiling to floor, filter the air, and dispose of debris properly ensures your house doesn’t just look new; it feels new.
If it sounds intimidating, hire a cleaning company that specializes in post-construction cleanups. You’ve already invested in turning the home around. Don’t let this be the one step you miss. Own your space and enjoy the makeover as intended.
It’s well known that Dallas–Fort Worth has been a hot spot for real estate investors. The region’s strong population growth, more than 20 Fortune 500 companies that call DFW home, and a healthy balance of supply and demand make it a magnet for investors.
Whether an investor is out of state or a Dallas native, managing your own properties can quickly become a full-time job. Many prefer to pay a management fee so they can focus on family or growing their business.
What many don’t realize is that not all companies for residential property management in Dallas, TX follow the same fee structure. Some use simple, all-inclusive pricing models, while others advertise low teaser rates that hide extra charges until you see the first monthly statement. Understanding these differences is key to avoiding unpleasant surprises and protecting your investment.
What Property Managers in Dallas, TX Charge for Full-Service Property Management
Core fees usually include the Property Management Fee, Renewal Fee, and Tenant Placement Fee.
Property Management Fees
Most Dallas property managers charge anywhere from 8% to 12% of one month’s rent. This fee is generally calculated based on the rent collected each month. Some companies instead charge a flat monthly fee, for example, $200 per property — regardless of the rent amount.
In many cases, property management fees cover full-service management, including property inspections, rent collection, owner and tenant portals, monthly statements, annual 1099s, direct deposits, and maintenance coordination. These services are often included when the fee is a set percentage of rent collected. Managers offering low or flat fees may provide certain services a la carte.
For instance, many flat-fee property managers charge 10–15% of all maintenance invoices, which can significantly raise overall costs and make future expenses unpredictable.
Renewal Fees
Residential leases typically run for 12 months and need to be renewed annually. Most property managers charge a renewal fee for this process. Managers who charge a percentage-based PM fee might add a $100–$250 renewal fee, while flat-fee managers often charge 25–50% of one month’s rent. That difference can noticeably increase annual management costs.
Tenant Placement Fees
When a tenant moves out or a manager takes over a vacant unit, there’s work involved in finding a new renter, from marketing and showings to drafting compliant leases. Tenant placement fees usually range from 50% to 100% of one month’s rent. Notice a pattern? Many flat-fee property managers charge the full 100%.
Additional & Legal Fees
Other fees owners can expect often stem from the legal side of property management. These might include costs related to evictions, compliance with government regulations, requested site visits, onboarding, or preventative maintenance. These fees vary widely and are typically passed on to the owner as needed. When it comes to maintenance, some property managers partner with outside vendors, while others have in-house repair teams. It’s essential for owners to understand their manager’s setup and vet those maintenance providers carefully.
A good property manager won’t just bill you for major repairs, they’ll gather at least three bids from trusted contractors to ensure fair pricing and quality workmanship. Another often-overlooked tool is the maintenance reserve. For example, if your PM holds a $500 reserve, they can authorize repairs or preventive maintenance up to that amount without needing your approval each time. Properties constantly need repairs, maybe a tenant punches a hole in the wall, backs into the garage door, or loses the remote. These things happen often and make the owner–property manager relationship all the more worthwhile.
Why Choosing the Right Dallas Property Management Company Matters
Image by Copper River Property Management
Ultimately, fees are only one part of the equation. Owners should choose a property manager who protects their assets and their bottom line.
As discussed, pricing models vary widely, and hidden costs can sneak up if you’re not careful. A trustworthy Dallas property management company is transparent about its pricing, manages maintenance costs thoughtfully, runs a preventative maintenance program, and works with reliable vendors to save owners money long term.
One local company that fits this description is Copper River Property Management. Their pricing is clearly stated on their website, with no hidden charges. They prioritize transparency and high-quality customer service.
Reach out to Copper River Property Management today to schedule a consultation and see how a trusted Dallas property management company can simplify your ownership experience.
Author Bio
Anthony Collazos is a US Army veteran and the founder of Copper River Property Management, a Dallas Property Management Company. He started his professional career as a U.S. Army Field Artillery Officer, where he gained leadership, discipline, and problem-solving skills that have been essential throughout his career.
Over the past decade, he has managed and financed more than $1.5 billion in real estate across the United States, including large multifamily communities and complex commercial projects. In Texas alone, he has overseen the asset and property management of 2,400 multifamily units, with 300 units being in Dallas. Throughout his experience, he has gained extensive real estate expertise and an in-depth knowledge of the Dallas residential real estate market.
He earned his MBA with a concentration in Real Estate from Southern Methodist University in 2022 and a BBA in Finance from Georgia Southern University in 2011. Anthony is a licensed REALTOR® and a member of National Association of REALTORS, Texas Association of REALTORS, and MetroTex Association of REALTORS. In 2023, Anthony obtained A.CRE’s respected certificate in real estate financial modeling.
Visit Copper River PM’s website at copperriverpm.com to learn more about the services offered. Copper River Property Management specializes in managing single-family homes, condos, townhomes, and multifamily properties up to 50 units. You can contact him via email at info@copperriverpm.com or by completing the contact form at copperriverpm.com/contact/.
When you’re looking at ways to add value to your Dallas home while cutting down on those sky-high heating bills, installing a wood stove might just be the smartest move you make this year. But here’s where most homeowners get sticker shock: the installation costs.
Professional chimney installation can easily run $3,000 to $5,000 or more, turning what should be a money-saving upgrade into a major expense. Installing your own chimney system might sound complicated, but it’s actually a lot simpler than you think. With the right guidance and quality materials, you can tackle this project yourself and pocket thousands of dollars in the process.
Why Dallas Homeowners Are Going DIY
The Texas housing market has been red-hot for years, and with that comes higher costs across the board. Contractors are busier than ever, which drives up installation costs. Meanwhile, energy prices keep climbing, making alternative heating sources more attractive than ever.
A quality wood stove can slash your heating bills by 50% or more during those chilly North Texas winters. When you factor in the money you’ll save by doing your own installation, you’re looking at a payback period of just a few seasons instead of several years.
But beyond the financial benefits, there’s something satisfying about completing a project like this yourself. You’ll know exactly how everything is installed, which components were used, and how to maintain the system properly. That peace of mind is worth plenty on its own.
Understanding Chimney System Basics
Before diving into installation, it helps to understand what you’re working with. A modern wood stove chimney system consists of several key components that work together to safely vent combustion gases outside your home.
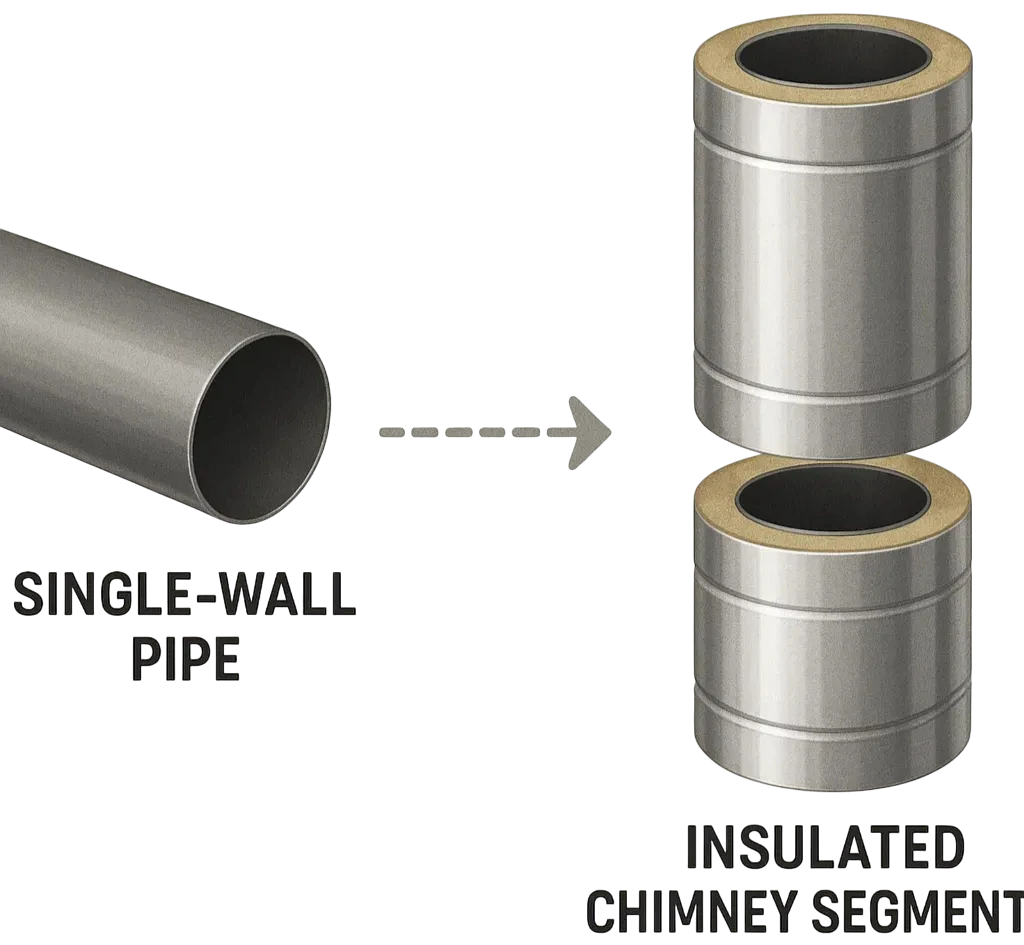
The stove pipe connects your wood stove to the chimney system. This is typically single-wall or double-wall pipe that runs from the stove outlet to where it meets the insulated chimney pipe. The diameter matters here – most residential installations use 6-inch pipe, though some larger stoves require 8-inch systems.
Once you transition from the living space to areas where the pipe passes through walls, ceilings, or the roof, you’ll switch to insulated chimney pipe. This double-wall or triple-wall pipe is designed to maintain safe clearances from combustible materials while keeping the flue gases hot enough to maintain proper draft.
Manufacturers have standardized connections, included detailed instructions, and engineered systems that don’t require specialized tools or extensive construction experience.
Planning Your Installation
Every successful installation starts with proper planning. Begin by determining the best location for your wood stove, keeping in mind both heating efficiency and installation requirements. You’ll want to minimize the number of turns and horizontal runs in your chimney system, as straight vertical runs provide better draft.
Measure carefully from your proposed stove location to where the chimney will exit through the roof. This helps you determine exactly what components you’ll need and avoid costly delays while waiting for additional parts.
Local building codes do apply to chimney installations, even DIY ones. While requirements vary by municipality, most areas require permits for new chimney installations. The good news is that most building departments are familiar with modern chimney systems and the permitting process is usually straightforward.
Don’t forget about clearances to combustible materials. Modern insulated chimney systems have specific clearance requirements that are much less restrictive than older masonry chimneys, but they still need to be followed exactly. Your installation instructions will spell these out clearly.
Selecting Quality Components
This isn’t the place to cut corners. Your chimney system is a critical safety component, and quality materials are essential for safe, reliable operation. Look for UL‑listed chimney systems that are tested and listed by recognized testing laboratories.
When shopping for the best chimney pipes for wood stoves, you’ll find systems designed specifically for different applications. Class A chimneys are required when passing through or near combustible materials, while connector pipe is used in the living space from the stove to the wall or ceiling penetration.
A 6-inch stove pipe diameter is standard for most residential wood stoves, though you should always verify what your specific stove requires. Using the wrong diameter pipe can create dangerous draft problems and void your stove’s warranty.
Many suppliers offer wood stove chimney kit packages that include all the components you need for a typical installation. These kits take the guesswork out of ordering and ensure all your components are compatible.
The Installation Process
Modern chimney systems are designed to go together logically, almost like a sophisticated set of building blocks. Most installations follow a similar sequence, starting with the stove pipe connections and working upward through the house to the roof termination.
You’ll typically start by connecting the first section of stove pipe to your wood stove outlet. From there, you’ll run pipe to your wall or ceiling penetration point, where you’ll install the appropriate thimble or support box.
The transition to insulated chimney pipe happens at this penetration point. This is where the single-wall connector pipe ends and the double-wall or triple-wall chimney pipe begins. This transition point is critical for both safety and proper system function.
Once you’re in the insulated chimney section, installation becomes a matter of assembling sections as you work your way up through the house. Most systems use a twist-lock connection that creates both a mechanical joint and an airtight seal.
The roof penetration requires careful attention to weatherproofing. A quality roof flashing system will keep water out while allowing the chimney to expand and contract with temperature changes. Take your time here – a small leak can cause big problems down the road.
Getting Expert Guidance When You Need It
Even with detailed instructions and quality components, questions come up during installation. Maybe you’re not sure about a specific clearance requirement, or you need advice on the best way to route your chimney through a particular part of your house.
This is where having access to experienced technical support makes all the difference. The specialists at Flue-Pipes understand that DIY installers need a different kind of support than contractors. They can walk you through specific installation challenges over the phone, helping you work through problems without requiring an expensive service call.
Having this kind of backup gives you confidence to tackle the project yourself while knowing help is available if you need it. It’s like having an experienced installer looking over your shoulder, ready to offer advice when you need it.
Cost Savings That Add Up
A typical professional installation might cost $4,000 to $6,000, while the same chimney system purchased directly costs $800 to $1,500 depending on height and complexity.
Even factoring in tools you might need to purchase and the value of your time, you’re looking at savings of $2,500 to $4,000 on a typical installation. For many homeowners, that’s money that can go toward other home improvement projects or simply stay in your pocket.
Safety Considerations
Working on roofs and handling chimney components require attention to safety. Take your time, use proper safety equipment, and don’t hesitate to get help when you need it. A helper makes many parts of the installation easier and safer.
Follow all manufacturer’s instructions exactly. These systems are engineered to work safely when installed according to specifications, but shortcuts or modifications can create dangerous situations.
When in doubt, consult with experts. A phone call to technical support can answer questions and ensure you’re on the right track. It’s much better to ask questions during installation than to discover problems later.
Maintenance and Long-Term Value
A properly installed chimney system should provide years of trouble-free service with minimal maintenance. Annual cleaning and inspection are typically all that’s required, and these are tasks you can handle yourself once you understand your system.
Regular maintenance protects your investment and ensures safe operation. A clean, well-maintained chimney provides better draft, burns more efficiently, and lasts longer than a neglected system.
The value added to your home by a quality wood stove installation often exceeds the cost of the materials, especially when installation costs are minimal. Energy-efficient heating options are attractive to buyers, particularly in areas where heating costs are significant.
Taking the Next Step
Installing your own wood stove chimney system represents both an immediate cost saving and a long-term investment in your home’s value and comfort. With quality components, proper planning, and access to expert guidance when needed, it’s a project that’s well within reach of most homeowners.
The key is starting with quality materials from reputable suppliers who understand the DIY market and can provide the support you need for a successful installation. Don’t let installation costs prevent you from enjoying the benefits of efficient wood heat in your Dallas‑area home.
Your heating bills will thank you, your home’s value will benefit, and you’ll have the satisfaction of completing a significant home improvement project yourself. In today’s economy, that combination of practical benefits and personal satisfaction makes DIY chimney installation a smart choice for Dallas homeowners looking to maximize their investment.
In the highly competitive world of short-term rentals, having a place to stay is no longer enough. Today’s guests want more than four walls and a bed. They book places that feel easy, comfortable and well run, with the kind of details they would expect at a good hotel and the personality they can only get in a home. When you set up your place with that mindset, you raise reviews, improve occupancy and build real cash flow. Travelers now look for hotel‑like amenities with a personal touch, which is exactly where you can stand out.
1) First Impressions That Sell: Curb Appeal And Landscaping
Guests start forming opinions the moment they pull up. Keep the exterior clean and cared for, then layer in simple features that read as premium without adding a lot of maintenance.
Landscape for impact, not upkeep. Mix native, drought-tolerant plants into a well-manicured garden, accented with a few potted color pops near the entry. Define pathways with pavers or gravel, and add low-voltage lights to guide guests at night.
Create a spot to linger. A small patio with comfortable chairs, an outdoor rug and a side table photographs well and gives guests a place to enjoy morning coffee.
Automate watering. With an automated irrigation system, including a drip line for beds and a simple sprinkler controller for turf, your landscape stays healthy while you focus on turnovers.
Mind the property line. When you place a fence, garden bed or pergola, confirm boundaries so your improvements stay on your land. A quick check with a plat map or, for trickier lots, a boundary survey avoids encroachment issues later. If a neighbor’s tree or fence crosses into your space, start with a friendly conversation, then formalize solutions if needed.
Think like an owner. Built‑in elements, like a fixed bench, a hard‑plumbed grill station or a permanent fire feature, become part of the real property and can support value, which is different from movable furniture.
2) Make Comfort A Given: Climate Control And Smart Basics
Comfort drives five‑star stays. Keep temperatures steady and controls simple.
Reliable heating and cooling. Service HVAC regularly, install a smart thermostat guests can adjust, and keep spare filters on hand. Efficient air conditioning for hot summers makes comfort effortless.
Quiet, dark and breezy. Blackout shades, a ceiling fan in each bedroom and door sweeps help with sleep.
Energy touches that matter. LED bulbs, weather‑stripping and a smart thermostat lower costs, and guests engage with listings that highlight efficiency. Renters are more likely to pursue homes that share positive energy‑efficiency details, which helps the listing and your utility spend.
3) Set Up A Kitchen Guests Can Actually Use
Many travelers book a home so they can cook. Equip the space so every meal is easy to prep and easy to clean.
Appliances that work hard. Full‑size fridge, range, microwave and a quiet dishwasher. Add both drip and single‑serve coffee options, an electric kettle and a quality toaster.
Tools that make sense. A complete cookware set, sharp knives, cutting boards, sheet pans, mixing bowls, a colander, storage containers and a basic bakeware set.
Stock the staples. Salt, pepper, cooking oil, a few spices, coffee, tea and sweeteners. Refill between stays and keep a labeled owner bin for bulk supplies.
Cleanup is part of the amenity. Dish tabs, sponge, towels and a small starter pack of trash bags. Upgraded kitchens and amenities help you command stronger rates, which supports cash flow.
4) Bedrooms And Baths Guests Look Forward To
Sleep and showers set the tone for the whole stay.
Beds worth bragging about. Quality mattresses, breathable sheets, two pillow types per person and spare blankets.
Blackout plus bedside. Full blackout window treatments, a nightstand and lamp on each side, and convenient outlets or USB ports.
Hotel‑level bath setup. Oversized towels, extras on the shelf, full bottles of shampoo, conditioner and body wash, a hair dryer, great lighting and a mirror guests can actually use. A rainfall shower head reads luxe, while leak‑free fixtures read professional.
5) Entertainment And Work‑From‑Here Essentials
Cover the basics guests now expect for downtime and remote work, then add a few memorable touches.
Streaming‑ready TV and strong Wi‑Fi. Set up a smart TV with the major apps, include an HDMI cable, and display the Wi‑Fi name and password on the welcome card.
Analog fun. A small stack of board games and a shelf of easy reads.
A real workspace. A desk and task chair with a power strip where it is obvious.
Travelers increasingly look for hotel‑style amenities paired with a home feel, so this mix lands well and photographs clearly in your listing.
6) Thoughtful Touches And Your Welcome Guide
You set the tone before guests even arrive.
Clear, friendly check‑in. A smart lock with a unique code, step‑by‑step directions, parking info and quiet‑hours guidance.
House binder plus digital guide. Include appliance instructions, trash day, emergency contacts, Wi‑Fi details and a neighborhood map with your favorite coffee, markets, trails, family spots, and local activities.
A little “hello.” A small welcome basket with local snacks, bottled water and coffee pods goes a long way with reviews.
7) Photos, Listing Copy And Pricing That Convert
Your page on the platform is your storefront. Make it easy for guests to say yes.
Stage the hero shot. Lead with your best angle, then show the floor plan flow, sleeping setups and outdoor spaces. Turn on all the lights, open the blinds and switch on lamps for warm photos.
Write for clarity. Bullet the top five amenities in the first lines. Set house rules in plain language.
Price with a plan. Put numbers behind your targets. As one large market example, a one‑bedroom in Los Angeles can see an average daily rate near the high‑$200s with an occupancy rate a little over half the nights in a year, which points to five‑figure gross revenue before expenses if you hit similar performance in your market. Use your own comps locally, then apply a simple check: ADR × nights booked ≈ gross nightly revenue.
Reduce vacancies thoughtfully. Use seasonal minimum‑night rules, offer a small discount for week‑long stays, and keep your calendar open and accurate. Simple incentives and flexible terms can trim gaps, which supports cash flow.
8) Operations You Can Repeat Every Time
Treat cleanings, restocks and safety like a checklist business.
Turnover checklist. Bed order and laundry sequence, kitchen reset, bath setup, dust and floors, patio sweep, supplies restock.
Safety and maintenance rhythm. Test smoke and carbon‑monoxide alarms, keep a charged fire extinguisher, inspect stair rails and trip points, and walk the exterior lighting each month.
Know the local rules. Some areas require registrations, tax remittance or specific occupancy and parking rules for short‑term rentals or for homes in an HOA. Many hosts hire a property manager when they scale or when they live far away, which keeps response times consistent for guests. Running an STR is a hands‑on operation, so management help can be a smart line item.
9) Switching From Long‑Term To Short‑Term, Or Buying A Place With Tenants
If you are purchasing a property that already has renters or you are converting a long‑term rental, plan the timeline and the legal side before you list.
Honor existing leases. Tenants keep the rights in their leases, and you take on landlord duties when you buy. In most cases, you change terms only when the lease ends, which means a conversion to short‑term hosting starts after that date unless your contract says otherwise.
Expect real responsibilities. You are on the hook to keep the home safe and habitable, keep systems working and handle repairs promptly.
Plan ahead if you need possession. Some buyers negotiate for the current owner to end the lease before closing, or they use an owner‑move‑in path where that is permitted. Evictions follow formal timelines and are a last resort, so a clean handoff plan is the easier route.
10) Invest Once, Keep It Simple: What Stays With The Home
When you add permanent features, you create a clearer, more valuable setup.
Permanent vs movable. A fixed deck, built‑in banquette, hard‑plumbed gas line or anchored pergola is part of the real property and conveys with the home. Freestanding furniture and décor count as personal property and do not affect the property itself. Use this lens when you choose upgrades.
11) When You Want Higher Income Potential
Short‑term rentals can lift revenue when demand is there, which is why many investors look at this approach in the first place. It does come with more involvement from you, and higher setup and operating costs, so plan staffing and reserves as part of the model. In strong markets, nightly pricing plus steady occupancy can outperform a traditional year‑long lease. That is where your photography, amenities and guest experience pay off.
Listing & Ops Hero photo staged, top five amenities listed, house rules clear, price plan built from local comps, turnover checklist printed, restock bins labeled.
Why This Playbook Works
You are making it easy for someone to choose your place, enjoy their stay and tell the next person to book. Strong curb appeal gets the click. Comfortable beds, reliable climate control and a fully stocked kitchen win the review. Clean photos, clear copy and smart pricing fill the calendar. Energy‑smart features keep operating costs in line while also helping your listing stand out.