Tag: DIY Projects

  • Save Money, Gain Confidence: The Benefits of Installing Your Own Shower Door

    A shower door does more than just keep water off the floor; it defines the look of your bathroom and gives the space a finished feel. If you’ve always called a pro for jobs like this, tackling the installation yourself can seem intimidating. But with basic tools and a careful plan, it’s an absolutely doable project. You’ll save significant money and gain the unique confidence that only comes from completing a job with your own two hands.

    The Cost Factor

    Hiring an installer gets pricey, and the total climbs fast if your walls are uneven or you’ve chosen a heavy glass door. A basic framed kit might run $200 to $600 for materials, while a frameless setup can land closer to $600 to $1,500 or more. Professional labor typically adds at least a few hundred dollars on top of that.

    When you handle the install yourself, you eliminate that labor cost. You can then put those savings toward thicker glass and premium hardware, or just bank the cash for your next upgrade. That freed-up money can also cover small extras that improve daily life, like a quieter bath fan, brighter vanity lights, or premium caulk and sealant for a longer-lasting job. It’s not just about spending less—it’s about spending smarter to get a bathroom that looks great and functions perfectly.

    Learning and Gaining Confidence

    Every DIY job teaches you something, and installing a shower door is a great way to level up your skills without committing to a full remodel. By reading the instructions carefully and working slowly, the process is surprisingly straightforward. You can often see the final results in a single afternoon.

    Before you start, pull up the manual for your specific model and watch the manufacturer’s installation video. For best practices, you might consider seeking practical help for DIY bathroom projects to guide you through the process. This preparation ensures you know the correct drill bit sizes, the proper order of parts, and where to apply sealant. As you work, you’ll pick up valuable, reusable skills, like measuring accurately, drilling into tile correctly, and laying a clean, professional silicone bead. That confidence carries right over to the next project.

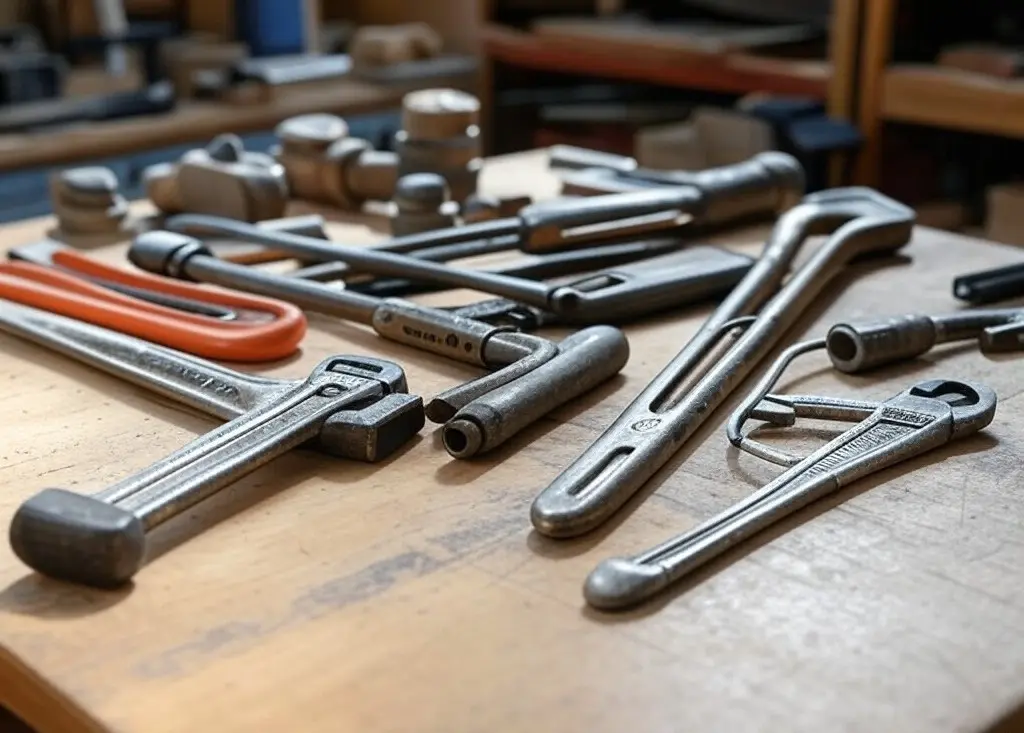
    Tools and Preparation

    Good preparation makes the installation smoother and is key to preventing leaks. Gather everything you need before you open the box.

    • Tape Measure: Confirm the width and height at the top, middle, and bottom to catch any out-of-square walls.
    • Level: Check that your walls and shower curb are plumb (perfectly vertical) and level (perfectly horizontal). You’ll use this constantly to keep the track or hinge side straight.
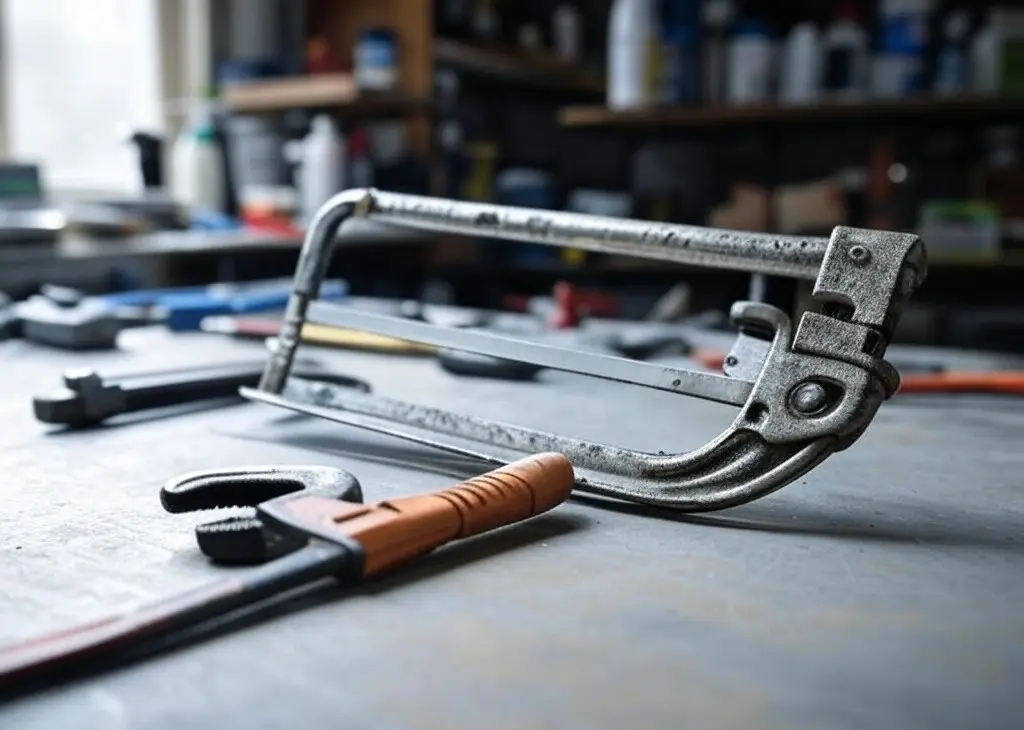
    • Drill: Use a carbide- or diamond-tipped bit if you’re drilling through tile. Always use the exact bit size specified in the instructions.
    • Caulk Gun: You’ll need 100% silicone sealant that is specifically labeled for kitchen and bath use to ensure the seams stay watertight.
    • Stud Finder: Use this where possible. If there’s no stud behind the hinge or track locations, you’ll use the wall anchors included with your kit.
    • Safety Gear: Wear safety glasses and cut-resistant gloves. Tempered glass is heavy, and its edges (or shards, if it breaks) can be extremely sharp.
    • Extras: Keep painter’s tape (for marking drill holes on tile), shims (for leveling), a rubber mallet, a pencil, and a shop vacuum on hand to make layout and cleanup easy.

    Having these basics ready not only speeds up the job but also sets you up for other quick fixes around the house. The same tools are perfect for hanging shelves, mounting mirrors, or swapping out hardware.

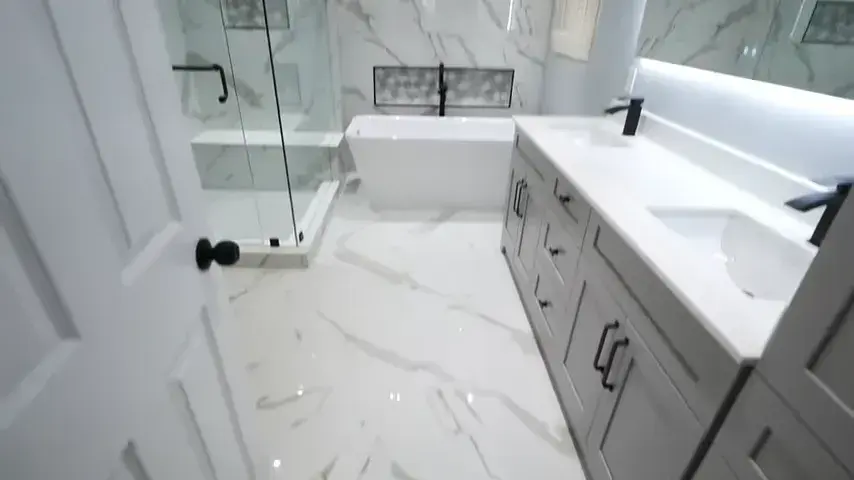
    Choosing the Right Door

    To avoid installation headaches, pick a door that fits both your physical space and your bathroom’s style.

    • Sliding (Bypass) Doors: These work well when floor space is tight and you don’t have room for a door to swing out.
    • Hinged (Pivot) Doors: These offer a classic look and a wide opening, which helps with accessibility and makes cleaning easier.
    • Bi-fold Doors: These doors tuck in on themselves and are a handy solution for very small bathrooms.

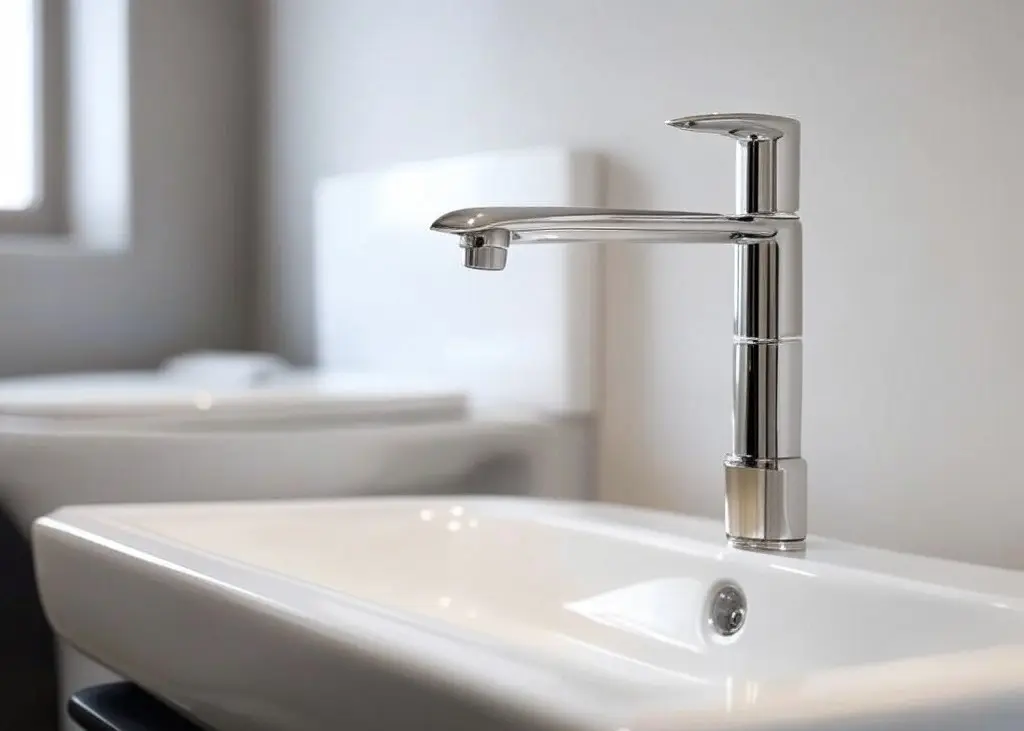
    You’ll also need to decide between framed, semi-framed, or frameless glass. Match the hardware finish (like the handle and hinges) to your faucet and showerhead so the room feels cohesive. Clear glass can make a small bathroom feel larger, while textured or frosted glass provides privacy and helps hide water spots. Finally, double-check that your shower curb (threshold) slopes slightly toward the shower so water naturally drains in, not out.

    Installation Steps

    1. Measure Your Space: Take width and height measurements in three spots (top, middle, bottom). Use the smallest number for your final measurement to ensure the door fits.
    2. Mark Your Layout: Hold the main track or hinge rail in place. Use your level to get it perfectly plumb, then mark your drill holes with a pencil. Placing painter’s tape over the marks provides a cleaner entry point for the drill bit on tile.
    3. Mount the Track or Hinges: Drill slowly, using the correct bit. Vacuum the dust as you go. Set your wall anchors if needed, and follow the manual’s precise order so all parts seat correctly.
    4. Hang the Door: This is a two-person job. Get a second set of hands and wear your gloves. Lift the panel and set it into the track or onto the hinges. Tighten the hardware just enough that you can still make fine adjustments to get it perfectly level.
    5. Seal and Finish: Run a neat bead of bath-grade silicone along exterior seams only. Critically, only seal the outside of the bottom track. This allows any water that gets inside the channel to drain back into the shower. Smooth the bead, wipe away any excess, and let it cure for at least 24 hours before using the shower.

    Work at a steady pace and double-check that everything is level after each step. You’ll end up with a door that looks clean and closes tightly. Best of all, you’ll know exactly how it’s built, which makes any future adjustments or part swaps simple.

    Post-Installation Satisfaction

    That first shower after the silicone cures just hits different. You can see and feel exactly what you built. You saved money, you matched the door perfectly to your style, and you get a small win every time the glass glides smoothly and the seal holds. When friends ask who installed it, you get to say, “I did,” and maybe even share a tip or two.

    Building on Your DIY Momentum

    Once you’ve successfully hung a shower door, other home projects feel much less intimidating. Don’t be surprised if you start eyeing the vanity, the light fixtures, or the bath fan next. The same ‘measure twice, prep once’ mindset works for all of them, and your new tools will keep paying off.

    Most home projects are manageable when you plan the steps, read the directions, and give yourself enough time. The payoff is seeing your space improve because of the work you put in. If you’re thinking about what to try next, start small, pick something useful, and keep the momentum going. Your next DIY win is closer than you think.

  • Got an Ugly Backyard? How to Fake Curb Appeal on a Budget

    We’ve all been there, staring out the window at a backyard that’s more meh than a masterpiece. Whether you’re planning to sell or just want to stop cringing every time the neighbors peek over the fence, curb appeal doesn’t stop at the front yard. But here’s the good news: you don’t need to spend thousands or call in a landscaping crew to give your backyard a glow-up.

    Even with a tight budget, some clever and surprisingly easy tricks can make your backyard feel fresh, inviting, and even a little Instagram-worthy. No need to rip everything out or start from scratch. A few strategic changes can fake that high-end look for way less than you’d think.

    Source: unsplash.com

    Hide the Bad, Highlight the Good

    Sometimes it’s not about changing everything. It’s about hiding what doesn’t work and making the best parts pop. Did you get an old, stained patio slab? Try an outdoor rug or a few strategically placed potted plants to hide those imperfections. Is your chain-link fence bringing down the vibe? Cover it with reed fencing, privacy screens, or even outdoor curtains for a cozy cabana vibe.

    And don’t underestimate lighting. String lights, solar garden spikes, or lanterns can distract the eye from problem areas at night while creating a warm, cozy ambiance.

    If you’ve got an eyesore like an AC unit, garbage bins, or patchy grass, think in terms of disguise. Lattice panels, faux ivy, or even a handmade wood cover can go a long way without draining your wallet. You’re not renovating, you’re cleverly redecorating.

    Budget-Friendly Greenery That Fools the Eye

    Plants are powerful. Even the roughest yard can look polished with the right greenery. But if you’re not a green thumb (or on a strict budget), don’t rush to a nursery for expensive trees and shrubs.

    Start with container plants. Grouped in different sizes and heights, they give a lush look without a permanent commitment. Repurpose old buckets, crates, or even tires with a coat of spray paint to use as planters.

    Don’t forget about fake plants, either. Quality artificial greenery when mixed with real plants can pass for the real thing and add color and fullness year-round. Hang some faux ivy on a blank wall or drape a trellis with artificial vines. It’s a trick that works.

    Grass looking patchy? Inexpensive grass seed and some patience can help, but if you’re after a quick fix, roll out a strip of budget-friendly artificial turf or use mulch and stepping stones to create defined paths and distract from rough patches.

    DIY Decor That Looks Way More Expensive

    You don’t need to splurge on designer outdoor decor. You just need a few smart DIYs. Create a cozy seating area using pallets and cushions. Add outdoor curtains using a tension rod and cheap fabric or drop cloths. Build a fire pit with a few concrete blocks or stackable stones.

    Paint is your best friend here. Spray-paint mismatched furniture in a unifying color. Add a pattern to plain concrete using a stencil and patio paint. Refresh an old fence or shed with a new color to bring the whole space together and make it feel designed.

    Add a personal touch with homemade signs, string lights in jars, or a painted mural. A backyard doesn’t need to be massive to feel charming. It just needs a little personality.

    Smart Layout Tricks That Add Style

    Even small or awkward backyards can feel pulled together with a little layout magic. Define zones: dining, lounging, gardening, and maybe even a tiny play area if you have kids. You don’t need walls, just visual cues, like rugs, planters, or even a change in ground texture.

    Use vertical space to your advantage. Hanging planters, wall-mounted shelves, or a living plant wall draw the eye upward and away from the flaws at ground level.

    Even the illusion of symmetry can work wonders. Balance out lopsided areas with a few mirrored elements, like two chairs, matching planters, or lanterns. It brings a sense of calm and order that instantly upgrades your yard’s vibe.

    Where to Find the Best Budget Materials

    Thrift stores, flea markets, and garage sales are goldmines for outdoor upgrades. Old furniture can be upcycled into plant stands or seating. Keep an eye out for baskets, pots, and lighting fixtures you can repurpose.

    Don’t overlook online community marketplaces, people often give away bricks, wood, or even patio furniture for free if you’re willing to pick it up. Your city’s bulk trash days can be hidden treasure troves.

    Also, local garden centers sometimes offer discounts on imperfect or end-of-season plants. And for structure, look into reclaimed materials: pallets, old shutters, or leftover tiles. Cheap doesn’t mean cheap-looking if you get creative.

    Plan for the Future Without Spending Today

    Even if you’re doing the bare minimum right now, it helps to think a step ahead. If you’re hoping to eventually sell your home, a well-staged backyard can boost your property’s perceived value without massive renovation costs.

    That’s where working with companies like Stillwater Properties can help you understand which improvements add value. Sometimes a few visual upgrades today are all it takes to change a buyer’s perception tomorrow.

    If you’re not selling, that same long-term thinking helps you avoid wasting money on temporary fixes that won’t last through a single season.

    You Don’t Need a Designer Yard to Impress

    Backyards don’t have to be perfect to feel good. A fresh, clean, and cleverly staged space can be just as impactful as a professionally landscaped one; if your goal is curb appeal on a budget.

    Because curb appeal doesn’t stop at the front yard, and neither should your creativity. And when the potential is packaged in a clean, cozy, and welcoming space, that’s what people remember. So don’t stress about the weeds you haven’t pulled yet or the fence you still want to paint. Focus on what you can do today. A little effort goes a long way, and a few bucks spent the smart way can completely change how you (and others) feel about your backyard.

  • Practical Guidance for Your Plumbing Projects

    Dealing with a minor leak or planning a major upgrade? Understanding your plumbing is essential. When those problems arise, it can feel like you’re trying to paddle upstream without a paddle. With clear tips and trusted advice, Dan’s Plumbing Guide is here to offer their expertise. They know all too well how disheartening and intimidating plumbing jobs can become.

    The aim is to make your plumbing work less complicated, providing concise, relevant information for you – with real-life solutions for real-life scenarios. So, roll your sleeves up, have them with you through your journey.

    Know Your System

    Your home’s plumbing system is made up of supply lines, waste lines, and vents. Each component ensures that clean water comes in and wastewater heads out, keeping everything in your home in top shape.

    Different systems like potable water, sanitary drainage, and stormwater drainage each have their own roles, promoting healthy water flow and safe waste disposal. Getting to know each system’s function is key to proper upkeep.

    • DIY Projects: Tackle minor issues like running toilets or replacing faucet washers. These quick fixes can save you money and boost your confidence.
    • Professional Services: For more complex problems, such as sewer line issues or big installations, it’s best to hire licensed plumbers. This can prevent potential dangers and costly mistakes down the road.
    • Plumbing Tools: Essentials like an adjustable wrench, drain snake, and plumber’s tape should always be in your toolbox, ready for common repairs or emergencies.
    • Important Maintenance: Regular check-ups can help avoid big, expensive repairs down the line.

    Fittings—such as couplings, elbows, and tees—are essential for making tight connections. Keeping these parts well-labeled and organized will make your plumbing tasks much more manageable.

    Gather Essential Tools

    Stocking your toolbox with the right items makes your job easier and prevents setbacks. Investing wisely in essential tools pays off, whether you’re fixing a small leak or overhauling your plumbing.

    Know Your Wrenches

    Pipe wrenches, basin wrenches, and adjustable wrenches are crucial for tightening fixtures. A faucet key is handy for dealing with tough nuts in tight spaces.

    Pipe Work Essentials

    A hacksaw for cutting pipes, a deburring tool for smoothing edges, and thread sealing tape are must-haves for pipe work.

    Clogging and Blockage Tools

    Plungers, hand augers, and snake machines are key for clearing tough clogs. Inspection cameras can help you spot problems without damaging your pipes.

    Safety First

    Always wear goggles and gloves to protect yourself, and be careful around flammable materials when soldering. A safe workspace leads to better results.

    Other Essential Tools

    Tools like PEX pipe expanders, crimpers, and tube benders add versatility to your toolkit. Don’t forget stubby screwdrivers for those hard-to-reach places and tools to measure flow rate and pipe volume for precise material handling.

    Expert Tips

    Keep your tools organized and inspect them regularly to catch any wear or defects early. Stay informed about the latest solutions to ensure success in your projects.

    Fix Leaky Faucets

    To fix a leaky faucet, start by isolating the leak and turning off the water supply. Disassemble the faucet carefully, keeping all parts organized for easy reassembly.

    Check for worn-out components like washers, O-rings, or seals, and replace them as needed. When reassembling, use plumber’s tape on threads to ensure a tight seal.

    Testing and Final Checks: Gradually turn the water back on, watching for any leaks. If you spot a drip, tighten the connections slightly with an adjustable wrench—but don’t overdo it to avoid damaging the materials.

    Sometimes, a worn handle can be the culprit behind a leak. Replacing it can stop the drip and enhance the faucet’s stability.

    Know your faucet types: Compression, Cartridge, and Ball. Each has unique mechanisms and common leak points, so tailor your troubleshooting accordingly.

    Unclog Drains Safely

    When dealing with clogged drains, patience and the right tools are key. Avoid harsh chemicals that can damage your pipes, and opt for tools specifically designed for the type of clog you’re facing.

    • DIY Drain Cleaners: A mix of baking soda and vinegar, or baking soda and salt, followed by hot water can clear greasy clogs naturally.
    • Prevent Future Clogs: Don’t pour grease down drains and use strainers to catch debris. Regular maintenance can prevent severe clogs and save you from costly repairs.

    Regular Inspections and Maintenance

    Keep your plumbing in top shape with regular inspections. Check for leaks, tighten connections, and replace worn parts as needed. This proactive approach can extend the life of your plumbing and prevent emergencies.

    Final Thoughts

    Your home’s plumbing is a critical asset. With the right tools and knowledge, you can maintain its integrity and ensure a comfortable, efficient living environment. Stay diligent and your plumbing will do its job without a hitch.

  • How to Modify RTA Cabinets for a Custom Look

    Ready-to-assemble (RTA) cabinets can be an affordable and flexible option for homeowners looking to redesign a kitchen, bathroom, or laundry room. The available options in market are such as shaker cabinets, frameless designs, paint grade cabinet doors among others.

    However, for those looking to achieve some unique and expensive appearance, it is possible to customize their RTA cabinet with a bit of extra work. With a few simple adjustments, you can modify standard RTA cabinets to perfectly fit your space.

    Why Modify RTA Cabinets?

    Many homeowners choose RTA kitchen cabinets for their affordability and ease of assembly. However, personalizing them allows you to:

    • Improve functionality with pull-out shelves and organizers.
    • Enhance aesthetics with custom paint, trim, and molding.
    • Adjust cabinet sizes to fit unique layouts.
    • Upgrade hardware and finishes to match your home’s decor.

    Now, let’s explore the best ways to modify your RTA cabinets for a custom look.

    1. Adjust Cabinet Dimensions for a Perfect Fit

    If your kitchen cabinets, laundry room cabinets, or bathroom cabinets need resizing, you can modify their dimensions:

    • Cut Side Panels and Shelves: Use a circular saw or table saw to resize panels for a better fit.
    • Modify Cabinet Depth: Reduce the depth to fit tight spaces by cutting the back panel and repositioning the brackets.
    • Create Custom Openings: If you need additional cutouts for appliances or plumbing, use a jigsaw to make precise modifications.

    2. Customize the Finish with Paint or Stain

    Want to make your cabinets truly yours? A fresh coat of paint or a stain can do wonders!. Consider these options:

    • Classic White Cabinets: A coat of white paint gives a fresh and timeless appeal.
    • Bold Colors: Try blue cabinets, black cabinets, or green cabinets to add character to your kitchen.
    • Sage Green Kitchen Cabinets: A trending choice that blends well with farmhouse and modern aesthetics.
    • Two-Tone Kitchen Cabinets: Pair white upper cabinets with dark kitchen cabinets below for contrast.
    • How to Make Oak Kitchen Cabinets Look Modern: Sand and stain them in a white oak or gray finish for a sleek update.

    3. Add Trim, Molding, and Panels for a Custom Look

    Want your cabinets to have that high-end, custom look? Try these tricks!:

    • Install Crown Molding: Creates a polished and elegant look at the top of shaker cabinets and frameless kitchen cabinets.
    • Attach Decorative Panels: Apply beadboard, shiplap, or raised panels to enhance cabinet doors.
    • Baseboard or Toe-Kick Upgrades: Adding decorative molding at the base elevates the overall aesthetic.

    4. Upgrade Hardware for a Premium Feel

    A simple hardware swap can completely change the vibe of your kitchen cabinets:

    • Modern Minimalist: Sleek, matte black or brushed gold handles pair well with modern grey kitchen cabinets and european cabinets.
    • Farmhouse Rustic: Antique brass or bronze pulls complement farmhouse sage green kitchen cabinets.
    • Contemporary: Long bar pulls work well with white oak cabinets and navy blue cabinets.

    5. Improve Functionality with Custom Features

    Who says your cabinets can’t be both beautiful and functional? Add these features for a custom touch:

    • Install Pull-Out Shelves: Makes storage more accessible in deep gray kitchen cabinets.
    • Add Lazy Susans: Optimizes corner cabinet space in black cabinet setups.
    • Upgrade to Soft-Close Hinges: Provides a luxury touch for discount kitchen cabinets and kitchen cabinets online.
    • Use Glass Inserts: Replace solid doors with glass panels for a sophisticated look.

    6. Combine Different Cabinet Styles for a Unique Design

    Want your kitchen to feel like it came out of a design magazine? Mix and match these cabinet styles:

    • European Style Cabinets & Shaker Cabinets: Blends modern sleekness with traditional charm.
    • Wholesale Kitchen Cabinets & Custom Panels: Buy wholesale cabinets and modify them with trim and paint for a custom look.
    • Modern Kitchen with Oak Cabinets: Pair dark green kitchen cabinets with white oak cabinets for a natural contrast.

    Final Thoughts

    With a bit of creativity, you can transform your RTA cabinets without breaking the bank. Whether you’re aiming for a sleek modern vibe with black or gray cabinets, or want to give your wholesale kitchen cabinets a high-end touch, these tips will help you create a space that’s both stylish and functional.

  • Can a Homeowner Perform Their Own HVAC Maintenance?

    Source: pexels.com

    Every HVAC system needs regular maintenance to ensure that it works at optimal levels. But can homeowners perform HVAC maintenance or is it something that they should leave to professionals? 

    According to Augusta HVAC services, there are some maintenance tasks that homeowners can perform on their own, but certain tasks should be performed by a professional. Here is everything you should know about homeowner and professional HVAC maintenance.

    DIY Maintenance Tasks 

    There are several DIY maintenance tasks that homeowners can do to ensure that their HVAC system is at peak efficiency. Take the following DIY maintenance tasks into consideration to save on costs and ensure efficiency:

    Change The Air Filters Regularly

    All homeowners should learn how to change their air filters, especially since this is one of the easiest maintenance tasks. Depending on whether you have respiratory issues, allergies, pets, environmental factors, and the type of air filter you use, changing the air filters should occur every one to three months.

    More expensive air filters can last up to six months without any need for replacement. However, you should speak with a professional to understand exactly what type of air filter is best suited for your circumstances. 

    Once you understand what type of air filter is the best for your home, stick with it and replace it according to the manufacturer’s recommendations. If you notice that dirt accumulates too much and too often on your filters, change them and consult a professional to understand what the issues are and whether or not you should upgrade your HVAC system or your air filter.

    Clean the Condenser Unit

    Cleaning the condenser unit is another task that homeowners can do themselves to ensure the efficiency and airflow of their HVAC system. These outdoor units will accumulate debris, leaves, and dirt over time, which can cause issues.

    Although it is generally recommended to clean condenser units every year, you should do it more regularly if too much debris starts to accumulate. 

    Check Thermostat Settings

    The thermostat settings dictate your system usage and should be checked often. Adjust the thermostat settings accordingly to ensure that your HVAC system operates efficiently. Although most HVAC thermostats last for ten years or so, you can ensure their longevity and avoid inaccuracies by regularly cleaning the thermostat.

    Consider cleaning the surface of your thermostat about once a week and the interior once every six months. If you want to get rid of the hassle of thermostat settings and save on costs, consider upgrading your thermostat to a programmable or smart one. 

    Inspect Ductwork

    With ductwork, homeowners should visually inspect it from time to time and check for any leaks or blockages. However, when it comes to fixing things, it’s best to leave it to the professionals. Generally, cleaning should occur every three to five years.

    Clear Drain Lines

    Another DIY maintenance task that homeowners can do themselves is to clear the drain lines. Usually, this should be done every one to three months, just like changing the air filter.

    However, certain factors will influence how often you should clear the drain lines. For example, if you live in an old home, have pets, or the area where you live has high humidity levels, you should clear the drain lines every month for the best results.

    This will help ensure that you avoid mold growth, water damage, and other issues that can have negative consequences on your health and the HVAC system. Use a mixture of vinegar and water to flush the drain lines and prevent clogs.

    Tasks Best Left to Professionals

    As seen above, there are several HVAC maintenance tasks that homeowners can do by themselves but when certain issues appear, it’s best to call a professional. Other maintenance tasks should be conducted by a professional from the start. Here are a couple of tasks best left to them to avoid potential damage to the system and harm to yourself:

    Refrigerant Checks

    Checking and refilling refrigerant levels should be done by trained HVAC technicians because handling refrigerants does not only require specialized knowledge and tools but also professional certification. 

    Checking your refrigerant levels should occur once every couple of years. However, depending on how old your unit is, you can schedule an inspection annually to ensure that everything is in good working condition.

    If you get your refrigerant levels checked annually, you can avoid issues such as ice buildup, leaks, and cooling issues. If you notice that your system makes hissing or bubbling sounds, ice forming on the evaporator coil, or your system no longer cools as effectively as before, call a professional even if maintenance is not yet due. Some of the signs should be addressed properly to discover the issue early and avoid potential system damage.

    Electrical Component Inspection

    All HVAC systems have various electrical components that ensure proper operation. Homeowners should always avoid handling electrical components as it is extremely dangerous.

    Only professionals should do it to ensure safety and compliance with local codes. Have your electrical components inspected, especially the wiring and connections, whenever you observe an issue. It might be a sign of a bigger problem. 

    Comprehensive System Inspections and Tune-ups

    Although homeowners can perform various maintenance tasks related to their HVAC every month or so, that doesn’t mean they should completely avoid a professional inspection. A professional inspection should occur at least once a year to identify any potential issues and ensure that your system operates at peak efficiency.

    Trained technicians can perform thorough evaluations and tune-ups for your system and help you save on costs in the long run by taking care of issues and providing personalized recommendations before anything goes bad and requires repair. Call an HVAC technician right away whenever a big issue occurs, even if it’s not time for the annual inspection.

  • Simple Home Improvement Ideas to Increase Property Value

    Source: pexels.com

    In today’s competitive real estate market, many people want to raise their home’s value without major renovations. Basic simple and inexpensive home improvements enhance one’s house appeal, utility, and efficiency.

    Improvements include fresh paint inside the home and new windows for better curb appeal. You can also update light fixtures, refinish floors, and change hardware.

    Other options are improving bathroom looks, adding smart home devices, and sealing or insulating your home.

    Refresh interior paint

    Neutral tones like beige, gray, or off-white can instantly brighten rooms and make them appear cleaner and more spacious. Opt for neutral tones to appeal to a wide range of buyers and help them envision themselves in the space.

    Upgrade window installations

    Upgrading to new, energy-efficient windows can significantly improve insulation properties and curb appeal. Look for reliable companies like All Weather Seal West Michigan for high-quality window solutions.

    Improve your curb appeal by planting colorful flowers

    Use annuals or perennials for variety.Update your front door and replace old mailboxes. Make sure your walkways and driveways are clean.

    These simple changes can significantly enhance the property’s appeal from the outside.

    Update your lighting fixtures

    Replacing old ones with LED lights can make your home more inviting. This can attract potential buyers.

    Refinishing hardwood floors

    Keeping them in great shape is a big selling point. Hardwood floors are both durable and timeless.

    Update your kitchen hardware

    Replacing old cabinet handles, drawer pulls, and faucets with modern designs can greatly improve the look.

    Improve bathroom aesthetics

    replace outdated faucets, install modern lighting fixtures, or add a new vanity.

    Expand storage space

    by adding shelving units, building custom closets, or using pull-out drawers. This will make homes look neater and more spacious.

    Install smart home devices

    Adding smart technology to your home can attract tech-savvy buyers. It can also help reduce your environmental impact.

      Home improvement projects greatly raise the value of your property, from aesthetic updates to functional improvements. They make life easier and more beautiful; they further enhance market value and, therefore, attract buyers’ eyes. Even the tiniest changes have great effects when it comes to the value of a property.