Tag: Dallas Homes

  • Rough Opening Guide for Doors

    I once watched a DFW handyman tear out fresh drywall because the rough opening was a half inch too narrow for the prehung door sitting on the porch.

    The door was fine. The opening wasn’t. He framed first and shopped second.

    That small mistake cost him an afternoon, a sheet of drywall, and a callback he couldn’t bill for.

    In North Texas, where slab-on-grade foundations, brick veneer, and both 2×4 and 2×6 walls are common, door planning needs to start before the framing is finished. When the rough opening is right, the door is easier to shim, latch, flash, and pass through inspection.

    When it’s wrong, you end up patching drywall, reordering materials, or explaining a delay to the homeowner.

    The safest rule is simple: plan the opening around the door unit, not the other way around. That gives the door the best chance of hanging, swinging, and latching correctly the first time.

    Key Takeaways

    Keep these basics in mind so you can frame once, order once, and avoid the mistakes that slow down the job.

    • Plan the rough opening before you buy: Match the framed opening to the manufacturer’s unit specs and the code requirements used by your local jurisdiction.
    • Egress matters: Every home needs at least one side-hinged egress door with a minimum 32-inch clear width and 78-inch clear height.
    • Exterior prehung doors need clearance: Most major brands call for a rough opening that is about an inch wider and about three-quarters of an inch taller than the assembled door unit.
    • Interior prehung doors need less room: Interior units usually need about half an inch of extra width and height, assuming the opening is square, level, and plumb.
    • Jamb depth has to match the wall: Common jamb depths are 4-9/16 inches for a 2×4 wall and 6-9/16 inches for a 2×6 wall, assuming half-inch drywall on both sides.
    • Sidelites change the math: A sidelite is the fixed glass panel beside the door, and it can add a lot of width to the required rough opening.
    • Flash exterior openings correctly: In the Dallas-Fort Worth area, a sill pan and self-adhered flashing tied into the wall wrap are essential for keeping wind-driven rain out of the wall assembly.

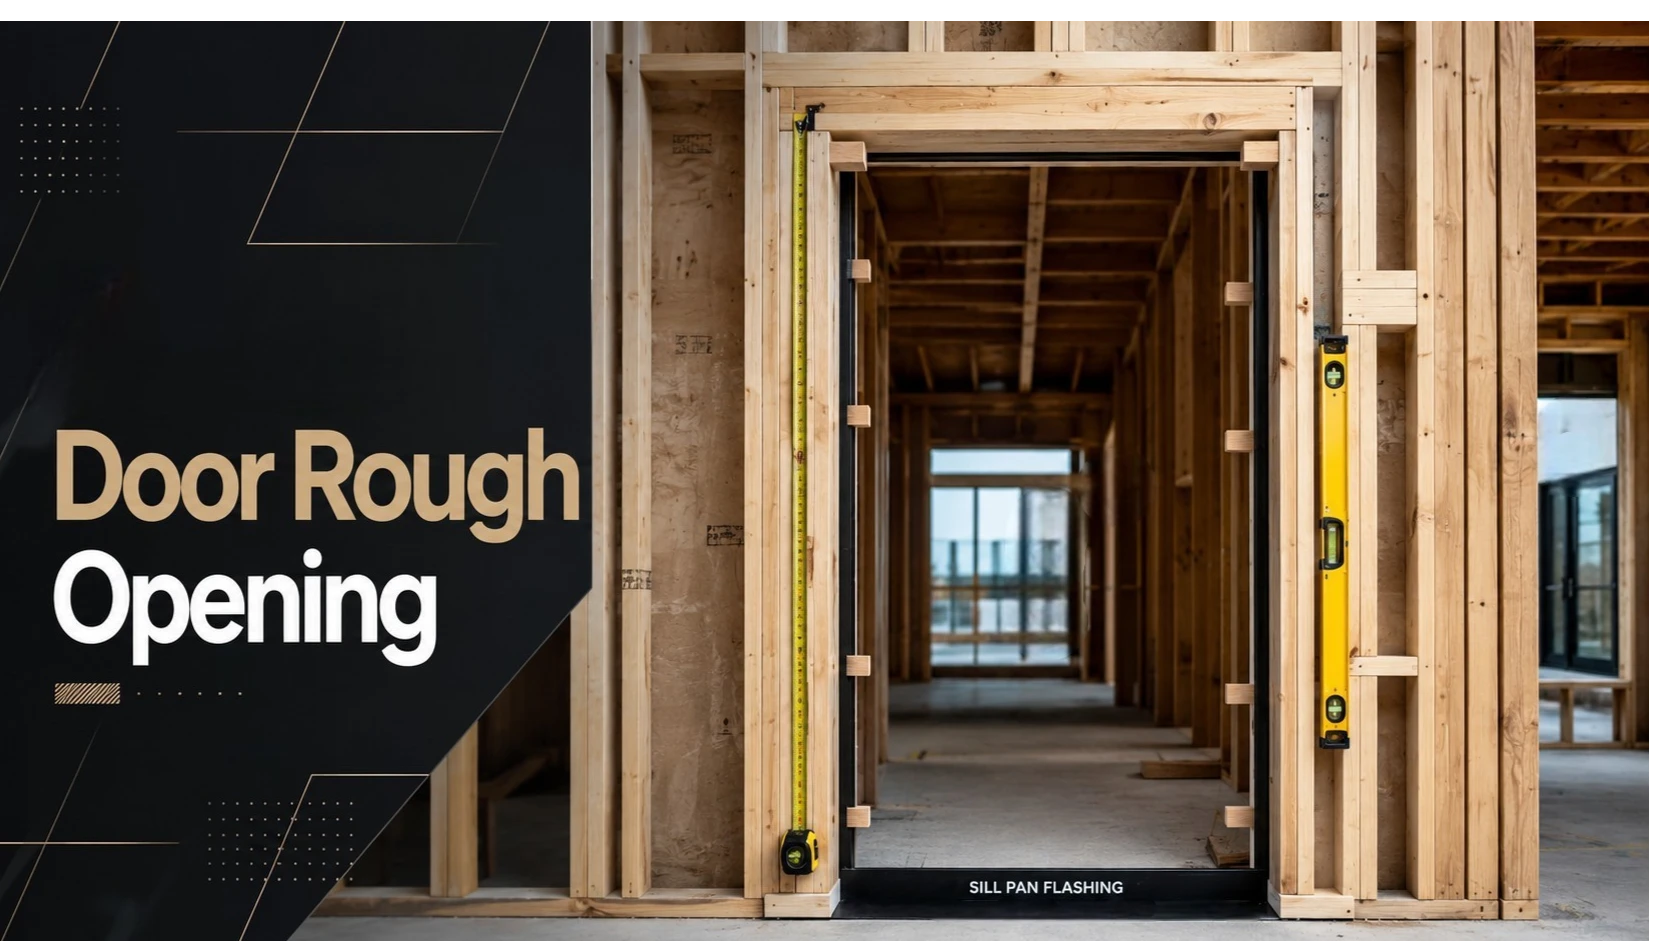
    What Is a Rough Opening, and Why Does It Matter?

    A rough opening is the framed space that holds the door unit, the shims, and the small adjustments needed during installation.

    It is measured from stud to stud and from the subfloor to the bottom of the header. The opening needs to be larger than the assembled door unit so there is enough room to plumb, level, and square the jamb before fastening it in place.

    It helps to know the framing terms. King studs run the full height of the wall. Jack studs support the header. Cripple studs fill the space above the header. The header carries the load over the doorway. When you buy a prehung door, the slab is already mounted inside the jamb.

    Do not confuse clear width with rough opening width. Clear width is the usable walk-through space when the door is open 90 degrees. Rough opening width is the stud-to-stud measurement. The outside width of the door unit falls between those two numbers.

    Most prehung doors need about half an inch of shim space on each side. Head clearance depends on the brand, threshold, and jamb design. Major manufacturers generally recommend keeping the extra width close to an inch total, so always check the installation sheet before framing or setting the door.

    Why You Should Plan the Rough Opening First

    Planning the rough opening early saves labor, reduces waste, and helps prevent service calls later.

    Faster Installation

    A square, level, and plumb opening lets you focus on setting the door instead of shaving studs, fighting bowed framing, or packing huge shim stacks into oversized gaps. On a remodel with multiple doors, that can save hours.

    Fewer Material Returns

    Accurate rough opening measurements help you avoid wrong-size units and jamb-depth mistakes. In the real estate market, one house may include both 2×4 and 2×6 walls, so verifying jamb depth before ordering matters.

    Fewer Callbacks

    North Texas clay soil can shift enough to expose weak door installation. Proper shim space, straight framing, and long hinge screws driven into the wall framing help keep the reveal even and the latch working smoothly.

    Common Door Rough Opening Sizes

    Standard planning sizes are useful early in the project, but the manufacturer’s spec sheet should always control the final rough opening.

    • Interior single prehung doors: A common planning rule is to add about two inches to the slab width and two inches to the slab height. For example, a 30×80 slab often needs a rough opening around 32×82. Exact tolerances vary by brand.
    • Exterior single prehung doors with a threshold: A standard 36×80 front entry unit often needs a rough opening around 38 inches wide and 82 to 82-1/2 inches tall. The final number depends on the threshold, trim, and jamb profile.
    • Entry doors with sidelites: Add the manufacturer’s sidelite width to the rough opening. Some framing tables allow about 1-1/2 inches for one sidelite and 3 inches for two, but the exact unit build should always be confirmed before cutting lumber.
    • Eight-foot doors: Check the full assembled unit height, not just the slab size. You may need to frame a higher header or adjust the floor transition to keep the exterior landing code-compliant.
    • Bifold, bypass, pocket, and barn doors: These systems use their own track kits and framing rules. Do not use standard swing-door rough opening dimensions for sliding or folding doors.

    How to Measure a Rough Opening

    Measure the width, height, and wall depth in multiple places. When ordering a door, use the smallest measurement.

    Major brands such as JELD-WEN recommend taking three horizontal measurements and using the smallest one. That helps ensure the replacement unit fits even if the framing is not perfectly straight.

    Step 1: Expose the framing

    Remove the interior casing so you can see the true stud-to-stud opening. For exterior doors, confirm whether you are measuring from the bare subfloor or from the finished sill reference point.

    Step 2: Measure the width

    Measure between the trimmer studs at the top, middle, and bottom of the opening. Write down the smallest number, not the average.

    Step 3: Measure the height

    Measure from the subfloor or finished floor to the bottom of the header on the left, center, and right sides. If hardwood, tile, or another finished floor will be installed later, account for that buildup now so the door does not drag.

    Step 4: Measure the wall depth

    On interior walls, measure from the face of the drywall on one side to the face of the drywall on the other. On exterior walls, measure the full wall thickness. This tells you whether you need a 4-9/16-inch jamb, a 6-9/16-inch jamb, or custom jamb extensions.

    Step 5: Check for plumb, level, and square

    Put a level on both trimmer studs, check the header, and compare the diagonal measurements. If a stud is bowed, twisted, or out of plumb, fix the framing before ordering or setting the door.

    If your measurements are inconsistent or the header looks off, use a visual guide before sending the numbers to your supplier. Doors for Pros has a useful walkthrough on measuring a door rough opening. It is a good field check before you order.

    For most prehung doors, keep about half an inch of shim room on each side. If the existing opening gives you less than that, reframe it before installation.

    How to Frame the Rough Opening Correctly

    Straight studs, proper clearance, and good flashing matter just as much as the final dimensions.

    Lay out the framing first

    Set the full-height king studs, then install the jack studs that support the header. Size the header according to IRC span tables or an engineered detail when the opening is wide or carrying a heavy load. Fill the space above the header with cripple studs up to the top plate.

    Straighten the opening before the door arrives

    Plane, shim, or replace bowed studs before setting the unit. The hinge-side trimmer should be plumb because even a small crown can create an uneven reveal from top to bottom.

    Keep the planned clearance

    Do not tighten the rough opening just because it looks cleaner during framing. That extra space is what lets you make small adjustments during installation.

    Prepare exterior openings for water

    Install a sill pan and tie the self-adhered flashing into the house wrap so water drains out instead of into the wall. In Climate Zone 3A, which includes warm and humid areas like Dallas County, this is basic protection against heat, humidity, and wind-driven rain.

    Prepare interior openings for support

    Dry-fit the unit, pre-shim the hinge side if needed, and use long screws through the top hinge. Those screws need to bite into the wall framing, not just the soft jamb.

    Code Checkpoints for North Texas Door Installations

    Inspectors commonly focus on clear width, exterior landing heights, garage fire separation, and water management.

    Dallas and Fort Worth currently use the 2021 International Residential Code with local amendments. but DFW jurisdictions vary. Some cities, like Frisco, have already moved to the 2024 codes, so verify the adopted code with the local authority before framing or ordering.

    • Primary egress door: Every house needs at least one side-hinged egress door with a minimum 32-inch clear width and 78-inch clear height. The clear width is measured from the face of the open door to the door stop with the slab open 90 degrees.
    • Exterior landing heights: At the required egress door, the interior floor landing cannot be more than 1-1/2 inches below the top of the threshold. Other exterior doors may allow a larger step-down in certain situations, but local amendments can change the rule.
    • Garage-to-dwelling fire separation: The door between the garage and the dwelling must be self-closing and self-latching, and must be a solid wood door, a solid or honeycomb-core steel door at least 1-3/8 inches thick, or a 20-minute fire-rated door. Inspectors may check the self-closing action on site, so do not rely on the fire label alone.
    • Climate note: Dallas County is in IECC Climate Zone 2A under the 2021 IECC. Some surrounding North Texas counties remain in Climate Zone 3A, so always confirm the project’s county and local jurisdiction before applying energy-code assumptions.

    How to Shim, Set, and Troubleshoot the Door

    Set the hinge side first, lock that vertical plane in place, and then adjust the rest of the unit around it.

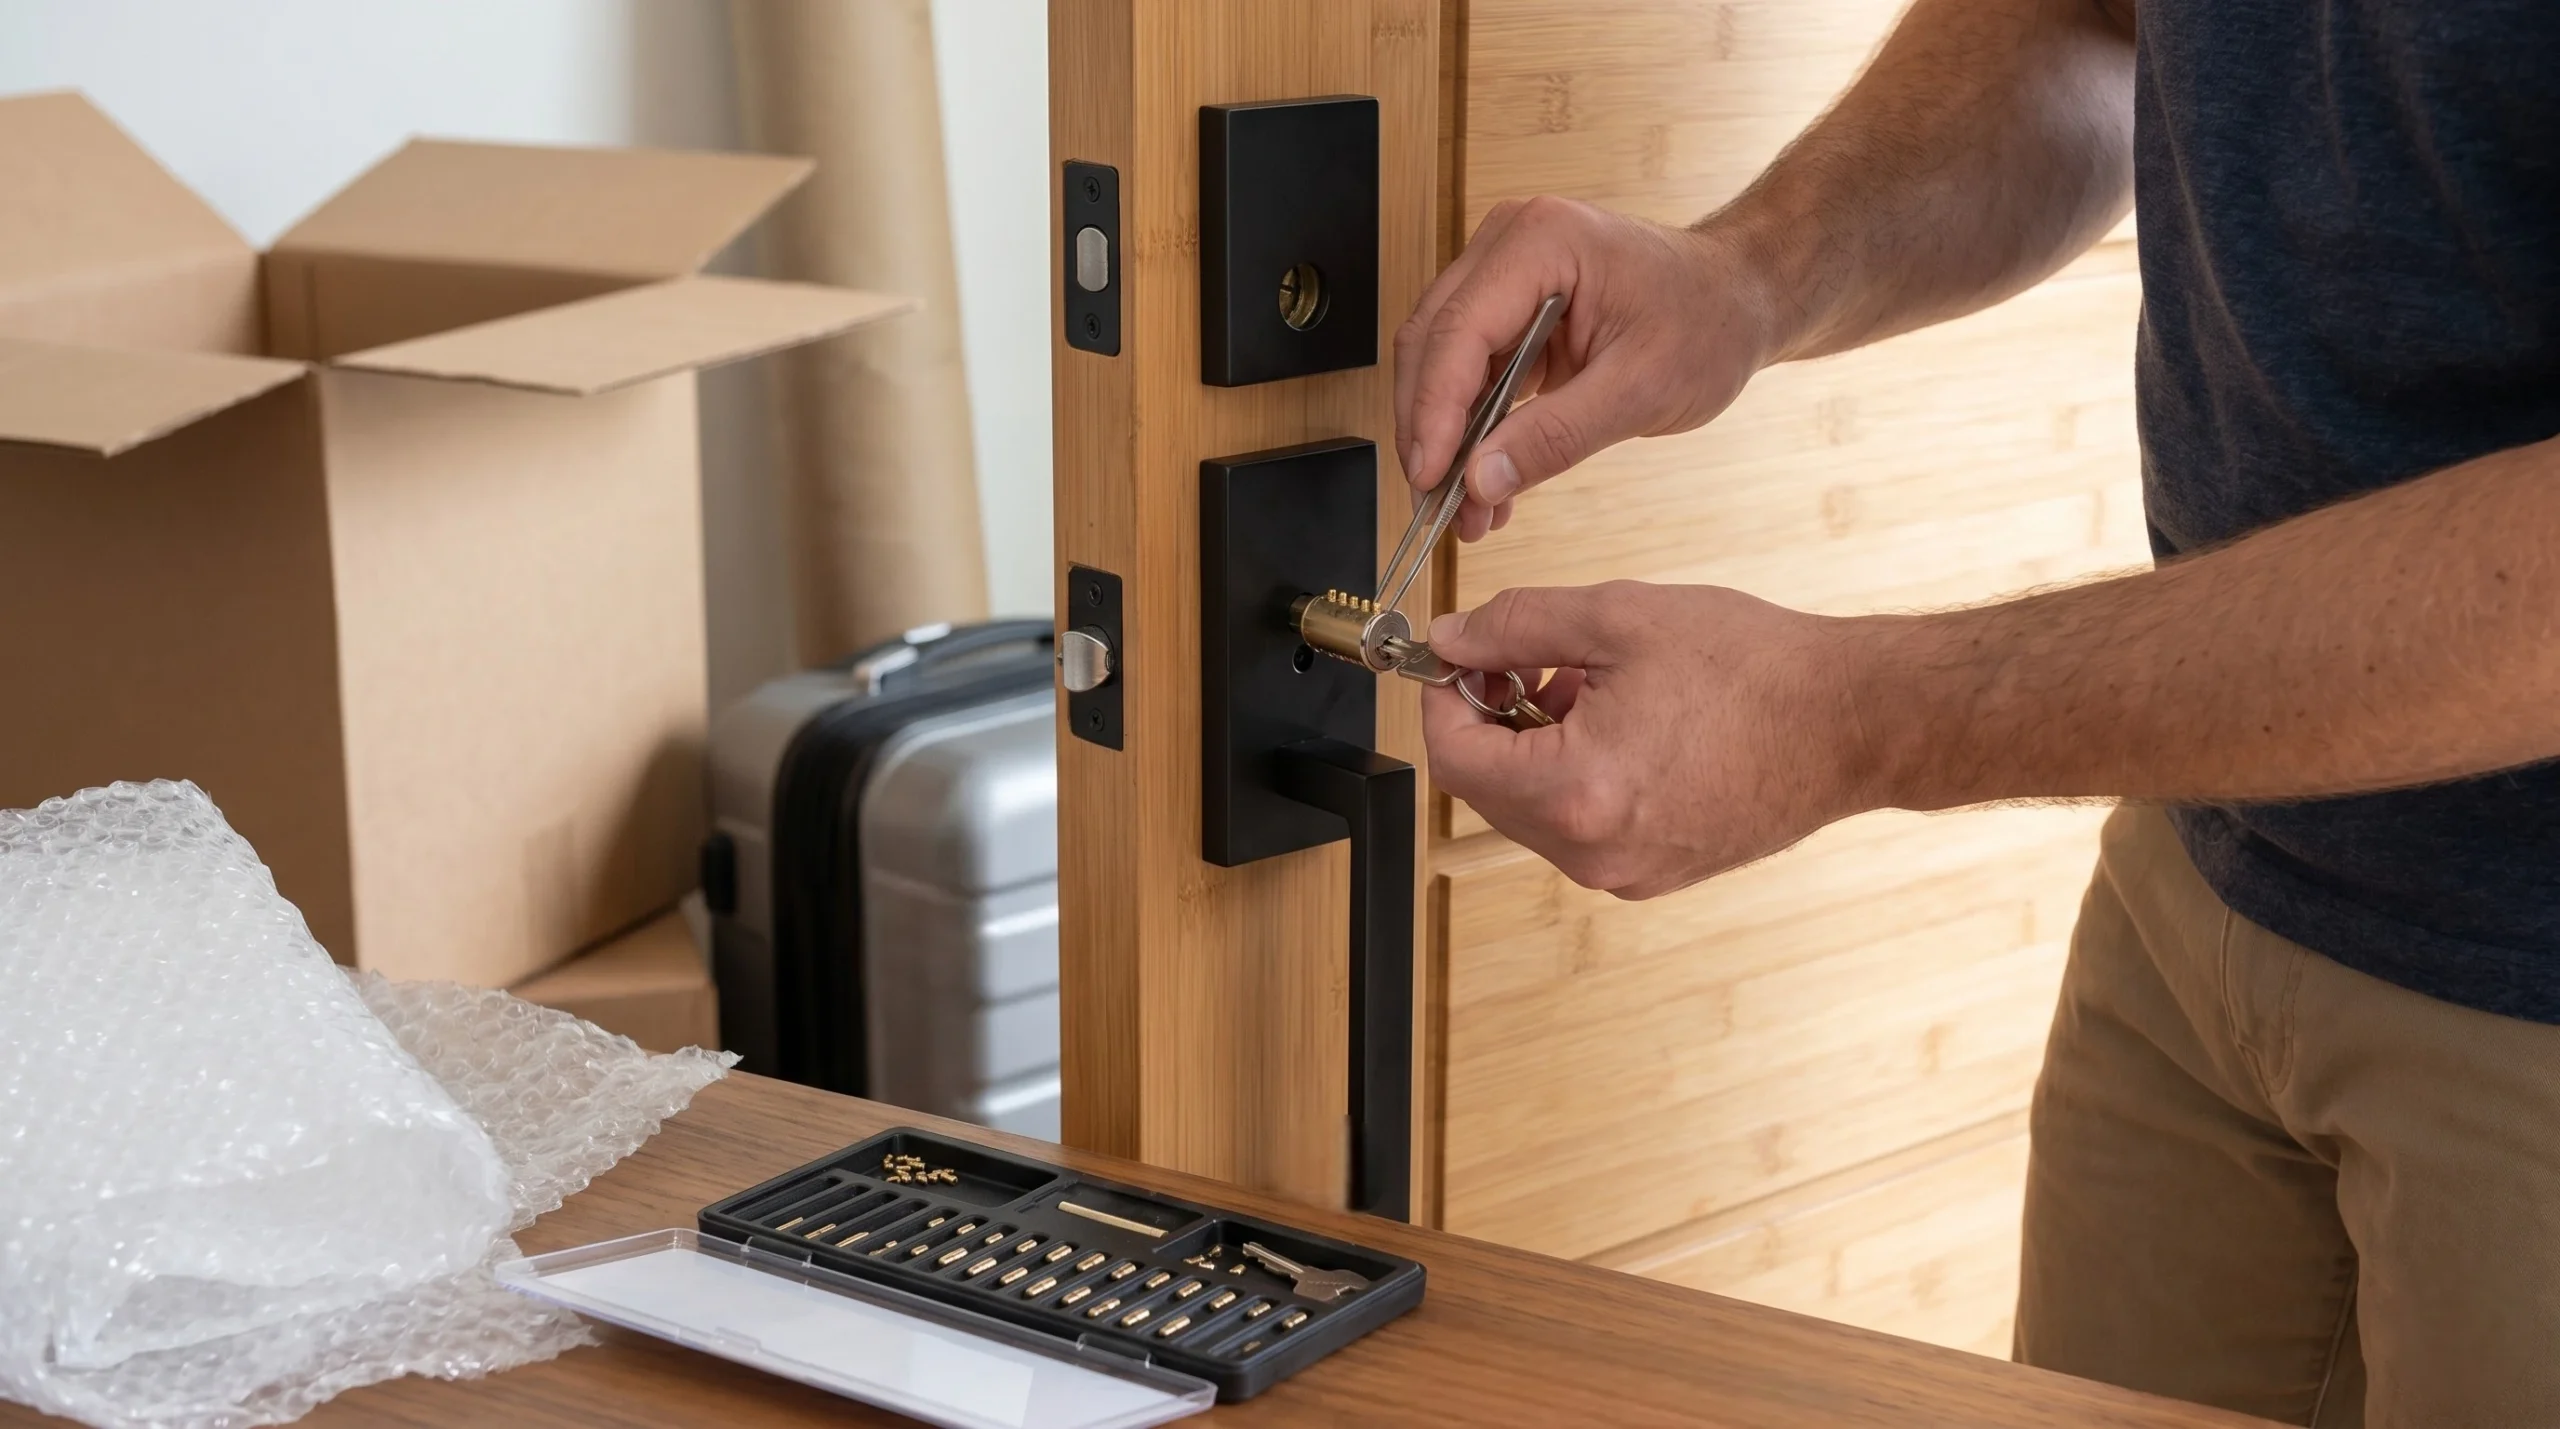
    Set the sill on the pan, tilt the unit into the opening, and fasten the hinge side through the shims. Drive long screws through the top hinge and into the framing. Once the hinge side is secure, adjust the latch side and head jamb until the reveal is even around the slab.

    Before installing casing, check the swing, latch engagement, and weatherstrip compression. A small bind is much easier to fix before the trim goes on.

    • If the rough opening is too small, reframe it. Forcing a prehung door into a tight opening removes the adjustment space and usually causes a bad reveal or sticky latch.
    • If the rough opening is too large, add solid filler framing. Do this wherever the shim stacks would be too thick. Also confirm that the casing will still cover the drywall gap.
    • If the jamb depth does not match the wall, fix the jamb. Use custom jamb extensions or reorder the door with the correct jamb depth. A 4-9/16-inch jamb in a 2×6 wall will leave a gap that standard casing will not hide.
    • If the studs are out of plumb, correct the framing first. Trying to solve bad framing with oversized shim stacks usually creates another door problem.

    A Quick Closeout Checklist

    A quick closeout check can catch most fit and code issues before trim, inspection, or handoff.

    Before calling for inspection or turning the project over to the homeowner, confirm the following:

    • The rough opening matches the manufacturer’s size tolerances.
    • The opening is square, level, plumb, and properly flashed for exterior exposure.
    • The hinge side is locked in place with long screws driven into structural framing.
    • The door reveal is even, the latch works smoothly, and the sweep and threshold are adjusted.
    • Egress sizes, exterior landing heights, and garage fire-separation rules have been checked where they apply.
    • The door model, jamb depth, and final rough opening dimensions are recorded in the project notes.

    Quality door work starts before the delivery truck arrives. The cleanest installations come from accurate measurements, straight framing, proper shim space, and flashing that can handle the local climate.

    Frequently Asked Questions

    How much bigger should the rough opening be than the door?

    It depends on whether you are measuring the slab or the assembled prehung unit. Most exterior prehung doors need a rough opening about an inch wider and about three-quarters of an inch taller than the unit’s outside dimensions. Most interior units need about half an inch of extra width and height. The manufacturer’s installation sheet is the final authority.

    What is the rough opening for a standard 36×80 front entry door?

    A common framing range is about 38 inches wide by 82 to 82-1/2 inches tall for a standard 36×80 exterior prehung unit. The exact size depends on the threshold, jamb, and trim profile, so confirm the manufacturer’s specs before cutting.

    Do I need a sill pan for an exterior door in North Texas?

    Yes. A sill pan and proper flashing are inexpensive protection against water intrusion. In the Dallas-Fort Worth area, wind-driven rain can push moisture into small gaps, so the pan should drain outward and tie into the rest of the flashing system.

    How do I choose between a 4-9/16-inch and 6-9/16-inch jamb?

    Measure the actual wall thickness on site. A typical 2×4 wall with half-inch drywall on both sides uses a 4-9/16-inch jamb. A 2×6 wall with the same drywall setup uses a 6-9/16-inch jamb. For non-standard wall thicknesses, order custom jamb extensions.

    What kind of door is required between the garage and the house?

    Under IRC R302.5.1, the opening between the garage and the dwelling requires a self-closing solid wood door, a solid or honeycomb-core steel door at least 1-3/8 inches thick, or a 20-minute fire-rated assembly. In practice, inspectors may verify both the door material and the self-closing hardware during the final inspection.

  • Hidden Property Value Beyond the Listing Price

    A property’s true value goes far beyond the asking price and a fresh coat of paint. In the DFW market, two properties with the exact same square footage and finishes can perform very differently over time. Why? Because location, ownership rights, zoning, and future development all dictate a property’s long-term worth.

    A high-priced property might actually be a bargain if it offers serious commercial upside, redevelopment opportunities, or sits in a rapidly growing neighborhood. On the flip side, an affordable home often hides costly repairs, drainage issues, title concerns, or restrictive HOA rules.

    Smart buyers look beyond the photos. They study legal documents, operating costs, neighborhood trends, and future usability before making an offer. Whether you are buying a family home or a commercial investment, this guide explains the hidden factors that actually drive real estate value in North Texas.

    What Does Hidden Property Value Actually Mean?

    Hidden property value boils down to a property’s real-world usefulness and long-term upside. It includes legal rights, location quality, future development potential, and the flexibility to use the property how you want.

    In the Metroplex, hidden value often comes from zoning flexibility, nearby growth, parking access, rental potential, and road visibility. A property near expanding retail or employment corridors will naturally appreciate faster than one in a stagnant area.

    But hidden value can also work against you. Foundation damage, flood risk, old plumbing, unclear title history, or strict deed restrictions can kill your investment, even if the building looks attractive during a showing.

    The Hidden Value Factors That Matter Most

    These are the specific details that make or break your future resale value, ownership flexibility, income potential, and long-term operating costs:

    • Ownership rights and title history
    • Zoning rules and HOA restrictions
    • Neighborhood growth and redevelopment
    • Utility access and drainage conditions
    • Renovation and maintenance needs
    • Commercial or rental potential
    • Parking access and road visibility
    • Future infrastructure nearby

    Buyers who review these areas early make better financial decisions and avoid costly surprises at the closing table.

    Listing Price vs. True Property Value: What Is the Difference?

    The listing price is just a number the seller wants, while the true property value reflects what the property is realistically worth over time. The difference matters because visible upgrades do not always equal strong long-term value.

    A remodeled kitchen or fresh paint may look great, but foundation problems, zoning restrictions, or high operating costs will quickly drain your equity. Meanwhile, an outdated property in a fast-growing corridor may hold massive untapped value.

    Here’s a quick comparison:

    Listing PriceTrue Property Value
    Based on what the seller wants or expectsBased on the property’s real long-term worth
    Often influenced by appearance and market positioningLooks deeper at condition, ownership rights, and actual risks
    Rarely accounts for hidden issuesIncludes hidden risks that could affect value
    Works as a starting point for negotiationShould guide your final offer

    Always review the title history, easements, deed restrictions, liens, and HOA rules before committing to any property. These legal details control what you actually own and what you are legally allowed to do with it.

    An easement may limit where you can build an addition. HOA rules may restrict rentals (like Airbnb), parking, fencing, or running a business out of the property. Older properties may also carry outdated surveys or unresolved permits.

    Important documents to request include:

    • Title commitment
    • Seller disclosures
    • Property survey
    • HOA documents
    • Permit history
    • Easement records
    • Tax history
    • Zoning confirmation (for commercial use)

    What Are Mineral Rights and Why Do They Matter in Texas?

    Mineral rights are property rights connected to underground resources like oil and gas. In Texas, it is very common for these rights to be separated from surface ownership. This means you might own the house, but someone else owns the rights to the resources underneath it.

    This matters because mineral ownership can affect long-term property value and future financial opportunities. Always confirm whether any mineral interests are included in the sale and whether previous leases or reservations exist.

    Understanding mineral rights value helps explain why some Texas properties hold value beyond the surface land itself.

    How Easements, HOA Rules, and Deed Restrictions Affect Value

    These rules directly impact your property value by limiting your flexibility. Some restrictions protect neighborhood quality, while others can become a massive headache.

    A utility easement may block future construction plans. HOA rules may limit rentals, parking, landscaping, or exterior changes. Deed restrictions may prevent commercial use or specific renovations.

    Never assume you can freely modify a property without reading the fine print first.

    Why Location is More Than Just a Zip Code

    Location creates value by driving convenience, resale demand, safety, and future growth. In Dallas, location quality almost always trumps cosmetic upgrades.

    Properties near strong job centers, retail growth, highways, schools, or transit access hold stronger long-term value. Commercial properties with good visibility naturally attract more business traffic and future redevelopment interest.

    Buyers should evaluate:

    • Commute patterns
    • Flood and drainage history
    • School district quality
    • Nearby retail and grocery access
    • Future development projects
    • Walkability and traffic flow
    • Noise from highways or nightlife

    A property’s surroundings often shape its future value more than the building itself.

    Spotting Commercial and Mixed-Use Potential

    If you are looking at real estate from an investment standpoint, commercial potential is a huge factor. It is the ability of a property to support business activity, mixed-use conversion, rental income, or future redevelopment. Many transitional neighborhoods continue to shift toward mixed residential and commercial zoning.

    Depending on local laws, a property may support retail, office, café, medical, or foodservice use. Even residential buyers should pay attention to nearby commercial activity because it affects traffic, convenience, taxes, and resale value.

    The most important issue is permitted use. A building may look ideal for a storefront, but it might still require zoning approval, parking upgrades, or utility improvements before you can open for business.

    The Value of Signage and Street Visibility

    For commercial buyers, street visibility increases property value because businesses thrive on customer exposure and traffic. Retail, restaurant, and service-based properties command higher prices when they sit on busy corridors with clear frontage.

    Visibility depends on road traffic, signage placement, lighting, and nearby intersections. However, always confirm local permit and zoning rules before assuming large signs or illuminated displays are allowed.

    Existing Infrastructure: Kitchens and Foodservice

    Kitchen or foodservice potential matters hugely when a property could support a restaurant, café, bakery, ghost kitchen, or catering operation.

    Foodservice properties require heavy-duty plumbing, ventilation, electrical capacity, refrigeration space, and fire safety systems. A building with these systems already installed saves buyers tens of thousands of dollars in renovation costs.

    When reviewing restaurant layouts and equipment needs, information about commercial kitchen equipment helps buyers understand how infrastructure affects long-term business value.

    Hidden Costs That Destroy Your Budget

    Renovation and operating costs can significantly change the true cost of ownership. A property with a low purchase price may still require major spending after closing.

    The biggest cost factors include:

    • Roof and foundation repairs
    • HVAC replacement
    • Plumbing and electrical upgrades
    • Insurance premiums
    • Property taxes
    • Utility costs
    • Permit and compliance expenses
    • Drainage correction work

    Commercial properties may also require ADA improvements, grease traps, parking changes, or fire safety upgrades. You need to estimate these costs before negotiating the final price.

    How to Spot Hidden Value Before You Buy

    Auditing hidden property value means reviewing the legal, structural, financial, and future-use details before purchasing.

    Follow these six key steps:

    1. Review the listing carefully for missing details or vague descriptions.
    2. Check title history, easements, and ownership records.
    3. Confirm zoning and permitted use.
    4. Hire inspectors to evaluate the structure and systems.
    5. Estimate repair, tax, insurance, and utility costs.
    6. Compare future resale or rental potential with nearby properties.

    Questions You Need to Ask Your Agent and Inspector

    Buyers should ask questions that reveal repair risk, legal limitations, and future costs.

    Important questions include:

    • Are there title or lien concerns?
    • Does the property have drainage or foundation issues?
    • How old are the roof and HVAC systems?
    • Are there HOA or zoning restrictions?
    • Is the property in a flood-prone area?
    • Are permits available for past renovations?
    • What nearby developments may affect value?

    These questions often reveal problems that are impossible to spot during a property showing.

    Red Flags That Turn Value Into Risk

    Hidden value becomes hidden risk when attractive features are outweighed by structural problems, legal restrictions, or unrealistic renovation assumptions.

    The biggest warning signs include:

    • Unclear ownership or title history
    • Major foundation movement
    • Flood or drainage issues
    • Restrictive zoning rules
    • High insurance costs
    • Unrealistic renovation estimates

    Always be skeptical when properties are heavily discounted without a clear explanation.

    The Bottom Line

    You should look beyond the listing price because true property value depends on far more than appearance. Ownership rights, zoning, location quality, operating costs, and future use all shape long-term value.

    A property with strong fundamentals will easily outperform a more attractive home in a weaker location. At the same time, hidden repairs or legal restrictions can quickly turn a cheap property into an expensive nightmare.

    The smartest buyers treat every property as both a functional space and a long-term financial asset.

  • 5 Things Homeowners Get Wrong About Home Security

    Most homeowners don’t realize there are gaps in their home security until something goes wrong. And by then, it’s too late.

    Fortunately, most of these mistakes are easy to fix and don’t require spending a lot of money. You just need to know what to look for. Whether you just moved into a home in Frisco, Garland, or Oak Cliff, or you’ve lived in DFW for years, this guide walks you through the most overlooked security mistakes and exactly what you can do about each one.

    1. Why Dallas Homes Face Unique Security Challenges

    Dallas is growing fast. New neighborhoods are popping up while older ones are being revitalized. That rapid growth creates a mixed landscape where new homeowners may not know the local vendors, service providers, or even their own neighbors yet.

    Older DFW neighborhoods like East Dallas and Oak Cliff often have mature landscaping and older door hardware making them easier to exploit. Newer suburbs like McKinney, Prosper, and Celina have large homes with multiple entry points and sprawling lots. Both come with their own set of security blind spots.

    These are just fixable gaps that most homeowners never think about until there’s a problem. Let’s dive in.

    2. Common Mistakes With Locks, Keys, and Entry Points

    Not Rekeying After Moving In

    This is one of the most common oversights new homeowners make. When you move into a home, you have no idea how many people have a copy of the front door key. Previous owners, their family members, past housekeepers, contractors, real estate agents, and neighbors could all have access. This is especially true for first-time buyers who are focused on settling in and might not think about who had keys before them.

    The fix is simple. Rekey your home within the first week. This doesn’t mean replacing your locks entirely. Rekeying just changes the internal pins so old keys no longer work. It’s affordable, usually under $150 for a whole house, and gives you complete control over who gets inside.

    Don’t forget the garage side door and any rear entry points. Those are just as important as the front door.

    Calling the Wrong Locksmith in a Panic

    Imagine getting locked out of your home at 9 p.m. You grab your phone, search for a locksmith, and tap the first result you see. That split-second decision can turn into a nightmare.

    Locksmith scams are more common than most people realize, especially in busy metro areas like Dallas-Fort Worth. Fake listings with local phone numbers, unusually low price quotes, and unlicensed technicians are everywhere. Once they arrive, prices balloon, shoddy work gets done, and you might have just handed a stranger access to your home.

    Before you’re ever in that situation, take ten minutes to read a solid locksmith scam prevention guide so you know exactly what red flags to watch for. Then save a trusted, licensed locksmith number in your phone so you never have to search during a crisis.

    3. Door, Window, and Outdoor Access Oversights

    Ignoring Sliding Doors and Window Locks

    Sliding glass doors are extremely common in Dallas homes, and they’re often the weakest entry point. A basic latch isn’t enough. With the right technique, intruders can lift sliding doors off their tracks entirely.

    The fix is easy and cheap. Place a cut-down wooden dowel or a metal security bar in the track so the door can’t slide or be lifted. You can also add a secondary pin lock at the top of the frame for extra reinforcement. Ground floor windows and second-floor windows near flat rooftops or trees need the same attention.

    Forgetting About the Garage

    The garage is one of the most overlooked entry points in any home. Older garage door systems with fixed-code technology can be hacked with basic tools. Plus, the door connecting your garage to your living space is often a hollow-core door with a simple knob lock.

    Treat the door from your garage into your home exactly like your front door. Install a solid deadbolt. If your garage door opener is more than a decade old, consider upgrading to a smart system with rolling code technology and real-time alerts.

    4. Lighting and Landscaping Blind Spots

    Letting Landscaping Provide Cover

    Dense shrubs next to windows and entryways might look great, but they give intruders a place to hide. This is especially common in older Dallas neighborhoods where mature trees and hedges have grown right up against the house.

    Keep bushes trimmed below window height. Make sure side gates and rear entries are clearly visible from the street or a neighbor’s yard. Visibility is one of the simplest and best deterrents.

    Relying on Static Lighting Instead of Motion Sensors

    A porch light left on all night eventually becomes background noise that nobody notices, including potential intruders. Motion-activated lights work much better because the sudden burst of light is startling and immediately draws attention.

    Install motion lights near your side gates, the rear of your property, and your driveway. These are the spots a standard light usually misses.

    5. Camera and Smart Device Errors

    Poor Camera Placement

    Most homeowners place cameras where they look good rather than where they work best. A camera staring down the street looks thorough but misses the actual angles of approach, like doorways and pathways.

    Point your cameras at door frames and ground-level walkways. You want to capture faces and body height clearly. If a camera can’t identify a person, it’s not doing its job.

    Ignoring Smart Device Settings

    A video doorbell without cloud recording or a smart lock without alert notifications is just a decoration. Many homeowners set these up and never configure them properly.

    Enable cloud or local backup recording on your cameras. Set your motion alert sensitivity carefully. Dallas summers bring heat shimmer and strong winds that can trigger constant false alarms, which might cause you to ignore the notifications altogether.

    The Bottom Line

    Home security doesn’t have to be expensive or complicated. Most security gaps come down to small oversights that are completely fixable once you know what to look for.

    Start with the two highest-impact steps: rekey your locks as soon as you move in, and make sure you know how to spot a fraudulent locksmith before you need one in a hurry. From there, work through your lighting, landscaping, cameras, and entry points one by one.

    Taking a few small, consistent steps today will protect your home and your family for years to come.

    Frequently Asked Questions

    How much does it cost to rekey a home in Dallas?

    Most Dallas locksmiths charge between $15 and $25 per lock cylinder, plus a service call fee of around $50 to $75. A full home rekey typically comes in under $150 and is one of the best low-cost security investments you can make.

    How do I verify that a Dallas locksmith is properly licensed?

    Texas requires all locksmiths to hold a license through the Texas Department of Public Safety. Always ask for the license number before any work begins and verify it on the DPS website. A legitimate locksmith will have no problem providing this information.

    Are video doorbells and smart cameras enough for DFW home security?

    They’re a strong first layer, but they work best when combined with motion lighting, solid deadbolts, and a monitored alarm system. Technology alone isn’t a complete solution without good physical hardware backing it up.

    Which part of your home are you forgetting to secure?

    The garage. Both the garage door itself and the interior door connecting the garage to the main living area are frequently left undersecured. Treat that interior door the same way you treat your front door, using a proper deadbolt and a reinforced frame.

  • Pier and Beam Foundation

    A pier and beam foundation is a construction method used to elevate a house structure above ground level using vertical support piers and horizontal beams as the main load-bearing system. This setup keeps the floor from sitting directly on the soil or a concrete slab, instead placing it above an open space known as a crawlspace.

    A crawlspace is a shallow, narrow space beneath the ground floor of a house built above the soil. It provides access to the underside of the home for structural inspections, plumbing repairs, electrical wiring, HVAC systems, and other utilities. The height of a crawlspace can vary depending on the home’s design, the age of the building, and local construction standards. Typically, it’s built just high enough for a person to enter and carry out inspections or repairs.

    The pier and beam system was commonly used in homes across the United States in the 1950s, including in areas like Dallas and North Texas, before slab-on-grade foundations became the standard due to post–World War II demands for faster and more cost-efficient construction. While many homes today use slab foundations, plenty of people still choose pier and beam for custom builds, historic renovations, and properties that need easy access to utilities beneath the floor.

    The main difference between the two is that a slab-on-grade foundation is a shallow system made of reinforced concrete poured directly on the ground, while a pier and beam foundation transfers the building load through the floor framing to the main beams, then down to the support piers and the soil beneath.

    This pier and beam foundation system works well in areas like Dallas and North Texas, where expansive clay soil is common. Clay tends to swell when it holds moisture and shrink when it dries out. These shifts in soil volume can cause a foundation to move, settle, tilt, or become uneven. That’s why pier and beam is often preferred—it’s easier to inspect and repair since everything is accessible through the crawlspace.

    Why Pier and Beam is Common in Dallas and North Texas

    The pier and beam system is a traditional construction method widely used in wood-frame homes and low-rise buildings in the United States. It’s commonly chosen because the construction is relatively straightforward, the materials are easy to source, and it works well for homes that need airflow and utility access beneath the floor.

    In the Dallas–Fort Worth area, pier and beam foundations are commonly found in older homes in neighborhoods like East Dallas, Oak Cliff, Lakewood, Bishop Arts, older parts of Highland Park, and other historic areas. Many of these homes were built in the early to mid-20th century, when pier and beam was still a standard foundation method for residential construction.

    One reason the pier and beam system is still used today is that many areas in North Texas have expansive clay soil that’s highly sensitive to moisture levels. During rainy periods, the soil absorbs water and expands. In long, dry summers, it loses moisture, shrinks, and can crack. In contrast, homes built on slab foundations can experience cracking or uneven settling of the concrete when the soil shifts. This cycle repeats year after year and can put significant stress on a home’s foundation.

    That’s why the pier and beam system is still used today. Even so, it requires consistent maintenance, especially when it comes to drainage, moisture control, and the condition of the wood components beneath the house.

    How a Pier and Beam Foundation Works

    A pier and beam foundation consists of several main components that support the structure, including piers, beams, joists, the subfloor, and the crawlspace.

    Here is a breakdown of the core components:

    • Piers are vertical support columns that serve as the main load-bearing points of the foundation. They can be made from poured concrete, concrete blocks, brick, steel, or helical pier systems. In older homes around Dallas, it’s still common to find piers made of brick or concrete blocks. Today, contractors typically use concrete piers, steel piers, or helical piers for foundation repairs, depending on soil conditions, structural design, and the level of damage.

      Piers usually rest on footings, concrete pads, or deeper, more stable soil layers to help distribute the building’s load more evenly and provide better support.
    • Beams are the main horizontal members installed on top of the piers. They are typically made from heavy timber, although in some cases they may be reinforced with steel or other materials. Beams carry the load from the floors and walls of the house and transfer it down to the piers.
    • Joists are smaller floor framing members installed across the beams. They support the subfloor, which is the base layer of the home’s flooring system. If the joists weaken, sag, or begin to rot, the floor can feel uneven, sloped, or overly bouncy when walked on.
    • The subfloor is the base layer of flooring installed on top of the joists. It’s the surface where finished flooring like hardwood, vinyl, tile, or carpet is placed. The condition of the subfloor is heavily influenced by the strength of the joists and the moisture levels in the crawlspace.
    • As for the crawlspace, as mentioned earlier, it’s the open space beneath the house and a defining feature of a pier and beam foundation. This area often becomes a source of problems if it’s damp, poorly ventilated, exposed to rainwater intrusion, or lacks proper moisture protection.

    Here’s the load path in a pier and beam foundation system:

    floor → subfloor → joists → beams → piers → footing or supporting soil

    Because of this, the overall strength of the system depends heavily on how well the wood framing, the piers, and the underlying soil conditions all work together.

    Below, we’ll take a deeper look at how the pier and beam foundation system works.

    Cutaway view of pier and beam foundation components under a home
    How a Pier and Beam Foundation Works

    The mechanism of a pier and beam foundation depends on the way the floor framing, main beams, support piers, and supporting soil work together. This foundation transfers the building load to specific support points, rather than across the entire ground surface. When there is load on the floor, that load is carried by the joists, then transferred to the beams. From the beams, the load moves down to the piers, and finally to the footings or the soil beneath them.

    The downside is that if the soil beneath one of the piers shrinks or loses its bearing capacity, that pier can settle. As a result, the floor above it may also drop. This often leads to uneven floors, doors that won’t close properly, windows that stick, or cracks forming in interior walls.

    On the other hand, when the soil expands from absorbing moisture, a pier can be pushed upward. This can cause one side of the house to lift while another side stays in place or even settles. This condition is known as differential movement, or uneven foundation movement.

    No need to worry—this can be corrected by readjusting the support points. Contractors typically use jacks to slowly lift the affected area of the house, then add shims between the pier and the beam. This process is known as shimming or reshimming.

    If the existing piers are damaged, leaning, settled, or no longer able to support the load, they can be replaced or supplemented with new ones. If beams or joists are compromised due to moisture, termites, or wood rot, those components need to be reinforced or replaced.

    In most cases, improving drainage is also necessary to address the root cause and prevent the foundation movement from happening again. Poor drainage is also one of the main causes of damage in pier and beam foundations. Water from the roof, yard, or downspouts that drains toward the house can end up entering the crawlspace. If left unchecked, the soil beneath the home can become overly saturated, causing piers to shift and the wood structure to start deteriorating.

    In short, the strength of a pier and beam system depends on how all its components work together. If one part weakens, the entire foundation can become unbalanced.

    Signs Your Pier and Beam Foundation Needs Repair:

    Over time, soil movement and moisture can take a toll on your foundation. If you notice any of the following signs, it’s time to call a professional: Doors and windows that stick or won’t close properly. Uneven, sagging, or bouncy floors. Cracks in the drywall, especially around door frames and windows. Musty odors or visible dampness coming from the crawlspace.

    How to Repair a Pier and Beam Foundation

    Proper repair starts with identifying the root cause of the problem. Not every sloped floor means you need new piers, and not every crack indicates a total foundation failure. That’s why an initial inspection is critical before deciding on the right repair approach.

    Here are some common pier and beam foundation issues and how to fix them:

    • The most common repair is shimming, or reshimming. In this process, contractors place thin plates (usually steel or another hard material) between the pier and the beam. This is to close the gaps and bring the floor back to level where it has settled. Shimming works for minor adjustments, but it won’t fix the issue if the real cause is ongoing soil movement or poor drainage.
    • If the home has experienced significant settling, leveling may be needed. This involves slowly lifting the house at specific points using jacks. Once the floor is brought back to the correct position, the contractor will install shims, reinforce the beams, or add new piers. The leveling process has to be done carefully to avoid putting too much stress on the walls, flooring, plumbing, or other structural components.
    • If the existing piers are no longer in good condition, then pier replacement or pier addition is needed. Old piers can be replaced with concrete piers, steel piers, or helical piers. Contractors typically use concrete piers, while steel or helical piers are chosen when deeper support, higher load capacity, or better performance in certain soil conditions is required. The choice of pier type is usually based on inspection results and structural needs, not just cost.
    • If the damage is in the wood components, repairs may involve beam replacement, joist repair, or sistering. Sistering is a method where a new joist or beam is installed alongside the existing one to reinforce the structure without having to remove the entire original piece. This approach is often used when part of the joist is still in decent condition but needs additional support.
    • If the root of the problem is water, then foundation repair needs to go hand in hand with drainage correction. This can include installing a French drain, adjusting the grading around the house, extending downspouts, adding a sump pump, or redirecting water flow away from the structure. Without fixing the drainage, even a leveled foundation can start moving again as the soil moisture changes.
    • If the issue is caused by moisture, then crawlspace encapsulation may be needed. This system seals off the crawlspace using a vapor barrier and protective materials to reduce moisture coming up from the soil. Encapsulation helps keep the wood dry and lowers the risk of mold, musty odors, wood rot, and excess humidity.

    Before making any pier and beam repairs, you need to look at the foundation system as a whole. If you’re not sure what you’re looking at, it’s best to consult an experienced contractor.

    Estimated Cost of Pier and Beam Repair

    The cost of pier and beam repair can vary widely depending on your location, the size of the home, the level of damage, crawlspace access, the number of affected piers, the condition of the wood beams, the type of piers used, and whether there are drainage or moisture issues.

    The cost ranges below generally apply to the Dallas area.

    • In Dallas, for minor repairs like reshimming and basic leveling, costs typically start around $2,000. These types of repairs are usually done when the floor has a slight slope, there are small gaps between the pier and beam, or doors are starting to stick. The cost can go lower or higher depending on how many areas need adjustment and how easy it is to access the crawlspace.
    • For more extensive leveling, the cost can increase since more areas of the house need to be lifted and adjusted. In Dallas, this type of work typically runs around $5,000-$10,000. If the job involves multiple rooms, many support points, or a structure that has been shifting for a long time, the process will take longer and cost more.
    • For pier addition or replacement, the cost depends heavily on the type of pier used. Concrete piers are usually the more affordable option, typically ranging from $300 to $800 per pier in Dallas. Steel piers generally run about $1,000 to $2,000 each, while helical piers are usually around $1,500 and $3,000 or more. Steel and helical piers tend to cost more because of differences in materials, installation depth, methods, and load capacity. That’s why the cost per pier can vary quite a bit depending on the type used.
    • For beam replacement, the cost depends on the length of the beam, the condition of the crawlspace, how easy it is to access, and whether other areas are affected. If the beam is damaged due to wood rot or termites, the cost can increase since the joists, subfloor, or other framing components may also need repair.
    • Drainage repairs such as installing a French drain, adding surface drains, regrading the yard, or extending downspouts can also add to the overall cost. However, this work is often essential since water is one of the main causes of pier and beam foundation problems.

      In Dallas, a French drain typically costs around $25–$35 per linear foot, including excavation labor, perforated pipe, and gravel. Surface drain systems usually run about $2,200–$3,800, depending on the number of catch basins and how complex the layout is. Regrading generally costs around $1,100–$3,300 for an average yard, or roughly $1 to $2 per square foot.
    • For crawlspace encapsulation, the cost depends on the size of the home, the condition of the crawlspace, the type of vapor barrier used, whether a dehumidifier is needed, and the overall moisture control system installed. In Dallas, contractors typically charge around $3 to $7 per square foot.
    • For major repairs, the total cost of pier and beam work in Dallas can reach tens of thousands of dollars, especially if the damage involves multiple piers, main beams, joists, drainage issues, and severe moisture problems. For new construction using a pier and beam system, foundation costs are typically based on the size of the home, structural design, soil conditions, engineering requirements, materials, and overall construction complexity.

    Note: For a more detailed cost breakdown, it’s best to speak with an experienced foundation contractor in your area. Make sure you choose someone with a strong reputation, proven experience, and a track record you can trust.

    Pier and beam foundations need regular maintenance. You want to make sure rainwater drains away from the foundation. Gutters should be working properly, downspouts shouldn’t discharge water right next to the house, and the soil grading should slope away from the structure. Water pooling around the foundation can make the soil unstable and increase the risk of pier movement.

    The crawlspace should also be checked on a regular basis. Make sure the area under the house stays dry, has no musty smell, no standing water, and no signs of termites or wood rot. The vapor barrier should be kept in good condition so ground moisture doesn’t rise into the wood structure.

    During the summer, be careful when using a foundation watering system so water doesn’t end up entering the crawlspace.

    With proper maintenance, good water management, and repairs that address the root cause, a pier and beam system can be a strong, flexible, and long-lasting foundation. Regular checks also help make sure the soil, moisture levels, wood components, and support points stay stable and solid.


  • 4 Key Features High-End Buyers Expect in a Primary Suite

    Image Source: unsplash.com

    Dallas-Fort Worth has no shortage of large luxury homes. Texas Realtors reported that the metro accounted for 38 percent of all $1 million+ home sales in Texas in 2025. If you are looking to sell a luxury property, you need to know what attracts high-end buyers.

    Buyers in affluent neighborhoods like the Park Cities or Southlake aren’t just looking for square footage. These buyers usually have a clear set of expectations. They want space, quality materials, and a suite that feels private, polished, and well-planned.

    That’s exactly what we’re going to show you how to achieve if you keep on reading.

    1. A Bedroom with Premium Finishes

    The bedroom itself should feel comfortable, polished, and easy to settle into. Starting with the bed, a luxurious king-size mattress or bigger is essential.

    While the furniture is up to you, upholstered bed frames with tall headboards are a popular choice. Dress the bed with a duvet, quality bedding in a neutral color, and a few accent pillows for contrast. White usually gives the room a clean and upscale look. Sage green, taupe, or navy blue can also work well in a high-end Dallas primary suite.

    Clean lines and warm materials are trending right now, and soft neutral palettes are the go-to for a sophisticated interior. Premium materials are an absolute must. You want to think about solid hardwood flooring like wide-plank oak or walnut, custom wall paneling, and high-end textiles like linen, velvet, or silk.

    Natural light is also a major selling point. High-end buyers look for large windows fitted with custom window treatments or motorized blackout shades. Adding a modern piece of art that suits the tone of the room ties the whole space together.

    2. A Custom Walk-In Closet

    In high-end Dallas homes, a walk-in closet is fully expected. The closet deserves just as much attention as the bedroom because it adds storage and convenience that buyers notice right away.

    Today’s luxury buyers often treat the closet more like a private dressing room. They want custom built-ins rather than wire racks or standard store-bought shelving.

    Ideally, the closet should feature plenty of closed storage, built-in shelving, and drawers so buyers can organize the space however they want. A center island with velvet-lined jewelry drawers is a highly requested upgrade. It should look sophisticated, clean, and have bright overhead lighting along with at least one full-length mirror.

    The design does not need to be overly complicated because the storage capacity and layout matter most.

    3. Spa-Like Bathroom Features

    For many buyers, the en-suite bathroom is what truly completes the suite. In a luxury home, it should feel calm, private, and well-designed.

    Features that define a luxury bathroom usually include several key upgrades.

    Buyers typically look for features like::

    • Freestanding soaking tubs (often as a focal point).
    • A walk-in rain shower with multiple showerheads.
    • Steam shower systems.
    • Marble or quartz surfaces.
    • Floor-to-ceiling tile.
    • Frameless glass shower enclosures.
    • Double vanities with ample storage.

    Premium plumbing fixtures in finishes like unlacquered brass or polished nickel can make the space feel much more custom. You can also add heated floors, towel warmers, and backlit anti-fog mirrors.

    Some high-end bathrooms even include aromatherapy shower systems or chromotherapy lighting. These upgrades make the most sense when they fit the rest of the home’s aesthetic.

    4. Discreet Smart Tech and Entertainment

    Dallas is huge on sports and entertainment, so we can’t finish this article without talking about the demand for cinema-style entertainment systems. These cost thousands of dollars, but buyers will definitely get their use out of them.

    They’re demanding integrated entertainment within the master suite, flush-mounted or hidden TVs within a cabinet. In our opinion, built-in TVs into the wall with surrounding ambient lighting is the way to go. They look so smart, and you can still do that with any size TV as long as the wall is big enough.

    Smart home features are another big selling point. This includes ceiling-integrated speakers and a centralized system that lets you control the lighting, motorized blinds, temperature, and media from a single device.

    Being able to turn off all the house lights and lower the AC right from the bed is a huge convenience factor for modern buyers.

    High-end buyers in Dallas expect quality, comfort, and details that feel intentional. If you want your primary suite to stand out, every finish should feel like it belongs.

  • What to Know About Faux Brick Panels

    Imagine walking into a historic Lakewood bungalow or a sleek Knox-Henderson townhome where one stunning feature wall makes the entire space feel custom. For many Dallas home improvement projects, achieving this look is easier than ever with faux brick wall panels. 

    Homeowners consistently choose these panels over real masonry because they save money, cut down on installation time, and look incredible.

    Dundee Deco faux brick wall panels are a great option for these interior upgrades, providing a realistic look without the heavy lifting.

    This comprehensive review evaluates Dundee Deco panels based on appearance and realism in natural Texas light, material quality, and ease of installation for a typical Dallas DIYer. 

    What Are Faux Brick Wall Panels?

    Image from: Dundee DecoKitchen with faux brick wall panels installed

    Faux brick wall panels are lightweight materials designed to mimic the texture, color, and visual appeal of traditional masonry. For Dallas homeowners and commercial space renovators, these panels offer an accessible way to achieve an authentic look without the high cost or structural requirements of actual brick.

    Dundee Deco’s faux brick wall panel line caters to diverse project needs by offering items in three distinct materials. These include waterproofPVC 3D and insulating Styrofoam varieties.

    The primary differentiators of these panels are their affordability, lightweight design, and low maintenance properties. Unlike porous traditional brick that requires periodic sealing and mortar repointing, these faux alternatives are easy to clean, highly water-resistant, and inherently DIY-friendly. 

    They effortlessly blend into multiple settings, making them highly versatile for living room accent walls, moisture-prone kitchen backsplashes, and high-traffic commercial spaces.

    Why Is Wall Prep Crucial for DIY Installation?

    Dundee Deco faux brick wall panels are made specifically for DIY installation, removing the need to hire specialized masonry contractors. Depending on the material chosen, the installation method generally involves either applying a high-quality construction adhesive or using the built-in backing.

    Because the panels are lightweight, one person can easily handle, measure, and cut them using basic household tools like a utility knife and a measuring tape.

    However, proper surface preparation is the key to a successful project, especially in older Dallas homes that may feature heavily textured walls. Practical tips for Dallas homes include measuring carefully and planning around electrical outlets before cutting any panels. A smooth, clean, and completely dry surface is required to ensure optimal adhesion.

    Once installed, these panels are easy to paint or stain to match evolving interior design trends. Pairing the exposed brick texture with modern finishes can give your home a fresh, updated look.

    Additionally, using the finished feature wall as a staging backdrop for listing photos can help boost buyer interest.

    Take note of the following steps for a smooth DIY installation:

    1. Clean and dry the wall surface thoroughly before applying any adhesive or panels.
    2. Check the wall texture carefully because perfectly smooth surfaces yield the strongest adhesion.
    3. Measure the total wall area carefully before ordering to account for cuts and pattern matching.
    4. Select the correct heavy-duty adhesive based on the specific panel material.
    5. Gather basic tools in advance, including a bubble level, utility knife, and measuring tape.
    6. Plan the layout pattern visually before applying glue, starting from the center of the wall outward.

    Comparing Faux Brick Panel Costs to Real Masonry

    Image from: Dundee DecoFaux brick panels installed in room with cityscape view

    Traditional brick installation in the Dallas market is expensive due to raw material costs, heavy transport, and the high hourly rates of skilled masonry labor. On the other hand, Dundee Deco faux brick wall panels offer a major reduction in project costs.

    Prices range from $4.5 to $290, depending on the panel type, material thickness, and bulk quantity needed. Plus, retail orders exceeding $500 qualify for free shipping, which helps save money on full room renovations.

    FeatureDundee Deco PanelsTraditional Brick
    Material Cost$4.5 to $290 per panel$10 to $30+ per sq. ft.
    Labor CostMinimal for DIYHigh professional fees
    Installation TimeHoursDays to weeks
    Maintenance RequiredLowHigh
    CustomizationEasily paintableLimited post-installation options
    WeightExtremely lightweightHeavy structural support needed

    What Are the Pros and Cons of Faux Brick Panels?

    While Dundee Deco provides a solid and cost-effective product line, determining if these panels are the right fit requires a quick look at their strengths and limitations.

    The ideal application depends heavily on your budget, your timeline, and the specific environmental conditions of the room being renovated. 

    The following analysis is based on standard product specifications and material properties to help you make an informed decision.

    FeaturePro or ConExplanation
    AffordabilityProSignificantly cheaper than traditional brick masonry options.
    DIY InstallationProLightweight panels require only basic tools and standard adhesive.
    Low MaintenanceProWaterproof options are remarkably easy to wipe clean.
    CustomizabilityProPanels can be easily painted or stained to match interior color schemes.
    Insulation ValueProStyrofoam variants actively improve room insulation for energy efficiency.
    Peel and Stick LimitsConVariants are strictly best suited for smooth and completely dry interior surfaces only.

    Where Should You Buy Dundee Deco Faux Panels?

    To view the complete collection, check out the material specs, and calculate the materials needed for your specific renovation, you can purchase directly from the Dundee Deco website.

    Exploring the full catalog allows you to compare the PVC and Styrofoam options side-by-side to ensure you select the perfect finish for your home improvement goals. This product is best for homeowners who want a quick style upgrade or sellers looking for an affordable focal point that helps a property stand out.

  • How Kitchen Remodeling ROI Impacts Dallas Home Sales: A Contractor’s Perspective

    So you’re getting ready to sell your home in Dallas-Fort Worth, and you’re staring at your kitchen wondering if it’s worth dumping money into before you list. I get asked this constantly, and the answer isn’t black and white.

    I’ve been doing kitchen remodels around North Texas for over a decade now, and I’ve seen pretty much every scenario you can imagine. Here’s the truth about whether kitchen renovations actually pay off when you sell.

    The ROI Numbers and Why They Don’t Tell the Whole Story

    Here’s what the data says: minor kitchen remodels give you back about 84% of what you spend, while major renovations return around 45%. It sounds straightforward, but there’s a catch.

    Real estate isn’t that simple. I’ve watched homes in Lakewood sit on the market for three months with a dated kitchen, then seen similar houses in the same neighborhood get multiple offers in a week just because they had updated countertops and painted cabinets. The stats don’t capture that.

    Last spring, I worked with a couple in Richardson who were debating whether to spend $30k on their kitchen before selling. Their agent told them comparable homes were selling for $425k. We did the renovation. Nothing crazy: new quartz counters, painted the oak cabinets white, and better lighting. They listed at $445k and got an offer for $458k within six days. Try calculating that ROI.

    [wpchtmlp id=523247]

    What Buyers Actually Care About in Dallas

    After doing this for years and talking to dozens of real estate agents, some patterns are pretty clear. Open layouts matter. Nobody wants a kitchen that’s boxed off from the rest of the house anymore. If you’ve got walls that can come down, as long as they aren’t load-bearing, that’s usually money well spent.

    Quartz or granite countertops are expected now. I remember when laminate was fine, but those days are gone. Buyers see laminate and immediately start mentally calculating replacement costs.

    Good lighting makes a bigger difference than most people realize. I can’t tell you how many kitchens I’ve seen with one sad fluorescent fixture in the middle of the ceiling. Add some recessed lights, under-cabinet LEDs, and maybe a nice pendant over the island. Completely different vibe.

    It’s surprising how much buyers fixate on the details. Soft-close cabinet doors, decent drawer pulls, a kitchen faucet that doesn’t look like it came from a hardware store clearance bin. These details signal that the house has been taken care of.

    The color thing is real too. I know your burnt orange accent wall seemed like a great idea in 2015, but neutral sells. White, gray, maybe navy if you’re feeling adventurous. Save the bold choices for your next house.

    Sometimes You Don’t Need to Go All In

    Not every kitchen needs to be gutted. Some of my favorite projects have been what I call “strategic updates”—spending smart money on high-impact changes.

    Take cabinet refacing. If your cabinet boxes are solid wood and in decent shape, you can replace just the doors and drawer fronts, add new hardware, maybe paint if needed. I did one of these jobs in Plano last year for about $9,500. Full cabinet replacement would’ve been $35k minimum. The kitchen looked completely different.

    Countertops are another place where you can make a big impact without redoing everything. Ripping out old laminate and installing quartz usually runs $4,000-$7,000 depending on the size. In North Dallas where buyers expect nicer finishes, this almost always pays for itself.

    Lighting is probably the most underrated upgrade. Most kitchens have terrible lighting. For $2,000-$3,000 you can add recessed LEDs, under-cabinet strips, and a statement fixture. It’s like putting the whole kitchen under an Instagram filter.

    When You Really Do Need a Full Renovation

    Sometimes there’s no way around it—the kitchen needs a complete overhaul. If your layout is terrible, like a galley kitchen with no room to move, or everything’s original from 1985, or the whole room just feels cramped and dark, cosmetic updates won’t cut it.

    This is where things get expensive, but in the right circumstances it makes sense. I worked on a house in University Park where we took out a wall between the kitchen and dining room, added a big island with seating, and put in all new cabinets and appliances, the whole nine yards. Cost was about $95k. House sold for $180k more than comparable homes with dated kitchens. Not all of that bump was “because of the kitchen,” but it was the main selling point.

    Modern kitchen design is all about flow. People want to be able to cook while talking to guests in the living room. They want an island where kids can do homework or where they can set up drinks during parties. If your kitchen doesn’t allow for that kind of lifestyle, it’s going to be a harder sell.

    In the luxury markets, like Highland Park, parts of Uptown, and some of the newer Frisco developments, buyers expect chef-grade appliances, custom cabinets with all the organizational bells and whistles, and high-end stone counters. If you’re selling a $800k+ house with a mid-grade kitchen, that’s a problem.

    The Green Kitchen Thing, Which Actually Matters Now

    I’ve noticed something interesting over the past few years. More buyers are specifically asking about energy efficiency and sustainable materials. It used to be kind of a niche concern, but now it’s mainstream.

    Energy Star appliances use way less electricity and water. LED lighting cuts energy use by something like 75%. Low-VOC paints don’t off-gas all those chemicals. Buyers like this stuff, especially younger buyers.

    Did a kitchen in East Dallas last fall where the homeowners really wanted to go eco-friendly. We used Energy Star everything, put in a tankless water heater just for the kitchen, even found some reclaimed wood for the open shelving. House got multiple offers fast, and the buyers actually mentioned the green features in their offer letter. You can see more examples of our sustainable kitchen projects at https://krmastersdallas.com/kitchen-remodel/.

    It’s not required, but it can help your listing stand out in a competitive market.

    The Biggest Mistake: Over-Improving

    This is the most common trap sellers fall into. You live in a neighborhood where most houses sell for $350k, and you decide to put $75k into a luxury kitchen with custom Italian cabinets and marble countertops. Sounds nice, but you’re not getting that money back.

    I always tell people to look at what’s sold recently in their area. Study the kitchens and the price bumps they actually got. Your real estate agent should be able to pull comps that show this.

    In newer subdivisions in Frisco or McKinney, a lot of homes already have pretty nice kitchens. A full renovation might only add $20k-$30k to the value. But in older neighborhoods in East Dallas or Oak Cliff where most kitchens are original? An update can add $40k-$60k easy.

    You’ve got to match the neighborhood. A $50k kitchen in a $300k house doesn’t make financial sense. A $50k kitchen in a $600k house might be absolutely necessary to compete.

    What to Expect: Time and Money

    Homeowners always ask about timeline and budget. Here’s the rough breakdown based on what I typically see:

    • Minor updates: cabinet refresh, new countertops, backsplash, and lighting. Usually 2-3 weeks, $15k-$30k. You can mostly still use your kitchen during this, though there will be some disruption.
    • Mid-range renovation: new cabinets, appliances, flooring, and maybe some layout tweaks. Figure on 4-6 weeks, $35k-$60k. You’ll need to set up a temporary kitchen situation because things will be torn apart.
    • High-end custom jobs: structural changes, luxury finishes, and all new everything. 8-12 weeks, $75k-$150k or more. These make sense in high-value homes where you need to meet buyer expectations.

    The timeline can stretch if you hit surprises, and you usually do. Old houses love to hide problems behind walls. Budget an extra 10-15% for contingencies.

    Budget-Friendly Ideas That Actually Work

    Not everyone has fifty grand sitting around to renovate before selling. Some things you can do for way less that still make a real difference:

    Paint is magic. Seriously. A gallon of good cabinet paint costs maybe $60, and if you’re reasonably handy you can paint your cabinets yourself over a weekend. Or hire someone for $1,500-$2,000. White or light gray cabinets instantly modernize a kitchen.

    New hardware is shockingly effective. You can get nice drawer pulls and cabinet knobs for $3-$8 each. For a typical kitchen that’s maybe $300-$500 total. Takes an hour to install. Huge visual impact.

    Backsplash adds a lot. Basic subway tile runs about $5-$10 per square foot installed. For a standard backsplash area that’s $800-$2,000. Makes the whole kitchen look more finished.

    I worked with a seller in Oak Cliff who had just $8,000 to invest. We painted the cabinets white, added new brushed nickel hardware, installed a subway tile backsplash, and replaced the old faucet and sink. The kitchen looked like a different space, and the home sold for $22,000 over asking with multiple offers. Kitchen Remodel Masters Dallas specializes in these types of budget-conscious transformations that make a big difference without overspending.

    Sometimes the smart play isn’t the most expensive option.

    Finding a Contractor Who Won’t Screw It Up

    Quality matters a lot here because a bad renovation can actually hurt your sale. Buyers notice crooked tile, gaps in the countertops, cabinets that don’t close right. I’ve had to fix other contractors’ mistakes more times than I can count.

    Look for someone who’s licensed and insured, which sounds basic but you’d be surprised. Ask to see photos of real completed projects, not just glossy renderings. Get references and actually call them. Ask how communication was, whether timelines were met, how clean the job site stayed, and how problems were handled.

    Get detailed written estimates that break everything down. “Kitchen remodel – $45,000” isn’t good enough. You want to see materials costs, labor costs, everything itemized.

    Don’t automatically go with the cheapest bid. I’ve seen too many people hire the low bidder and end up with work that needs to be redone before they can list their house. Sometimes the mid-range contractor who actually knows what they’re doing is the better investment.

    What Real Estate Agents Say (Because They See This All Day)

    I work with a bunch of different agents around Dallas, and they’re all pretty consistent on this: kitchens make or break showings. Buyers walk in and go straight to the kitchen. If it’s dated or gross, they start calculating costs in their head. That comes right off what they’re willing to pay.

    One agent told me about two houses in Richardson that listed the same week. Similar size, similar location, similar condition overall. One had an updated kitchen, with white cabinets, quartz counters, and stainless appliances. The other still had the original 90s oak cabinets, laminate counters, and mismatched appliances.

    Updated kitchen house: sold in five days, $15k over asking. Dated kitchen house: sat for 47 days, sold for $18k under asking after a price cut. That’s a $33,000 swing, mostly because of the kitchen. And the updated kitchen probably cost $25k-$30k to do.

    The math matters.

    Design Trends That Actually Have Staying Power

    Trends come and go, but some things seem to stick around. Two-tone cabinets are pretty popular right now—white uppers with gray or navy lowers. It’s been going strong for a few years and still looks good.

    Large format tile for the floor (12×24 or bigger) gives you that clean, modern look with fewer grout lines to maintain. Waterfall countertops on islands photograph really well and have that luxury feel.

    But here’s my advice: don’t chase every trend you see on Instagram. Stick with things that have proven staying power. White cabinets have been popular for like 15 years and probably will be for another 15. Gray is still safe. Navy blue has been around long enough that it’s probably not going anywhere soon.

    I’m more cautious about things like brass fixtures. They’re everywhere right now, and they might feel dated in five years. Brushed nickel and matte black are safer long-term bets.

    Natural wood is making a comeback, which is funny because everyone painted over their wood cabinets 10 years ago. But you’ve got to be careful with wood tones—some look timeless, others look dated.

    Small Kitchens Don’t Have to Feel Small

    Lots of Dallas homes, especially in Uptown and the M Streets, have compact kitchens. You can make these spaces work better and feel bigger with smart design.

    Vertical storage helps a lot. Take your cabinets all the way to the ceiling—it gives you more storage and makes the room feel taller. Light colors on everything make the space feel more open. Mirrors or glossy backsplash tiles reflect light around.

    They make slimmer appliances now that are actually pretty nice. A 24-inch dishwasher instead of 30, a narrower fridge, stuff like that. Sometimes a peninsula works better than trying to cram an island into a small space.

    I did a tiny galley kitchen in an Uptown condo last year, maybe 90 square feet total. White cabinets, mirrored backsplash, good lighting, apartment-size stainless appliances. Made it feel way bigger than it was. Condo sold in three days. Multiple buyers said they were surprised how functional the small kitchen felt.

    You work with what you’ve got.

    So Should You Do It?

    Depends. Three main things to consider: how bad is your kitchen now, what do other kitchens in your neighborhood look like, and when are you selling?

    • If your kitchen is terrible, meaning it hasn’t been updated in decades, the appliances don’t work properly, or the layout is so bad you can’t open the dishwasher and the fridge at the same time, then yeah, you probably need to do something.
    • If your kitchen is just a little dated but functional, maybe you only need some strategic updates rather than a full renovation.
    • If your kitchen is already pretty nice and modern, spend your money elsewhere. Fix the roof or paint the exterior or update bathrooms instead.

    Best move is to talk to a real estate agent who really knows your specific neighborhood and a contractor who can give you realistic numbers. Between those two people, you should be able to figure out the right level of investment.

    I’ve done enough of these projects to know that the homes that sell quickly and for good money are the ones where sellers made smart, targeted improvements. You don’t always need the fanciest stuff or the biggest budget. You need the right improvements done well.

    Your kitchen is the heart of your home. For buyers, it’s often the heart of their decision on whether to even make an offer. Getting this right can make a real difference in your final sale price and how long your house sits on the market.

    Ready to maximize your home’s value with a strategic kitchen renovation?

    Whether you’re planning to sell soon or want to increase your property’s appeal, professional guidance makes all the difference. Visit our website to schedule a free consultation and discover how the right kitchen improvements can transform your home’s marketability and sale price. Our team specializes in renovations that deliver real ROI for Dallas homeowners.

  • The Role of a Level 2 Electrician in Increasing Property Value Before Listing

    When I first began getting homes ready for sale, I focused heavily on aesthetics. I assumed fresh paint, stylish light fixtures, updated landscaping, and professional staging were the things that brought the most value. But over time, I realized something surprising. Buyers grew more wary, inspectors more strict, and even the tiniest electrical issues, just like peeling paint used to, raised red flags.

    That was when I realized how essential the electrical system had become to modern real estate, especially with the rise of energy-efficient appliances, home automation, and growing power needs. That’s also when I fully appreciated the importance of a Level 2 Electrician in boosting the property’s value before it hits the market.

    Knowing the Difference With a Level 2 Electrician

    I thought all electricians were all the same at first. It wasn’t until I had my first property that had out-of-date over-head service cable, you can imagine the difference. Under normal circumstances, the electricians can handle internal wiring, appliances and general or minor electrical maintenance. A Level 2 Electrician is here to work directly on the supply network, repairing or replacing service mains or consumer mains, upgrading switchboards and meter boards as well as relocating your overhead service lines. I soon realised that supply-side improvements have a big impact on a building’s security assessment, compliance record and total value in the market. As soon as I began working with level 2 electricians ahead of time, before listing a home, buyers were happier and negotiations went more smoothly.

    How I Learned That Electrical Issues Can Make or Break a Sale

    I’ll never forget trying to sell a property a few years ago. It was beautifully renovated, well-styled and competitively priced. But as soon as their inspector found old service cables and a non-compliant switchboard, each potential buyer’s hand went up. The repairs went on for weeks and I came to understand the issue was not cosmetic — it was structural. Since then I have begun requesting a Level 2 Electrician to check out the place before I even list it! These inspections revealed issues I could not see myself — from aging overhead lines to deteriorating meters and unsound Mains. After addressing these issues upfront, “the property was much more attractive, breezed through inspections and fetched even higher offers. What I learned from that experience has reshaped how I stage homes in preparation for the market.

    Why Electricity Compliance Is a Major Seller Concern

    Today, buyers are well equipped when it comes to real estate. Most people are familiar with electrical regulations, energy, compliance, and more. Buyers of homes with old electrical infrastructures consider it a significant negotiation point, or even a liability. In doing so by working with a Level 2 Electrician prior to listing I ensure the house is prepared and up to date, this ranges from having safe earthed wiring, compliant meters and updated switchboards. And this is not only to assist with inspections, it’s also an indication for buyers that the home is safe, updated and capable of handling current as well as future electrical needs. Along the way, I’ve witnessed firsthand how this confidence materializes in stronger offers, faster decision-making and more assured buyers.

    How Re-Wiring My Property Amped Up My Values

    One of the more graphic examples occurred in a home whose switchboard hadn’t been upgraded in decades. Was it that the house, modern on the outside, had a system of electricity preserved from an earlier time? It was inspected by a Level 2 Electrician, who advised replacing the consumer mains and installing a new compliant switch board with safety switches. After the upgrade, not only did it perform better at open homes, but buyers would comment on the difference right away. There was, the home sold for over asking and I attribute a good part of that to the electrical updates. I’ve since learned that buyers value a property with the potential to be foresighted, particularly when those improvements have implications for long-term safety and functionality.

    Service Line Repairs and Upgrades The Value Hidden Beneath the Streets

    A lot of homeowners – as I used to be one – don’t pay attention to their overhead and in-ground service lines. These are the lines that deliver electricity from the grid to the home, problems with which often only become apparent after a catastrophic failure. If you experience flickering lights, surprise outages and/or inconsistent power these may be signs of deficient service lines. By partnering with a Level 2 Electrician, I guarantee that these problems are found and addressed before your property is listed. Upgraded lines not only make the house more reliable, they dramatically enhance its perceived value. Purchasers have more peace of mind that they won’t be faced with flashes in the night or hazardous leaks post-sale.

    Why Buyer’s want more: The Modern Electrical Loads

    Homes today require vastly more power than before. Old electrical systems get taxed with more air conditioners, high-capacity ovens, smart home devices, electric vehicle chargers and entertainment systems. When I found this out, I discovered that a lot of homes that I was faced with were simply not ready for today’s electrical loads. A Level 2 Electrician can check out the system, and advise any enhancements that you may need to accommodate today’s type of living. These improvements are often done before you go on the market and they fetch higher valuations because buyers don’t see a big project to tackle upon move-in. Rather than having to fret as to whether or not the system can service their applications and lifestyle, they know that the home is designed for long-term ease.

    My personal experiences negotiating with buyers after a panel upgrade 

    In the past, if an inspector discovered electrical problems, the buyer would either negotiate immediately for a lower price or ask for repairs as a condition of making the purchase. Once I began cold hitting Level 2 electricians at first light, things started to change for me. Houses that were once problematic just didn’t seem to be problems when buyers visited with property inspectors. Not only did this save me money (by avoiding a price drop), but it also gave me more power at the bargaining table. Buyers love to have homes with paper trails for electrical upgrades, especially those completed by a licensed professional. I have had buyers who contacted me to say they feel reassured after seeing a recent receipt from a Level 2 Electrician, and then purchased without any further questions.

    Here’s Why I Suggest a Pre-Listing Electrical Inspection Every Time

    That has become a rule of mine fronting listing: have the property inspected by a Level 2 Electrician. Those assessments give perspective on whether the home meets today’s electrical standards, what it would take to do so if not and just how safe (or potentially hazardous) infrastructure might be. Certain small changes — such as repairing a corroded point of attachment or making certain the meter box conforms to regulations — can make a very big difference in how buyers view the property. This Forward Thinking mitigates delays in listing, and promotes your home better to both agents and buyers.

    The Supply-Side Electrician I Use

    When I want a reliable pro for supply-level works, I call in one of the guys @ No1 Sydney Electrical everytime. Professional and meticulous These ladies have helped me get multiple homes ready for the market with great results. (3) A reliable Level 2 electrician operating in my team has been a cornerstone of my sales strategy and helped me make more profitable property sales.

  • Keep Your Home Safe and Warm

    Home heating brings comfort, yet hidden smoke residue can slowly build inside flues. Regular cleaning keeps the air healthier and reduces fire risk from leftover soot. Many owners delay service because chimney work seems unclear or complicated.

    This guide explains how professional sweeping checks each section, cleans deposits, and confirms your system is safe. With a clear overview of inspection tools, brushing methods, and safety checks, you gain confidence. You also learn when to book service, what to expect during a visit, and how routine care saves money on repairs. Understanding the process turns a chore into a simple habit that protects your home.

    What Chimney Sweeping Involves

    • A chimney is more than a simple tunnel above the fireplace.
    • Inside the flue, smoke carries tiny particles that stick to the walls.
    • Over time, these layers turn into soot and sticky deposits that catch sparks.
    • Professional sweeping starts with a full visual review of the stack firebox and flue.
    • The technician checks access points, measures clearances then plans how to reach every surface.
    • For many owners, the search for a chimney sweep near me begins when smoke drifts back.
    • Regular service should start well before that moment.

    A proper appointment always includes assessment, brushing, vacuum removal of debris, plus a safety review. Modern tools collect dust so rooms stay tidy while brushes clear hidden corners. Detailed records also matter because written reports show dates, findings, and any repair notes. That record helps you track how fast residue returns, which guides the timing of future visits. Understanding these steps turns a confusing subject into a clear routine for your household. You gain insight into what professionals check, making every conversation with them simpler. This knowledge empowers you to request the high level of care your home deserves.

    Key Benefits of Regular Maintenance

    Regular sweeping supports safety, health, and property value. Instead of focusing only on soot removal, it delivers several key advantages. These benefits show why routine care deserves a place on your household maintenance plan.

    • Less soot inside flues lowers the chance of sudden, uncontrolled chimney fires.
    • Cleaner exhaust paths improve indoor air quality, so breathing feels easier for everyone.
    • Regular reports from technicians support insurance needs while proving responsible property care.
    • Scheduled visits catch damage early, which helps avoid expensive structural repairs.

    The Step-by-Step Process

    When the technicians arrive, furniture near the fireplace is covered with protective sheets. The technician lays down floor coverings so soot does not touch carpets or rugs. Next, the inner walls are inspected with a bright light or camera to spot trouble. Brushes sized for the flue are pushed upward, section by section, loosening built-up residue. A powerful vacuum captures falling dust, keeping it out of your living area.

    After brushing, the professional clears the firebox, removes loose bricks or debris, and checks the damper movement. Smoke paths are tested using small puffs so any leak shows clearly around joints or seams. Finally, the work area is tidied, tools are packed away, and the report is prepared for you. Before leaving, the technician answers questions about future care, so you feel ready for the next season. Notes about repairs or upgrades are explained so you understand which tasks are urgent or optional.

    When To Book

    Many owners wait until smoke problems appear before calling a professional. It helps to know the early warning signs so you can schedule service in time. Watch for these clues that suggest your flue needs attention soon.

    • Visible dark stains around the fireplace opening suggest heavy smoke residue buildup.
    • Strong burnt odors after use linger in rooms, indicating deposits smoldering in the stack.
    • Smoke pushes back into living areas during lighting, which hints at partial blockage.
    • You cannot recall the last service date, so inspection becomes urgent rather than optional.

    Risks And Myths

    Misunderstandings about chimney care can quietly increase danger inside a property. Some ideas sound sensible, yet ignore how heat, smoke, and residue actually behave. Clearing up these myths reduces avoidable risk and encourages practical decisions.

    • Believing occasional fires “self-clean” the chimney is dangerous; soot actually leaves thick layers that can suddenly ignite.
    • Ignoring minor cracks lets heat reach timber sections hidden behind masonry surfaces.
    • Assuming smoke only exits upward overlooks downdrafts that push fumes back indoors.
    • Relying on old wives’ tales instead of trained assessment risks unsafe shortcuts during cleaning.

    Professional Care Tips

    Simple habits between visits keep your fireplace healthier for longer. Burn only dry seasoned wood, so flames produce less sticky residue on surfaces. Avoid using liquid fire starters because sudden flare-ups send high heat into the flue. Before each cold season, shine a flashlight inside the opening and look for unusual staining. If you spot nests, loose fragments, or a strong odor, book service promptly rather than waiting.

    Why Choose Local Experts?

    Choosing a nearby professional makes future appointments easier to arrange. Local specialists also understand typical building styles, fuel choices, and weather patterns in your area. Use these suggestions to find dependable support close to home.

    • Search local directories for certified firms that follow recognized safety standards and codes.
    • Ask neighbors or friends who recently booked sweeping work for honest feedback on providers.
    • Compare inspection reports carefully, noting photos, measurements, and clear written explanations for suggested repairs.
    • Choose services offering reminder schedules so regular cleaning never slips from your calendar.

    Natural client mention

    When you select a trusted local provider, you gain more than basic sweeping. The same team learns how your fireplace behaves over many seasons. They recognize usual burning habits, typical fuel loads, and past issues noted in earlier reports. That history lets the company recommend check schedules, products, or repairs that truly suit your property needs.

    Chimney Care FAQ

    • How often should sweeping occur?
      Most homes need yearly service for regular fireplaces.
    • Can I clean the flue alone?
      Basic brushing helps, yet full checks require trained support.
    • Does rain reduce risk?
      Moisture mixes with soot, forming corrosive deposits that damage liners.
    • How long does the service take?
      Most routine visits finish within a couple of focused hours.

    Warm Home Assurance

    Ongoing care keeps your fireplace safe while lowering the chance of hidden smoke issues. Regular cleaning also supports smooth heating so every flame burns with steady control. A simple service plan protects your property through each season with fewer surprises.

  • Fall 2025 Home Projects: Prepare for Winter With These Upgrades

    Fall 2025 Home Projects: Prepare for Winter With These Upgrades As the weather cools, it’s smart to focus on warmth, efficiency, and durability. Fall is a perfect window to tune up your home before the cold months hit. The right projects bring comfort now and can lower your utility bills later.

    In this guide, you’ll find:

    • The most impactful fall home projects for 2025.
    • Budget‑friendly and high‑ROI upgrade ideas.
    • Seasonal design and comfort trends.
    • Expert tips for winter‑ready renovations.

    Why Fall is the Best Time for Home Projects

    Cool days and plenty of daylight make both indoor and outdoor jobs easier. Schedules are also looser for many contractors until the first hard freeze sends everyone scrambling. Starting now lets you seal drafts, service an older furnace, and fix tired weather seals before they turn into bigger repairs.

    Waiting usually costs more. Heat leaks grow, small drips turn into damage, and emergency visits are pricey. That said, late‑season discounts do pop up, which is why timing depends on your forecast, your budget, and what is in stock.

    The “Freeze Defense” Protocol

    Most Dallas homes are built on slab foundations with pipes running through uninsulated attics or exterior walls. When temps drop below 20°F, these are the vulnerable points.

    1. The “4 P’s” Rule

    Protect People, Pets, Plants, and Pipes. Cover outdoor faucets with styrofoam domes (available at Home Depot/Lowe’s).

    2. Know Your Shutoff

    Find your main water shutoff valve NOW. It’s usually in a flowerbed near the street or in the garage wall.

    3. Drip & Open

    During a freeze: Drip indoor faucets (both hot and cold) and open cabinet doors under sinks to let heat in.

    Top 10 Projects for Your Home in Fall 2025

    1. Energy‑Efficient Windows & Insulation

    Energy costs spike without warning, so tightening the envelope climbs the list. Double- or triple-pane glazing with low-E coatings locks in heat, while attic and wall insulation plugs the silent leaks. Weatherstripping and a careful bead of caulk calm both drafts and outside noise.

    For households looking beyond insulation, energy resilience is becoming just as important as efficiency. Hybrid solar solutions, such as Sol-Ark inverters, allow homes to store solar energy and keep critical systems running during outages. Check local incentives, permit rules, and load calculations before you buy.

    The U.S. Department of Energy reports heating costs can drop by up to 20% with proper insulation and window upgrades, which is useful, though outcomes vary by climate and house age. Big promise, but each house tells its own story.

    2. Smart Thermostats & Home Tech

    Smart thermostats set tight schedules, learn patterns, and trim waste. Models like Ecobee or Nest can pair with voice assistants or smart vents, nudging comfort room by room. Power should be cut at the breaker before any wiring work; manufacturer instructions exist for a reason. Solar-powered products add value while trimming cost.

    The headline savings can look great on paper. Yet, real results depend on habits, insulation levels, and whether the household actually allows the automations to do their job.

    3. Kitchen Refresh with Seasonal and Timeless Upgrades

    As temperatures drop, kitchens become gathering zones. Small changes, such as new cabinet pulls, brighter under-cabinet lighting, and a fresh coat of paint, shift the whole mood. Seasonal textures, such as deep green linens or burnished metals, add warmth without locking into a trend cycle.

    Minor updates often return a healthy share at resale, but prices and buyer tastes move around. Pick durable finishes that wear well and fit nearby comps.

    4. Bathroom Retreats with Spa Inspired Features

    Cold mornings make heated floors a compelling option. Soaking tubs, quiet lighting, and earthy tile bring the spa vibe home; wood-toned vanities calm the room without shouting. Safety-forward choices, such as grab bars and low-threshold showers, help all ages —a detail that market watchers keep bringing up.

    Comfort rises today and resale appeal follows, although the right mix depends on neighborhood norms.

    5. Outdoor Living for Cooler Months

    Cool air shouldn’t end patio season. Covered areas, fire features, and built-in seating stretch outdoor time well into fall. Durable materials plus layered textiles, outdoor rugs, and throws make chilly evenings feel intentional rather than improvised.

    Add string lights and consider a solar path or deck light to boost safety without raising the bill. Watch the forecast and order long lead-time items early so weather doesn’t stall the plan.

    6. Curb Appeal with Doors Paint and Landscaping

    Shorter days spotlight the entry. A bold front door color, crisp hardware, and seasonal planters can completely transform the entire façade. Low-maintenance plantings, evergreens, ornamental grasses, and fresh mulch retain their form through frost.

    Aim exterior lighting so it helps with both safety and drama. First impressions matter, yet the exact bump you get depends on local style and what nearby homes are doing.

    7. Fireplace & Heating System Upgrades

    A clean, inspected chimney reduces risk and sets the tone for a cozy winter evening. Fresh tile or stone can modernize a tired surround without requiring a complete room renovation. For whole-home comfort, a furnace tune-up is beneficial, or consider upgrading to mid-season zoning: many households see gains from a 4-zone mini split for efficient, adjustable heating across different areas.

    Actual savings hinge on insulation, layout, and usage habits. The tech is solid; the wildcard is how the space is used daily.

    8. Multi‑Functional & Zoned Spaces

    Flexible rooms pull double duty. Built-in desks, partial walls, and movable storage let a room switch between work, hobbies, and guests without friction. In compact homes and condos, a full cabinet bed creates a guest suite in seconds while vanishing when not needed.

    Many professionals and new arrivals seek flexibility through furnished apartments in Ottawa, especially near government centers, universities, and major transit routes, an indicator of how adaptable layouts continue to win favor. The lesson holds at home: the same square footage can do more if allowed.

    9. Statement Walls, Ceilings, and Seasonal Decor

    A single statement wall can change the whole room. Try bold paint, wood slats, or a patterned ceiling for quick warmth. Peel‑and‑stick wallpaper lets you test ideas in a weekend.

    Layer textured throws, candles, and natural branches so the space feels seasonal. Tastes change, which is why reversible choices are smart for the long haul.

    10. Aging in Place & Accessibility Upgrades

    Future‑proofing helps everyone under your roof. Barrier‑free showers, lever handles, brighter task lighting, sturdy handrails, and grippy mats cut slip risks when freeze-thaw cycles hit.

    Safety doesn’t have to look clinical. The best results happen when function and calm design meet, although the exact mix will depend on budget and product availability.

    [wpchtmlp id=522709]

    72-Hour Survial Kit

    Build your kit now, before the shelves are empty. Check off items as you acquire them.

    Checklist:

    • Water (1 gallon per person/day for 3 days)
    • Non-perishable food (cans, bars, dried fruit)
    • Manual can opener
    • Flashlights + Extra Batteries
    • NOAA Weather Radio (Battery/Crank powered)
    • First Aid Kit + Prescription Meds
    • Water Shutoff Key (T-handle tool)
    • Portable Cell Phone Charger (Power bank)
    • Blankets / Sleeping Bags
    • Baby Supplies / Pet Food

    Did you know?

    During the 2021 storm, many Dallas residents were without power for days. A manual can opener and backup battery for your phone were cited as the most undervalued items.

    Maximizing ROI Projects That Add Value

    Not every dollar comes back the same way. Modest kitchen refreshes, targeted bathroom fixes, and efficient windows are steady performers in many resale reports. Simple curb moves such as paint, tidy landscaping, and cleanup deliver value without guesswork.

    Smart controls and some solar add‑ons can draw buyers who want lower operating costs. Markets move with rates and local supply, so the top pick this fall may slide by spring.

    Bringing It All Together for Your Fall 2025 Home Project Plan

    A strong fall plan blends comfort, resilience, and long‑term value. Put insulation, air sealing, windows, and heating maintenance at the front of the list so bills stay manageable and outages hurt less when temps drop.

    Use flexible upgrades, convertible furniture, smarter controls, and modular storage to stretch each room across seasons. Keep curb appeal and outdoor comfort on the list because you feel those wins every day and buyers notice them too. Check tax credits and local rebates for heat pumps, insulation, doors, and windows to lower the bill.

    FAQs

    • What is the 30 percent rule for renovations?

    There is no universal 30 percent rule for remodels. A more practical guardrail is to keep a kitchen around ten to fifteen percent of the home value and a bathroom around five to ten percent, then hold a ten to twenty percent contingency for surprises. Local comps and appraisals still set the ceiling for what makes sense.

    • What are the most in‑demand home improvements for 2025?

    Energy‑efficient windows, smart thermostats, refreshed kitchens and baths, outdoor living that works in cool weather, and flexible room solutions such as a Murphy bed keep showing up in buyer wish lists. Demand shifts with energy prices and interest rates, so rankings do move during the year.

    • Which home projects offer the best ROI in fall?

    Curb projects such as a new garage door or a steel entry door often lead cost versus value lists, and minor kitchen work, targeted bath updates, and efficient window replacements are steady choices. Returns still vary by neighborhood style, inventory, and the quality of the install.