Category: Home Maintenance Inspection

  • Heater Maintenance Tips for Extreme Cold Weather

    Are you getting ready for winter’s harsh cold? Do your heating and cooling systems stand a fighting chance in such extreme temperatures? Keeping your living spaces warm and cozy during winter is a necessity, and a little maintenance can go a long, long way in terms of preventing breakage.

    Here are a few simple tips for keeping your heating system running like a charm.

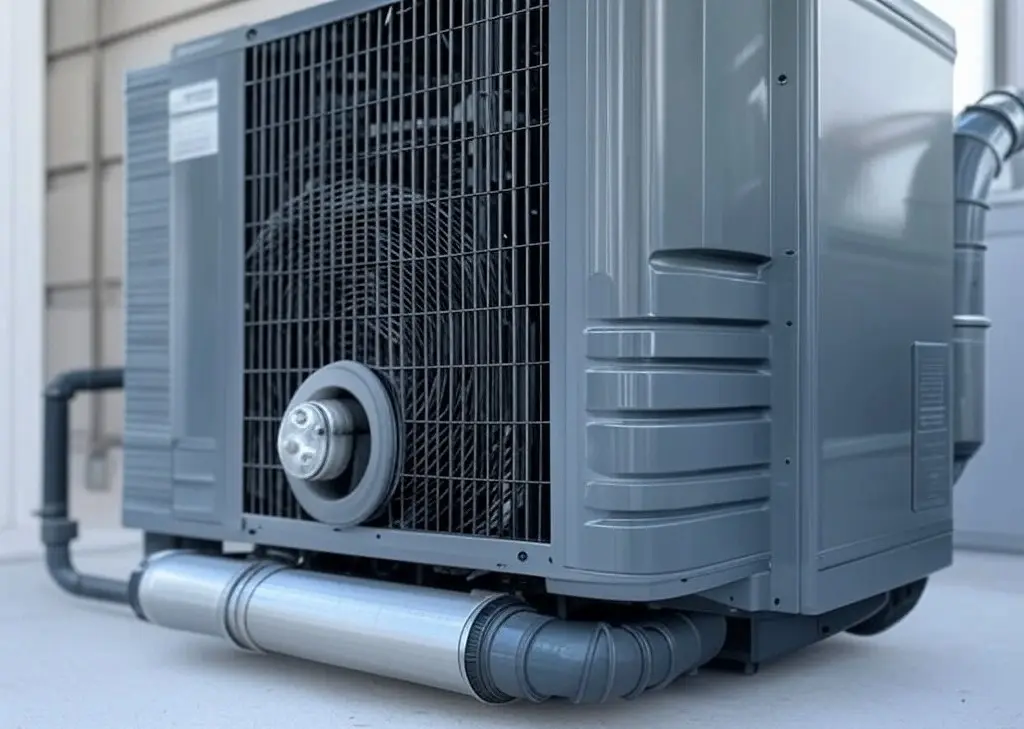
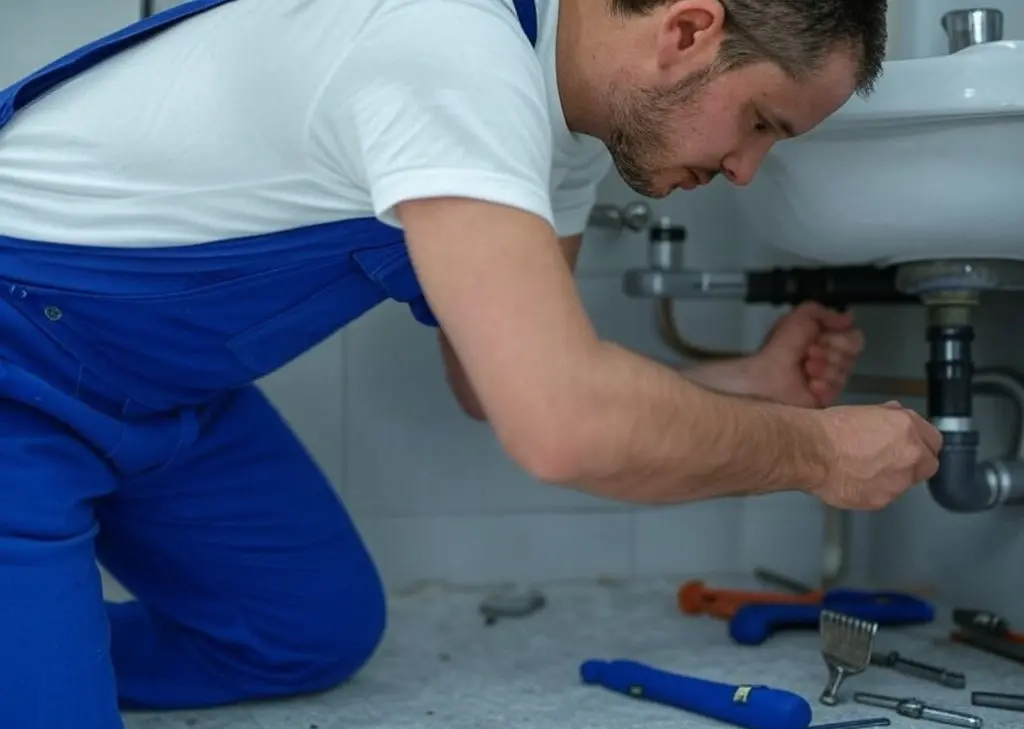
    Schedule a Professional Inspection

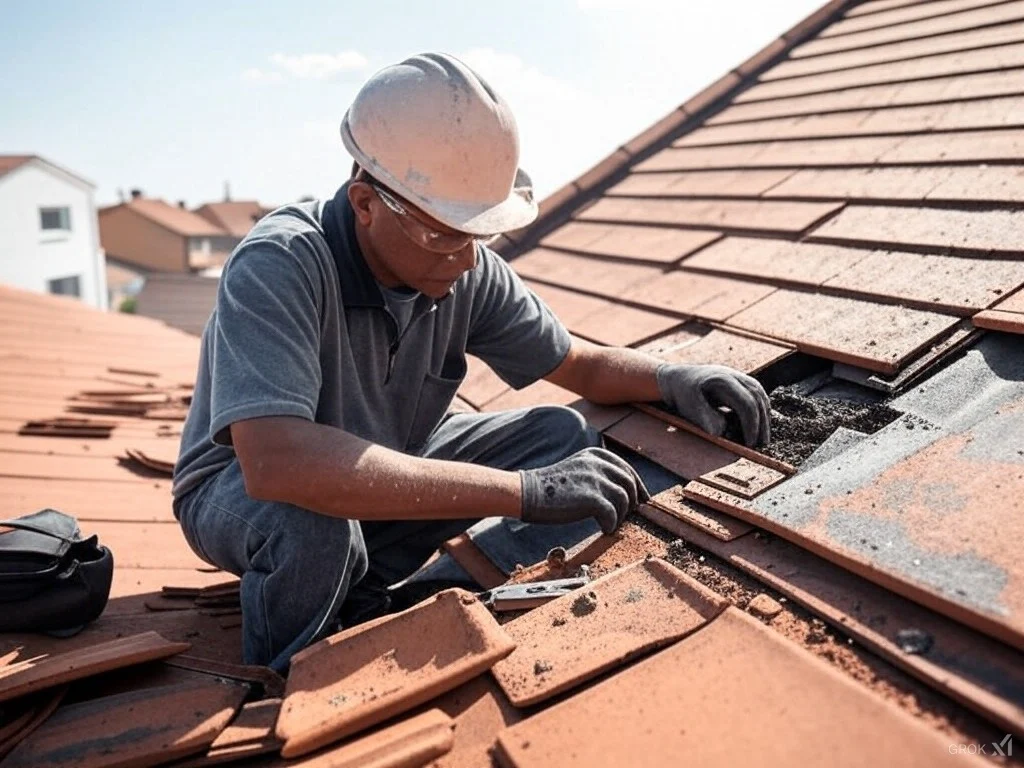
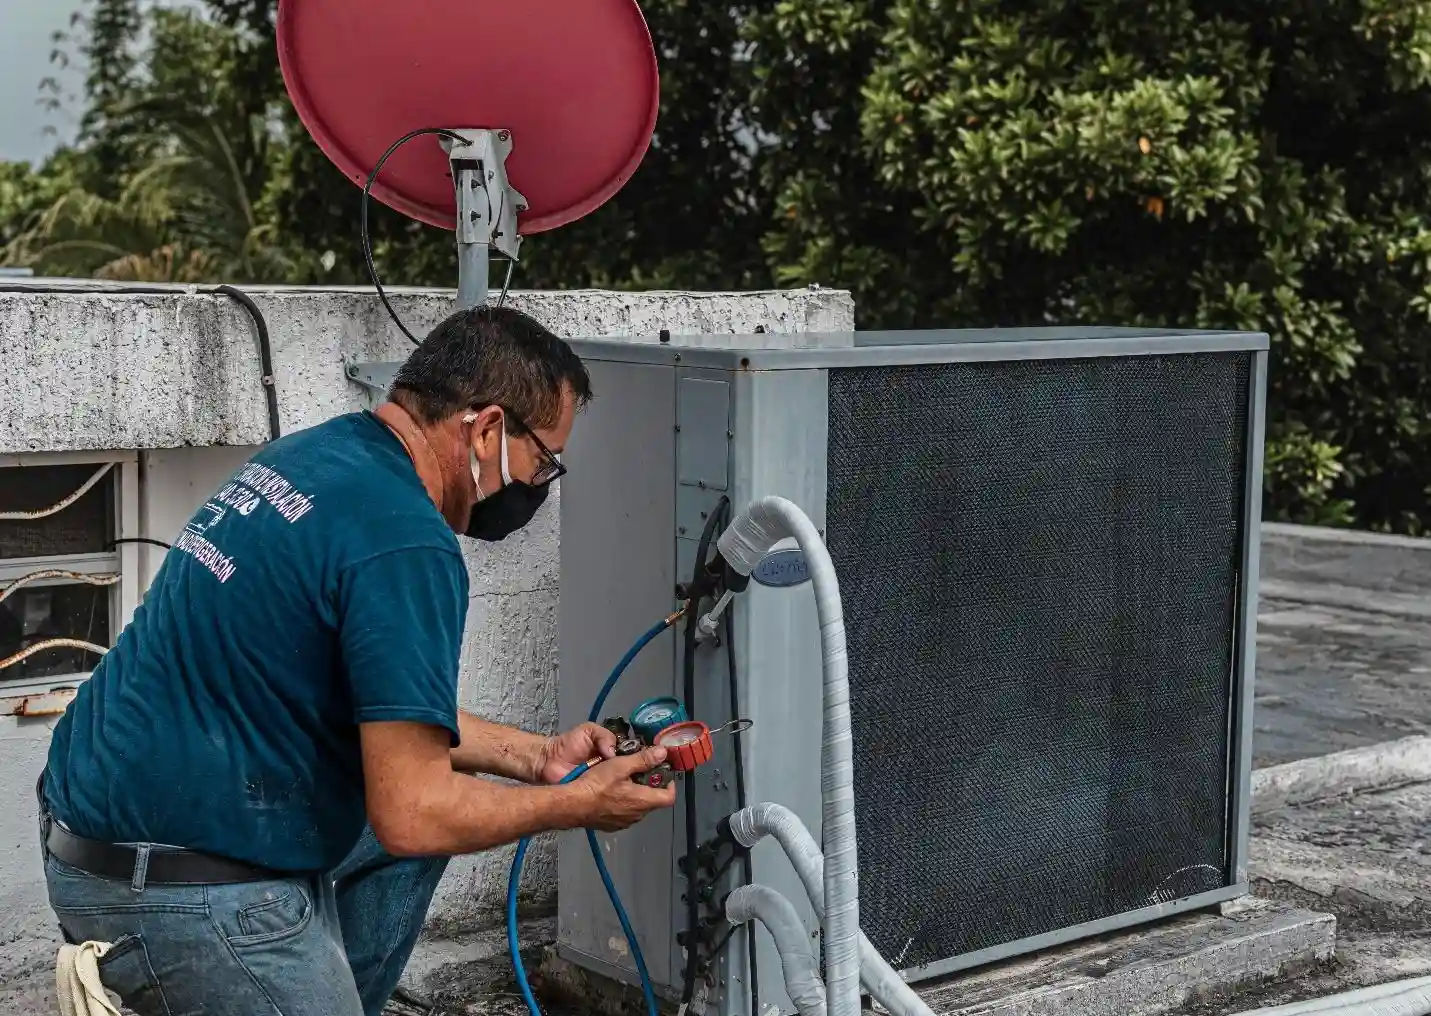
    When was the last time a professional inspected your heater? If you’ve found yourself Googling “heater repair near me“, it’s a sign to get your unit checked. A licensed technician can catch early signs of trouble, saving you from the nightmare of a breakdown in sub-zero temperatures.

    During an inspection, the technician will check burners, clean essential parts, and test the system’s safety controls. This helps your heater run more efficiently, saving energy and lowering your bills. Getting this done before winter sets in will give you peace of mind when the cold really hits.

    Replace or Clean Air Filters Regularly

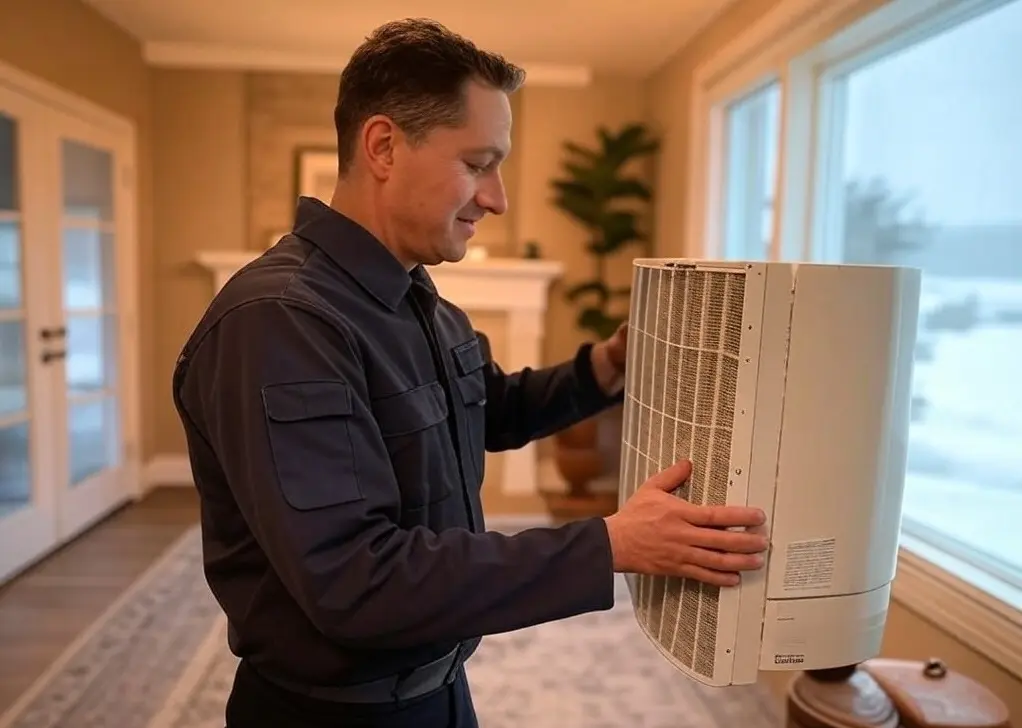
    Clogged filters are one of the sneaky culprits behind poor heating performance. They block airflow, forcing your system to work harder, which drives up energy bills and shortens the life of your equipment.

    To keep things running smoothly, swap out or clean your filters every 30 to 90 days—more often if you have pets or allergies. Clean filters improve airflow, enhance air quality, and prevent your system from overworking itself.

    Seal Leaks and Insulate Your Home

    Feeling drafts around your doors and windows? That warm air might be sneaking out, causing your heater to work extra hard. And you know what that means, high utility bills and less effective heating.

    To fix it, seal up those cracks with weatherstripping or caulk. You might also want to add more insulation, especially in the attic. Keeping the heat where it belongs will give your heater a break and keep you cozy without draining your wallet.

    Optimize Thermostat Settings

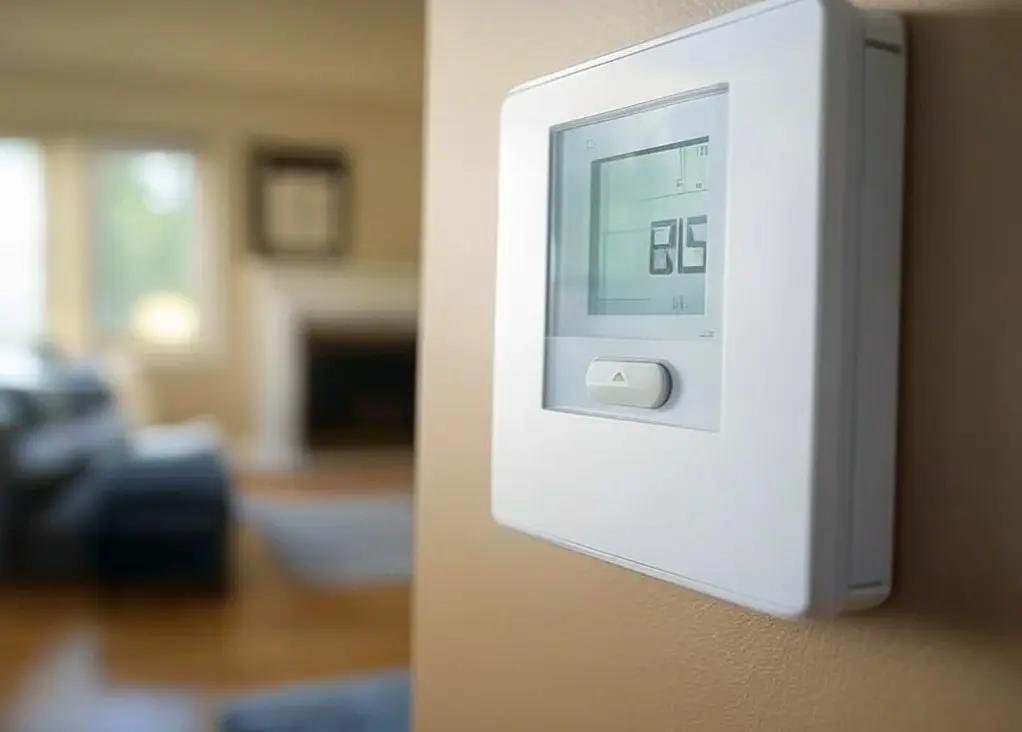
    Your thermostat can either help you out or cause trouble, depending on how you set it. Turn it up too high, and your heating system works overtime. Set it too low, and you’ll be stuck shivering.

    The sweet spot is a moderate temperature that keeps your home comfortable without wasting energy. If you haven’t already, think about upgrading to a programmable or smart thermostat. These devices can adjust the temperature based on your schedule, saving energy when you’re not home.

    Keep Vents and Ducts Clear

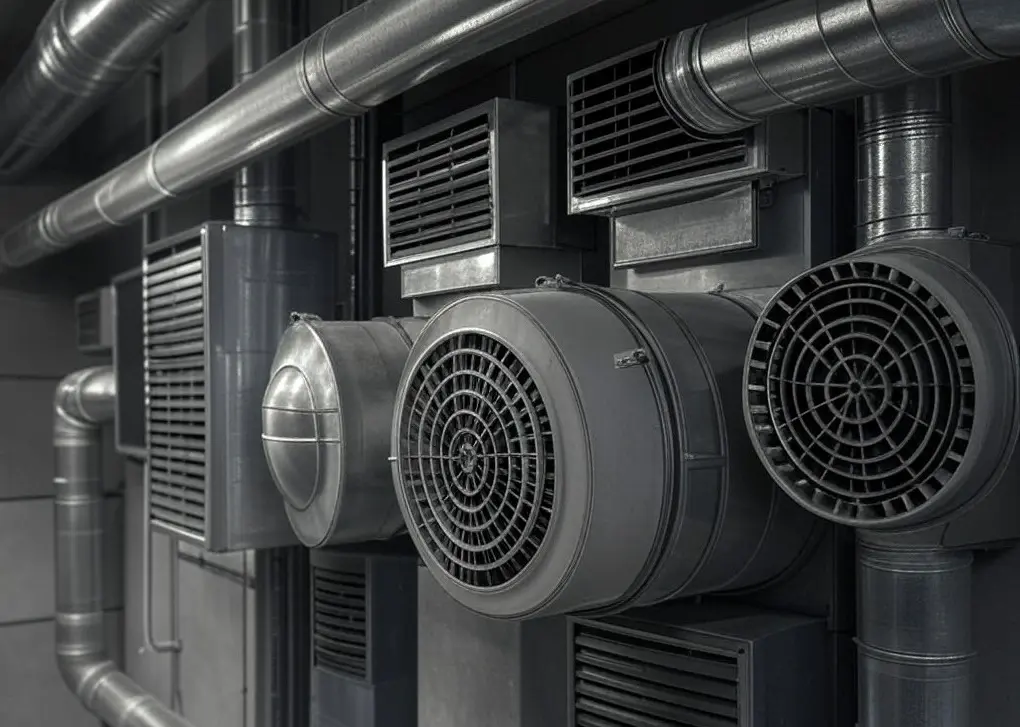
    Blocked vents are like roadblocks for warm air. Dust, debris, or even misplaced furniture can stop air from circulating properly, making some rooms feel colder than others.

    Give your vents a regular vacuuming and check for any obstructions. Also, inspect your ducts for leaks or blockages. Clear airflow not only improves heating efficiency but also boosts your indoor air quality.

    Stay Warm Without Worry

    Getting your heating system ready for extreme cold doesn’t have to be a hassle. If something goes wrong, a quick search for ‘heater repair near me‘ will connect you with pros who can fix it fast. Regular maintenance helps you stay ahead, so you can enjoy a warm, worry-free winter.

  • Signs Your Home Needs Immediate Repairs

    Source: pexels.com

    Owning a home comes with many responsibilities, particularly in maintaining safety and integrity, especially maintenance to ensure its safety as well as integrity. Speaking of, it’s important to catch your home’s signs of distress early. Responding promptly not only ensures your safety but also assists in managing repair costs.

    Many homeowners may neglect small problems until they have turned into significant, expensive repairs. This article will help you to identify those red flags around the house that indicate that you need to take action right away. 

    Unusual Noises from Systems

    It starts with a noise. Maybe it’s a creak that you didn’t notice before, or a banging pipe when the hot water runs, or maybe your HVAC system hums just a little louder than it did last summer. These sounds shouldn’t be written off as just quirks of an aging house; they may be cries for help from your home’s essential systems.

    Think your floors creak too much as if something has shifted in the foundation or is no longer structurally sound. Additional sounds, like banging pipes can indicate if you have air in the water lines or if the plumbing system is failing soon. An unusual racket from an HVAC system could indicate that it’s clogged or part of it has failed. Lending an ear to what your house is saying can save small problems from turning disastrous.

    Roofing Issues

    Always have your roof inspected for possible damages like broken shingles or tiles, growth of mosses and algae, and visible leaks. If direct sunlight can be seen in any space of your attic, then go to any roofing service for replacing the roof immediately. reaching out to a roof replacement company may be the best option for keeping your home protected from the elements.

    Persistent Dampness or Mold

    Moisture in a home not only can cause damage, but also serious health risks. Stains that stay wet, flaking paint or a musty odor often indicate secret leaks or condensation problems.

    When moisture seeps into walls or ceilings, it creates a perfect place for mold to develop. Then too much mold not only affects the air quality but also can lead to structural damage. A professional can identify the root cause of moisture and suggest measures for removing mold, as well as preventing its return.

    Cracks in Walls or Foundation

    Tiny crevices may not seem like pressing issues, but they can quickly turn into portals to larger problems. Whether in your foundation, floors or walls, cracks are an indication that your home is under stress. This could be natural settling, shifting soil underneath the foundation, even water damage.

    Small hairline cracks are common and usually benign outside of the furnace and flooding seasons, but bigger ones deserve a closer inspection by a structural engineer. They can analyze whether such cracks are simply aesthetic issues or signs of catastrophic problems.

    Skyrocketing Energy Bills

    An unexpected increase in energy costs is often linked to inefficiencies within your home’s systems. Windows that no longer seal properly, crumbling insulation or an aging HVAC system can all mean an energy-robbing home.

    High energy bills may also indicate that your heating or cooling system is running harder than it needs to, potentially due to clogged filters, causing leaks, or poor airflow.

    An energy audit knows what specific problems are being reported, so it can guide you toward solutions that will not only reduce your bills but improve the comfort and sustainability of your home.

    Plumbing Issues

    Sometimes, issues relating to plumbing can be subtle. For example, low water pressure may indicate leakage, while repeated backups suggest blockages or sewage issues.

    Discolored water from the taps indicates that the pipes have rusted. Professional plumbing services can address such issues within a short time, ensuring that water is safe and major breakdowns are prevented.

    Dimming Lights or Bad Wiring

    So while flickering lights can create a ghostly ambiance in your home, they should really be a cause of concern, not a source of entertainment. This phenomenon can be attributed to something as simple as a loose bulb or as serious as faulty wiring.

    Additional problems with your electrical system such as tripped circuit breakers or sizzling switches are definitive signs that your electrical system is overloaded or degrading. Electrical issues like flickering lights or tripped breakers are not only inconvenient, but they also pose serious fire risks. A licensed electrician can help prevent such dangers.

    It’s an essential part of being a homeowner to be able to identify and address these signs that your home needs repair so that small issues don’t become big ones.

    Sensible inspections and timely repairs can save you a world of money and keep your home a safe and pleasant place to live. Don’t wait until the time is right. Being proactive about maintenance means you can protect your investment and sleep soundly, knowing your home is in good shape.

  • How to Know if Your Roof Needs Repair or Replacement in 2025

    Your roof is your protection against the elements, but even the most durable roofs deteriorate with time. Being able to recognize the signs of damage early will save you costly repairs or replacement later on.

    Signs Your Roof Needs Repairs

    Water damage is one of the most frequent and costly sources of house repairs. Roof problems may be indicated by cracked, curling, or missing shingles, ceiling stains, or sagging.

    Other indications of wear in gutters include moss or algae development and granules. Higher energy expenses could be a result of inadequate insulation because of roof concerns; therefore, inspect your roof on a regular basis, particularly after storms.

    Can Missing Shingles Cause Bigger Problems?

    Yes, the missing shingles expose your roof to moisture, leading to leaks and mold. Missing shingles should not be allowed to persist without being attended to in order to cut costs on repairs.

    When to Consider Roof Replacement

    Repairs will suffice for minor issues, but if your roof is old—usually 30–50 years for materials like asphalt or metal—or has multiple leaks, sagging, or persistent mold, it may be time for replacement. Are you experiencing a need for a complete roof replacement? Click here to learn more!. Replacing your roof can improve safety and energy efficiency

    Storm Damage: Repair or Replace?

    Hailstorms give the roofs some serious damage. While minor issues are usually repairable, extensive damage or compromised structural integrity often means that full replacement is both safer and more cost-effective.

    Cost vs. Long-Term Value

    While roof repairs might be cheaper, constant repairs over time add up. Replacing your roof may be a better value, since it can also bring improved durability, energy efficiency, and even better resale value for your house. According to Home Guide, a new roof can offer up to 85% return on investment.

    Roofing Materials to Consider in 2025

    For the year 2025, metal and solar shingles will be favored due to their durability and sustainability. Asphalt shingles continue to retain versatility with affordability, while clay tiles maintain their durability in a warm region.

    Why Expert Inspections Matter

    Regular inspections by a roofing professional can catch issues early, extending your roof’s lifespan and preventing costly repairs. The cost of an inspection will generally range from $119 to $900, depending on the size and material of the roof. For larger commercial roofs over 1,500 square feet, inspections can cost between $1,000 and $2,000.

    Conclusion:

    The decision between repairing and replacing depends on the condition and age of the roof. While repairs may extend a newer roof’s life, older roofs might benefit from a full replacement. Consulting a roofing professional ensures you make the right decision to safeguard your home.

  • Signs Your Driveway Needs Asphalt Repair

    Have you noticed cracks, potholes, or fading on your asphalt driveway? Could these be warning signs that it requires repair? Addressing issues early can save significant costs and extend the surface’s lifespan.

    A ruined driveway affects not only aesthetic appearances but also safety. Regular inspection and professional asphalt repair can identify the problems before they escalate. Understanding these warning signs allows you to take prompt action to prevent costly replacements.

    1. Cracks in the Surface

    Visible fissures are some of the most common manifestations of deterioration. They may range from tiny hairline cracks to larger, more visible gaps. Cracks allow moisture to penetrate into the foundation and weaken the asphalt over time. If left unattended, they can lead to potholes and other severe structural problems.

    2. Formation of Potholes

    Potholes are more than a nuisance; they reveal serious underlying issues. They occur when water infiltrates fractures and erodes the asphalt’s foundation layer. Potholes should be repaired as soon as possible to avoid additional growth and vehicle damage. Neglecting this problem might result in more expensive repairs in the future.

    3. Uneven Surface and Sinking Areas

    An uneven driveway plainly shows that the foundation underneath the asphalt is eroding. this may be due to poor drainage, soil erosion, or high traffic. These sunken patches compromise the structural integrity of the surface and create a tripping hazard. Restoration immediately keeps the driveway usable and safe.

    4. Discoloration and Fading

    Over time, exposure to sunshine, weather, and chemicals may produce discoloration of the asphalt driveway. Fading means the protective sealer has worn off, and the surface is exposed to damage. A new seal coat can help restore its appearance and provide protection.

    5. Water Pooling

    Puddles after a rain signify poor drainage. Water should also flow easily and not laboriously down a well-paved driveway. Water pooling can deteriorate the asphalt, leading to fractures or potholes. Early addressing of drainage issues helps in maintaining the structural integrity of the driveway.

    6. Visible Wear Along Edges

    • The edges of an asphalt driveway often show the first signs of deterioration.
    • Fraying or crumbling along the sides indicates that the asphalt is losing its stability.
    • Damaged edges can expand inward, compromising the entire driveway.

    Regular maintenance can prevent further erosion and keep the surface intact.

    Steps to Address Driveway Issues

    • Seal small cracks to prevent water infiltration.
    • Fix potholes with professional-grade materials to restore durability.
    • Reapply sealant periodically to protect against fading and weather damage.

    Proactive care reduces the need for major repairs and extends the driveway’s life.

    Why Hire Specialists for Asphalt Driveway Repairs?

    Professionals can easily correct the underlying problems that untrained individuals cannot even see, thus eliminating recurring problems. Their expertise ensures durable asphalt repair that will maintain the driveway structurally sound. Investment in competent services leads to long-term savings in time, money, and effort.

    Recognizing the signs of asphalt deterioration goes a long way in keeping your driveway safe and durable. Timely repairs will keep the surface serviceable and attractive. Early attention to flaws can help a homeowner protect their investment and avoid costly replacements.

  • 7 Most Neglected Areas of the House That Need Cleaning

    Image Source

    The hidden and overlooked spots of the house usually remain unobserved, gathering dust, grime, and bacteria over time. Neglect in these areas can lead to negative effects on air quality, hygiene, and structural integrity.

    Cleaning the neglected areas prevents not only long-term issues like mold growth and pest manifestation but also ensures a cleaner home.

    1. Behind and Under Appliances

    Large appliances behind and underneath walls can be hotspots for dust, crumbs, and grease buildup, further attracting pests and creating odors. To clean, unplug, move away, use a vacuum cleaner, and wipe down surfaces with mild detergent. Regular maintenance prevents bigger problems and keeps kitchen and laundry areas cleaner.

    2. Air Ducts

    Air ducts are responsible for circulating air in space and, over time, build up dust, allergens, and mold that affect indoor air quality and the efficiency of the HVAC system. Skilled services, such as Amazon Air Duct Cleaning, will help raise indoor air quality and the efficiency of the system. That is how regular maintenance enables clean air to circulate and minimizes allergy-related issues.

    3. Ceiling Fans and Light Fixtures

    The ceiling fans and light fixtures tend to accumulate dust, cobwebs, and a lot of grime build-up that gives rise to allergies or an unhygienic atmosphere. Regular cleaning will keep the air fresh in the house and make them look good with an extended duster or microfiber cloth.

    4. Window Tracks and Sills

    Window tracks and especially window sills often retain dirt, insects, sometimes mold, and don’t always get cleaned during regular cleaning; the cleaning includes vacuum suction, toothbrush scrubbing, and wringing a cloth to wipe down the sill.

    Regularly cleaning window tracks and sills not only improves air quality but also prevents mold growth and structural damage.

    5. Baseboards and Molding

    Moldings and baseboards have tendencies to build up dust, pet hair, and dirt over time that dull a room’s look. Some cleaning that will be regularly practiced for an updated home will call for microfiber cloths, vacuums, damped cloths, and mild soap for a dust-free dissemination of areas.

    6. Behind the Toilet

    The area behind the toilet is one of the most overlooked spots in many homes. This narrow, hard-to-reach space often collects dust, hair, and grime, making it a breeding ground for bacteria and unpleasant odors. Since it’s not easily visible, it tends to miss regular cleaning routines.

    Use a long-handled cleaning brush or microfiber mop for cleaning narrow spaces, removing dust, and using disinfectant cleaner to kill bacteria and stains that could develop into foul odors and deterioration of cleanliness.

    7. Showerheads and Faucets

    Cleaning showerheads and faucets regularly makes a big difference in trying to avoid mineral deposits building up, or soap scum and mold. These should be soaked in vinegar and water a few hours in cleaning, scrubbed around their base and any crevices with an old toothbrush.

    Such overlooked areas-high dust and bacteria-can be approached for better air quality and hygiene, making a general contribution to the house’s looking good. Other ways of including regular deep cleaning or employment of professionals would prevent long-term damage and make much fresher space to reside in.

  • 9 Common HVAC Problems and How to Fix Them

    Have you ever found your home uncomfortably hot during summer or freezing during winter, even when the HVAC system is running? You are not alone. While HVAC systems can keep indoor comfort, there are places like Sacramento that have really scorching summers and cold winters. In time, these systems can start to develop a number of problems that hamper their ability to function correctly.

    Many of these are simple issues that can easily be noticed and then resolved, some may be resolved only with the help of a professional. Being informed of such common problems could save time, money, and frustration for you.

    We will let you know about some common HVAC issues and share with you quick practical tips on how to repair them.

    Source: pexels.com

    1. Uneven Temperatures Across Rooms

    Homeowners often complain of rooms that have varying hotness. For instance, you may enter one room, and it is so toasty but then as you go to the other one, it feels like winter inside there. In most cases, the HVAC system does not distribute air evenly when it is at fault for this issue. The problem could be due to dirty air filters, obstracted vents, or unfit duct installation.

    Start by checking your air filters and replacing them if they’re dirty. Make sure no furniture or objects are blocking your vents. If the problem persists, inspect your ductwork for leaks or poor insulation, as these can reduce airflow. Regular maintenance can go a long way in keeping your system balanced and efficient.

    2. Strange Noises Coming from the HVAC Unit

    Have you ever heard banging, rattling, or squealing from your HVAC unit? Strange noises are a clear sign something is wrong. The main culprits can be loose components, a damaged fan, or even caught debris in the system. Such kinds of sounds must not be ignored lest bigger problems follow.

    If you’re in need of professional help, consider HVAC repair in Sacramento, CA. Technicians in the area are skilled at diagnosing and fixing these noises quickly. However, before calling a pro, check for any visible debris around the system. Tighten loose screws if you can safely do so. If the noise doesn’t go away, it’s time to schedule a service appointment.

    3. Poor Airflow Throughout the Home

    Poor airflow makes your HVAC system work harder than usual when it feels weak or inconsistent. Common causes of restricted airflow are a clogged filter, blocked vents, and a malfunctioning blower motor that raises the energy bills at the same time as providing reduced comfort indoors.

    To do this, clean or replace the air filter first. Then, check if the vents are open and free from blockages. If these do not work, the blower motor may need repairs or replacement. A technician can also check your ductwork for issues such as leaks or blockages that reduce airflow.

    4. Thermostat Problems

    Problems with the HVAC system could be with a defective thermostat. Check for proper settings to your desired mode and temperature setting. Change the batteries when necessary, and if still not working, consider installing a programmable or smart thermostat for enhanced energy efficiency, superior monitoring, and better home comfort management.

    5. Frequent Cycling On and Off

    Short cycling in your HVAC system can strain it and increase energy bills. Most of these are due to a dirty filter, low levels of refrigerant, or an over-sized system. The filter should be replaced, and the airflow should be checked. If this does not help, have consultations with an expert for the refill of the refrigerant level. Have consultations with the HVAC specialist for long-term solutions.

    6. High Energy Bills

    Clean air filters or replace them to decrease your energy bills. Stop any leakage around ductwork by sealing them with HVAC tape. And if the age of your HVAC is above ten to fifteen years, think of its replacement with the purchase of a modern and efficient unit. Though expensive enough in price, these varieties promise savings in the longer run.

    7. Bad Odors Coming from the HVAC System

    A smell in the HVAC gives discomfort and may suggest electrical or mold problems. Replace or clean air filters; watch any ducts for moldy formations/debris using a flashlight through ventilation openings. While electrical odors require an immediate shutdown with expert assistance, regular cleaning will suffice, and professional maintenance might ensure that conditions cannot allow odors to permeate again.

    8. HVAC System Fails to Turn On

    If your HVAC system doesn’t turn on, it could be due to a tripped circuit breaker, faulty wiring, or a thermostat issue. Check the circuit breaker, inspect the thermostat for battery issues, and if these don’t work, there may be an electrical issue requiring professional attention.

    9. Leaking Refrigerant

    Refrigerant leaks can impact your HVAC system’s performance. If the levels of the refrigerant are low, it may struggle to cool your house as expected; you may also find ice building up on the coils.

    To fix this, check for visible leaks around the unit. While small cracks can sometimes be patched, refrigerant handling requires a licensed professional due to safety and environmental regulations. Regular maintenance helps to identify leaks early, avoiding expensive repairs and keeping your system running well.

    Conclusion

    Your HVAC system is one of your most valuable assets in matters of comfort throughout the whole year. Knowing some basic problems and taking early corrective measures can save you the frustration of expensive repairs and long downtime.

    However, not all issues can be self-diagnosed; hence, you might need to seek expert help if some of them are far beyond your ability. Your HVAC system will work accordingly and serve for a longer period, provided you pay due respect to its maintenance and handle timely repairs. By being proactive, you add years of life and comfort in your home with a system like this HVAC system.


  • Preventing Blocked Drains: A Guide For Facility Managers

    As a building manager or expert plumber like Plumberoo Plumbing clogged and slow drains are a nuisance you want to avoid. Blocked drains not only impede functionality, but also signal potential pipe damage if not addressed promptly. The good news is there are several effective preventative measures you can implement to minimize clogs and keep your drains free-flowing. In this comprehensive guide, we’ll explore a multi-pronged approach covering tenant education, strategic maintenance, and smart design considerations.

    Follow these best practices, and you’ll be far less likely to encounter the headaches of blocked drains across your properties.

    Tenant Education Regarding the Use of Drains 

    When it comes to drain unclogging, the key issues of maintenance come down to the knowledge the tenants have regarding what should not be sent down the drains. Make sure the tenants are educated on the following items: 

    • Fats / Oils/ Grease – These turn solid once cooled and will cause blockage
    • Produce stickers – These do not dissolve very quickly 
    • Hair – This forms tangles and accumulates debris
    • Paper product – paper towels, wipes, tissues and the such 
    • Cotton swabs – This does not flush down but gets stuck to the pipes 
    • Feminine products – These are large and thick for a reason.
    • Kitty litter – causes tremendous harm to sewer systems.

    Targeted messages reinforced with simple signs placed strategically around sinks and drains work effectively in the reduction of misusage.

    Installation of Strainers and Screens

    Barriers such as sink strainers, tub drain screens, floor drain covers, and other objects to prevent the entry of debris into the pipes must be installed at the union of the sinks or tubs to the piping system. The implementation of this measure will reduce the amount of debris collected by the drains themselves.

    Monitoring and Cleans Up of the Drains located in the Laundry Rooms 

    Laundry room floor drains get clogged with a build-up of hair and lint so there should be warnings for users of such facilities to avoid making unnecessary deposits of such materials. Regularly sending a drain snake through clogged surfaces would entail little wait time if Fan cord has been fitted as described above.

    Regular Monitoring of Drains 

    Regular routine maintenance evaluation of sink pipe and drains should be carried out in every occupied unit; sheer tension across the points of leverage will replace the need for such measures. Utilize drain cameras to determine if any faults have arisen or developed.

    Schedule A Professional Sewer Drain Cleaning On Regular Intervals

    Source: plumberooplumbing.com.au

    To ensure that the building’s sewer pipes remain unclogged, professional hydrojetting or augering services should be done at least every 12 – 24 months, or even more frequently if suggested by site conditions. This is known as a preventative measure since it helps to avoid big blockages.

    Caution/Restrict Use Of Garbage Disposal

    Garbage Disposal, while efficient, is always going to make plumbing stressful. Consider placing a ban on disposals in rental homes, or limiting usage to select low-power models that exert less pressure on the drain.

    Replace Old Galvanised Pipes

    If the outlets that are already in place are made of iron or steel, it is advisable to replace them with wider and smoother PVC pipes which will help in preventing accumulation and improving the flow of water. 

    Install Water-Efficient Outlets

    Outlets such as low flow showers, faucets and toilets result in less solid materials being flushed within the drains, thus decreasing possibilities of clogging. 

    Use Intelligent Landscaping Techniques

    Do not plant trees or shrubs with aggressive root systems within close proximity to the exterior drains as this may draw in and damage the pipes. 

    Conclusion 

    With consideration towards these preventative measures, one will be able to ensure that the drains are free from clogs and the amount of maintenance required in order to fix drain issues is minimized.

  • Got Sprinkler Trouble? 6 Reasons To Call A Pro For Irrigation Repairs

    Is your lawn looking a little less green lately? Are your sprinklers on the fritz? Irrigation issues can be super frustrating, but before you go tinkering around yourself, consider this – some sprinkler situations are better left to the professionals likeTeachers Irrigation Kansas City

    Source: teachersirrigation.com

    As someone who’s dealt with my fair share of wonky irrigation systems, let me walk you through 6 times when it really pays to call in an expert to get your system back up and running right.

    You Have No Clue Where to Start

    Let’s be real, if you’ve never touched your irrigation before, trying to suddenly diagnose and fix a problem can feel straight up bewildering. All those pipes, valves, heads – where would you even begin?

    When you’re totally clueless about the hows and whys of your sprinkler setup, don’t waste hours trying to YouTube University your way through it. Call up a trusted pro who can quickly assess what’s wrong and take care of it. Their expertise pays off big time.

    When you can’t find where is the leak

    Ugh, there’s nothing more frustrating than an irrigation leak you just can’t seem to locate. You stick your head in bushes, dig around pipes – but that water is coming from somewhere you just can’t access.

    A pro has the right tools, like pressure testing equipment, to sniff out the source of a leak even in hard-to-reach spots. Just describe what you’re seeing and they can methodically track it down. Say bye bye to that mysterious hidden leak.

    Pressure Problems Persist

    Are your sprinklers looking weak and anemic? Maybe certain zones have low pressure while others spray like crazy. Erratic water pressure usually means issues with the pump, valves or irrigation heads.

    But determining the exact cause of wonky pressure and knowing how to fix it takes training. A pro can methodically test your system, pinpoint any pressure problems and get your irrigation flowing evenly again.

    You Need Some Upgrades

    Perhaps your system is over 10 years old and needs some updates, like replacing outdated heads or pipes. Or you want to upgrade to a smart irrigation controller with handy features like smartphone control and weather sensors.

    Big upgrades like these are too complex for DIY. But an experienced pro can walk you through options, suggest the best equipment for your yard, and seamlessly install it. Invest in upgrades done right.

    You Keep Fixing The Same Thing

    Is there one zone or part that constantly acts up, even after you seemingly fix it? Repeated issues typically mean a deeper problem needs addressing.

    Rather than just applying quick band-aids, call in an expert. They can thoroughly examine that trouble spot to get to the root of the matter once and for all. Then you can stop wasting time on the same irritating problem.

    It Needs a Seasonal Check-Up

    Prevent problems before they happen. Have a pro perform a seasonal check-up to inspect and tune up your entire system. They can catch any potential issues and replace worn parts before they turn into headaches during the watering season.

    Think of it like changing the oil in your car, regular maintenance prevents big breakdowns down the road. Make check-ups an annual tradition for a smoothly running system.

    When In Doubt, Ask the Pros

    Dealing with a wonky irrigation system is mega frustrating, I know. But before you let DIY frustration get the better of you, remember – calling a professional irrigation repair service can save you loads of time, money and stress in the long run.

    Conclusion 

    So next time your sprinklers start acting up, don’t go it alone. Pick up the phone and let an expert get your system back in top shape. Your lawn will thank you.

  • How to Maintain Your Robotic Lawn Mower for Long-Term Performance

    Robotic lawn mowers are a great way to keep your grass looking good, without having to do it yourself. However just like any other machine it is important that they are kept up so that they can work properly all of the time!. When you give your mower the right care it will operate effectively for an extended period without breaking down often & costing too much in repairs. In this article, we will discuss how you can take care of your robotic lawnmower to ensure that it serves you well for many years!.

    1. Regular Cleaning of Your Robotic Mower

    Maintaining the cleanliness of your robotic lawn mower is one easy task that carries a lot of weight. The performance of the mower can be affected by grass clippings, dirt, and debris that accumulate around the blades, wheels as well as sensors. Take out the mower from its charging station on a regular basis & pass a soft brush or damp cloth across the underneath side while doing so. Do not use high-pressure water since this can cause harm to the electronics which are very sensitive when touched with it.

    By keeping the mower clean, you help it operate more efficiently and avoid potential overheating or sensor malfunctions caused by blockages.

    2. Check and Sharpen the Blades

    In maintaining a well-manicured lawn, the blade of your robotic lawnmower play a vital role. The blades may lose their sharpness with time or get damaged which will then make it operate unevenly, as well as overworking itself. You should always check for wearing out signs on the edges to ensure that the machine operates optimally.

    Blades should be inspected for wearing properties such as bluntness or chips hence depending on model they ought to be sharpened or changed after some months say three to four!. There are mowers that utilize disposable razor type cutting edges; on the other hand, some have stronger ones which require sharpening every now and then like once in a while”.

    3. Inspect the Wheels and Tracks

    In navigating the terrain, the movement of your robotic lawnmower is dependent on its wheels or tracks. In case dirt blocks the wheel it may be unable to move well & cutting across your garden!. Ensure you clean the robot clogged wheels with mud or grass after every operation and also check on its wearing rates particularly on lawns that are not level.

    For tracked mowers, ensure that the tracks are intact and there are no cracks or tears on them. This will ensure that that robot moves easily without putting much stress on its engine if all track & wheel systems are properly serviced.

    4. Maintain the Battery Health

    The powerhouse of a robotic lawn mower is its battery. For one to make sure that they have an optimal battery life they should not let the mower run until completely out of charge. Most modern robotic mowers return to their charging stations with low battery, but it is important to keep an eye on the charge cycles!. As time goes by, all batteries degrade so depending on usage you might have to change the battery after some few years.

    Keep the mower in cool & dry place when not in use for extended periods e. g. winter season so as to prevent battery deterioration.

    5. Keep the Charging Station Clean and Level

    Your robotic mower depends on the charging station for its operation; therefore you should always keep it in good condition. See to it that there is no rubbish or anything blocking around the station. On top it all ensure to put the station at a place which is flat so that there are not any problems related to docking and recharging.

    It is important to confirm that the charging connectors are tidy & without rust!. Dust may cause improper charging, thereby affecting the mower’s performance and reducing battery life.

    6. Update the Software Regularly

    Most of the present-day robotic lawn mowers are being built with sophisticated software that makes them adaptable to any kind of environment for proper operation. The manufacturers continue to improve the navigation algorithms, increase energy efficiency and also introduce new features through updates!.

    Refer to the guide or manual provided with your mower on how you can carry out the software update.
    If you update your machine’s software, it will function properly, operate at peak performance & take advantage of all recent technological advancements.

    7. Protect the Mower from Harsh Weather

    Even though a lot of robotic mowers can survive under different climatic conditions, their life span may be reduced by too much exposure to rain, sunlight, or extreme temperatures. It would be advisable that if there is expectation of heavy rains to bring the mower in for safety or make sure that it gets back to its charging point in time!. Some models are equipped with rain sensors which make them return the mower back to its docking station on sensing any rain. Nevertheless one should still take heed of the climatic issues.

    During winter keep the mower inside at a dry place and remember to disconnect the battery when possible.

    8. Check the Perimeter Wire Regularly

    In case the robotic mower that you have is guided with the help of wires acting as boundaries for its operation area, there is a need to check on them. The reason for this is because with time the wires may loosen, get covered by soil & at times one may cut them accidentally while working on the yard. A complete perimeter wire which is in its right place & position serves a very important role in helping the mower move around effectively without crossing over to other areas.

    If there are problems with where the mower is going, then you must test the circumferential wiring early!.

    9. Lubricate Moving Parts

    Your robotic lawn mower’s moving components, e. g., cutting mechanism and wheels, should be oiled regularly. This is because with time the wearing effects of friction which can be lessened by using the proper lubricant that is recommended by the manufacturers for such applications keeping all parts running smoothly!.

    Refer to the user manual as to where and how you should put grease but don’t forget about one important thing – do not overdo it because too much oil may gather dust & make it difficult for your device to operate properly!.

    10. Schedule Professional Servicing

    It is important to do regular DIY maintenance but it is also very important to schedule an annual/bi-annual professional service. Deep cleaning, replacement of worn out parts, updating of any necessary hardware among others are some of the things that certified engineers could do in servicing the unit. This will make your robotic lawn mower last longer and you will be sure that everything was taken care of at its early stage by prolonging its operation for sometime.

    11. Monitor for Software or Mechanical Issues

    Similar to every other type of technology, it is important to be vigilant for any potential problems that may occur with your robotic lawnmower. If you notice anything unusual such as erratic movement, inconsistent cutting patterns or if the app displays error messages then act fast and take care of them so that they don’t cause irreversible harm!. Today most mowers are equipped with a self-test system that can be used to identify malfunctions with ease; such devices will direct you to what should be done in order to set things right again.

    Conclusion

    To guarantee that your robotic lawn mower will last long and stay efficient, it is important that you take good care of it. If you follow this advice — clean the unit, watch the state of knives and wheels, update software, as well as carry out prevention from specialized services — for many years your device will be like new!. Preventive measures taken serve their purpose – with a properly maintained garden but also give you peace of mind as far as investment on the same is concerned since it enables one to experience an easy time at the garden throughout every season without any problem at all.