Author: TJ Cornwall

  • Off-Plan vs Ready Villas in Abu Dhabi: Which Is the Smarter Investment?

    Off-Plan vs Ready Villas in Abu Dhabi: Which Is the Smarter Investment?

    Abu Dhabi has become a popular market for buyers seeking strong returns, long-term potential, and a polished lifestyle. Villas sit at the center of that story. They offer privacy, generous space, and a daily routine that feels elevated. If you’re deciding between an off-plan villa and a ready villa, read this guide first. Each path affects your budget, your timeline, and the way you earn a return. Use this guide to learn how both options work and decide which one works best for your strategy.

    Interested investors can browse a wide selection of villas for sale in Abu Dhabi on Bayut, a leading UAE property portal, to explore various options according to their needs and preferences.

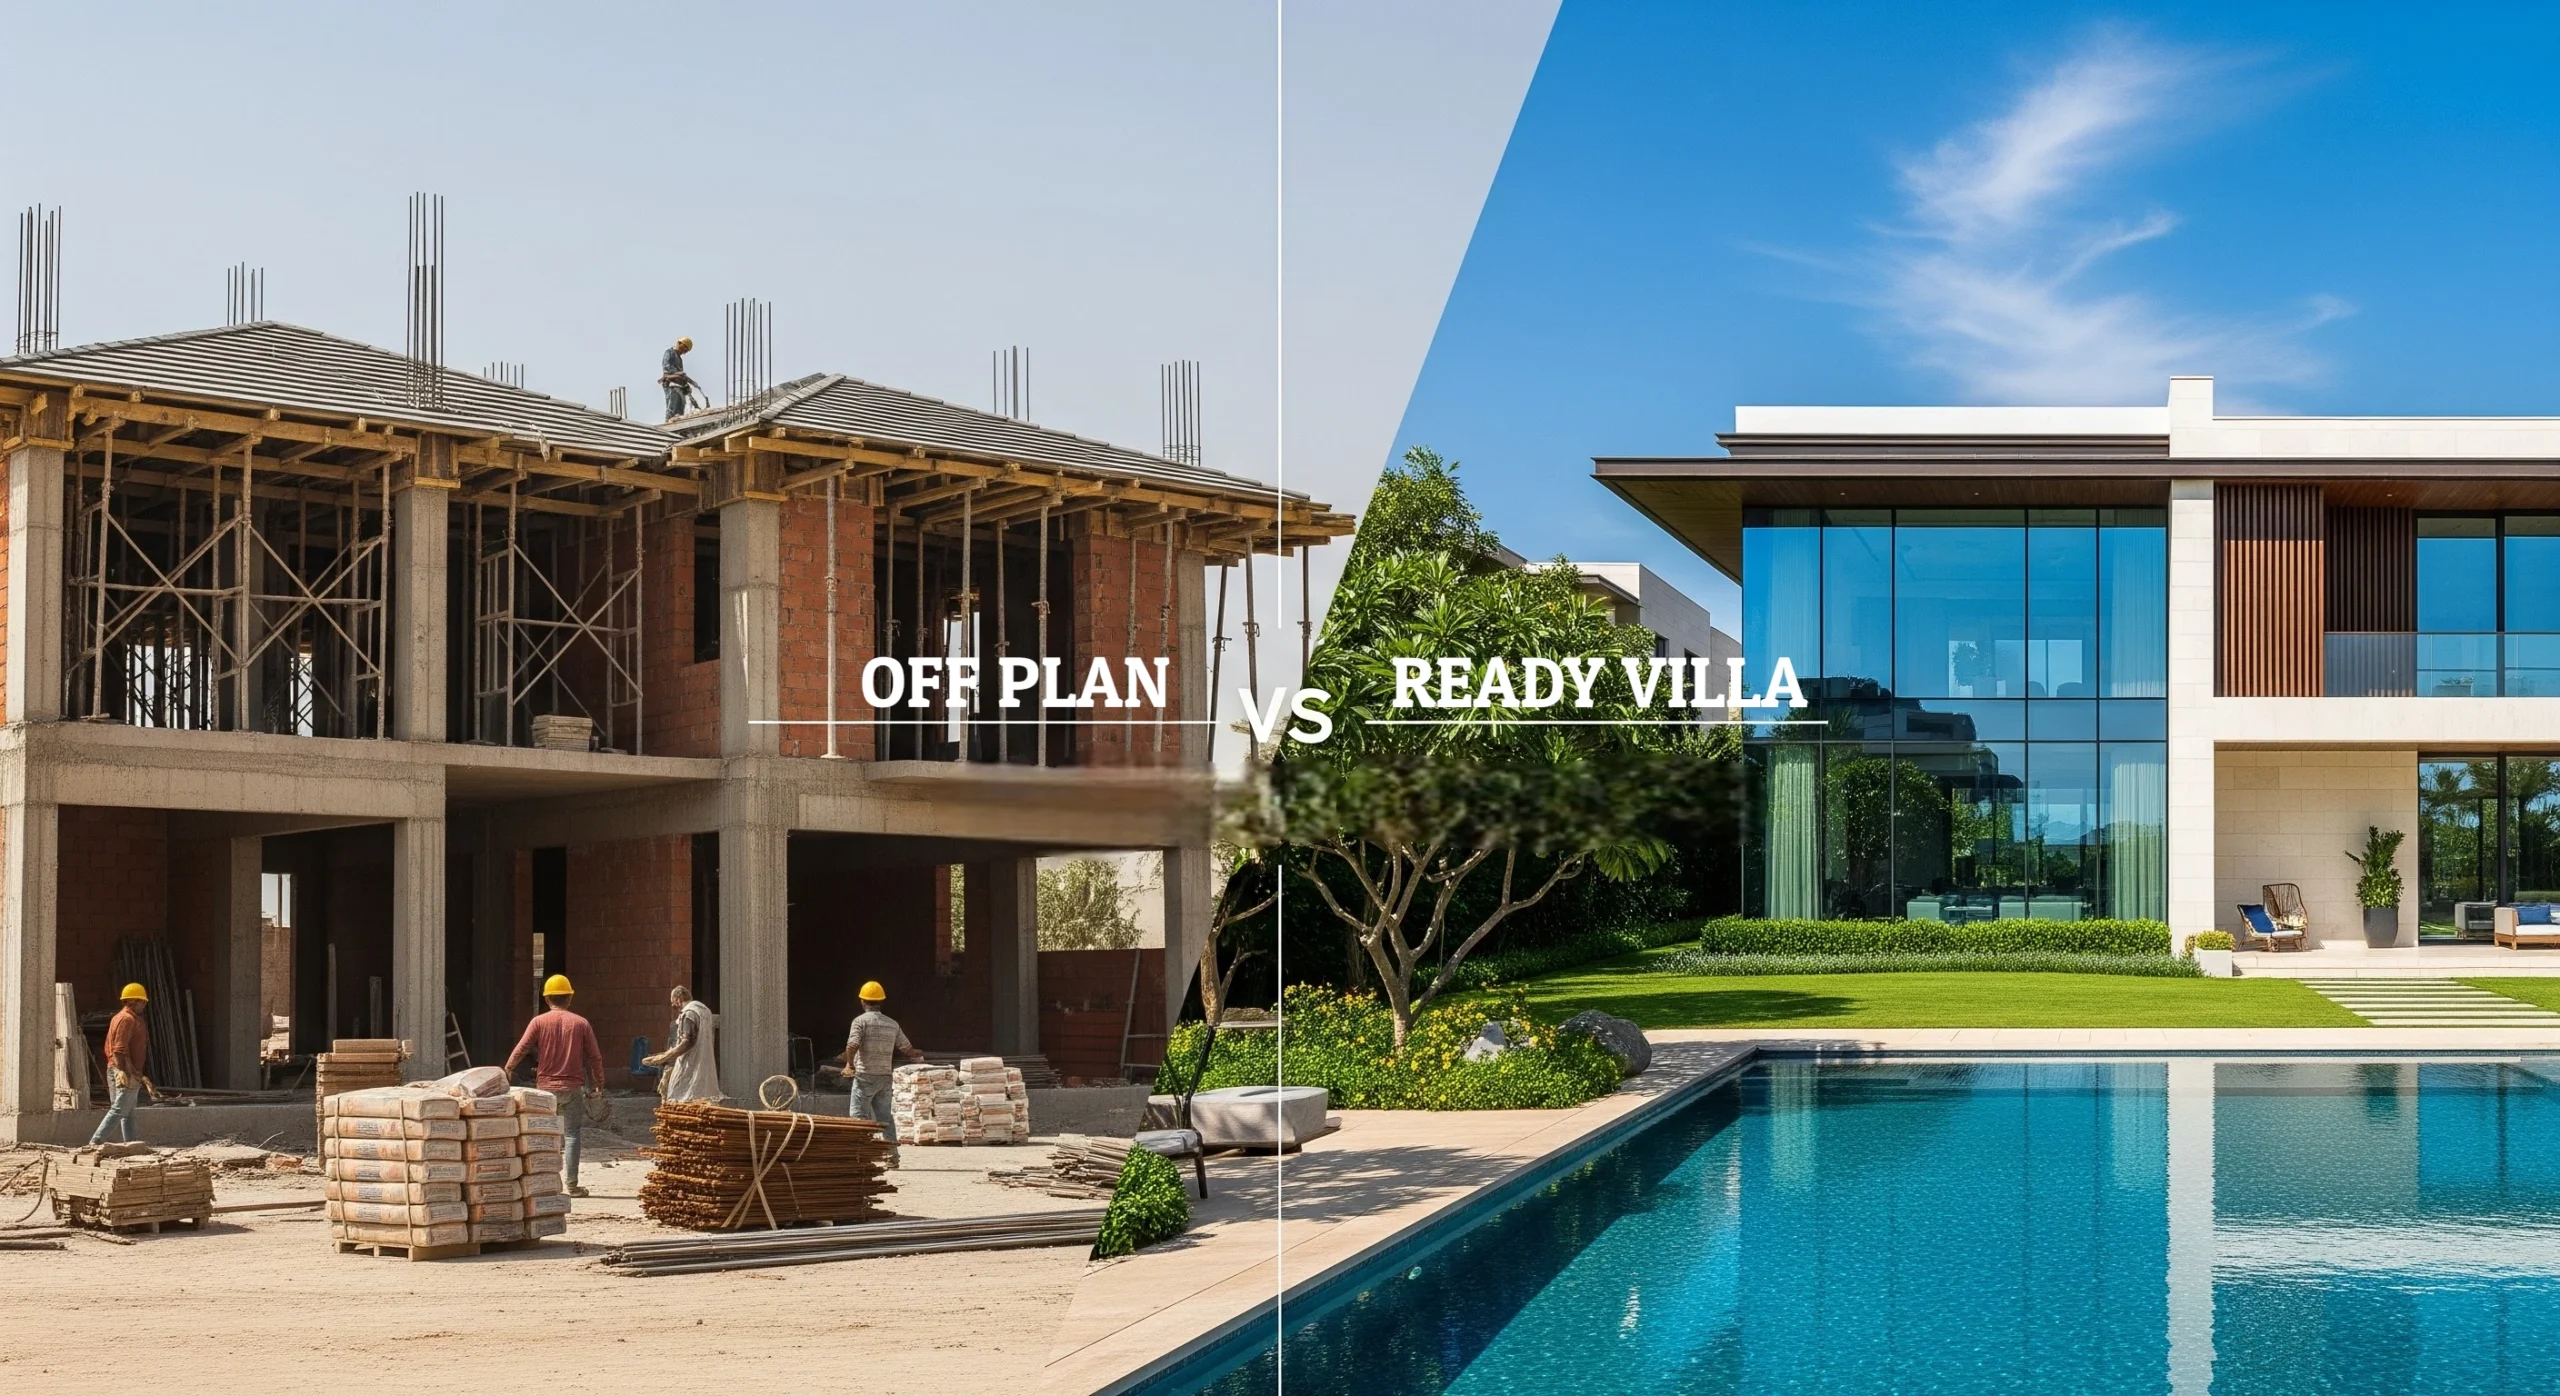
    How Off-Plan Villas Work

    Off-plan villas are sold during planning or construction. You typically buy directly from the developer, which can mean a lower entry price and a payment schedule that follows the build. Construction updates arrive in phases, and handover can range from one year to five years depending on the project.

    Why buyers choose off-plan

    Before you sign anything, it helps to know what stands out with this route:

    • Lower entry price: Launch pricing and early-buyer incentives usually lower your upfront cost compared to completed homes in the same community.
    • Flexible payment plans: Installments are spread over the build, which can make cash flow easier to manage.
    • Appreciation during construction: Values in well-located communities often rise by handover, which can set you up for a profitable resale.
    • Fresh design and amenities: New builds tend to include smart-home features, energy-efficient layouts, and access to brand-new community facilities.

    What to plan for with off-plan

    There are details to stay on top of so the experience meets your expectations:

    • Shifting timelines: Construction schedules can move, which pushes back your handover and rental start date.
    • Market swings: Prices can fluctuate during the build period, which affects short-term resale plans.
    • Developer track record: Delivery quality and on-time performance depend on the builder, so past projects matter.

    How Ready Villas Work

    A ready villa is complete and available for immediate use. You can walk the property, evaluate finishes, and confirm neighborhood appeal before making an offer. For many buyers, that transparency keeps the process straightforward.

    Why buyers choose ready villas

    If you value clarity and near-term income, this route checks a lot of boxes:

    • Immediate rental income: Leasing can begin as soon as you close.
    • Tangible due diligence: You can inspect the home, confirm condition, and understand the exact streetscape and access points.
    • Lower uncertainty: There is no build timeline to manage, which reduces delivery risk.
    • Financing comfort: Banks often prefer lending on completed homes, which can make mortgage approval smoother.

    What to plan for with ready villas

    You will want to factor in the realities of a finished property:

    • Higher upfront purchase price: Completed villas usually trade at a premium over similar off-plan listings.
    • Less customization: Layouts and finishes are set, so big changes may require renovations.
    • Maintenance by age: Older properties can need updates, which affects your first-year budget.

    Money and Timing: What To Expect

    A clean view of pricing, payments, and returns will help you line up your choice with your goals.

    Price and payment

    • Off-plan prices are often about 10% to 30% below comparable ready homes at launch, and developers commonly offer installment plans that continue through construction. Some plans include post-handover installments.
    • Ready villas require either full cash or bank financing at closing, which means a larger outlay upfront.

    Rental yield and ROI

    • Off-plan: Rental income begins after handover. The potential upside comes from price appreciation during the construction period, which can position you for a gain if you resell near completion or shortly after key community milestones.
    • Ready: Typical villa yields in Abu Dhabi are often in the 3% to 6% annual range, based on recent market reporting, so you can plan for income right away while building equity over time.

    Financing notes

    • Many lenders offer mortgages for both ready and off-plan villas, and terms vary based on the developer, the stage of construction, and your profile as a borrower. Preapproval clarifies your budget early and helps you move faster when you find the right fit.

    Where Demand Is Strong

    Buyer demand has stayed strong in established communities that offer a great lifestyle and easy access to everything you need. Areas such as Yas Island, Saadiyat Island, and Khalifa City remain popular thanks to master-planned amenities, cultural anchors, schools, and transit links. Long-term visa options for investors, along with ongoing urban investment, have strengthened confidence in both off-plan and ready property segments.

    Rules and Paperwork: What You Will See

    The framework is designed to support transparency and delivery.

    • Off-plan: Purchases are governed through escrow accounts that release funds only when construction milestones are met. Project registration, milestone schedules, and handover standards are documented by the developer and the authorities.
    • Ready: Transactions move through a standard title deed transfer with Abu Dhabi Municipality, along with standard closing costs and registration.

    It is smart to review the developer’s past deliveries, confirm escrow and registration details, and read the community guidelines so you understand service charges and use rules before you commit.

    Which Profile Fits Each Option

    Off-plan might be right for you, if you’re:

    • Focused on long-term appreciation and willing to wait for handover.
    • Working with a set budget and prefer staged payments.
    • Comfortable choosing a developer with a strong delivery record.

    Ready can suit you if you are:

    • Aiming for immediate rental income or planning to move in now.
    • Working with higher liquidity and want lower delivery risk.
    • Looking for a tangible asset you can inspect in full before closing.

    How To Decide With Confidence

    A short checklist keeps the process organized and aligned with your goals:

    • Research the developer’s past projects, delivery timing, and build quality.
    • Review current pricing, expected yields, and resale trends by community.
    • Match the payment plan to your cash flow and risk tolerance.
    • Clarify your timeline, either to move in or to start renting.
    • Map location details, including schools, access roads, parks, and daily conveniences.
    • Inspect documents, including sales agreements, escrow details, handover standards, and community service charges.

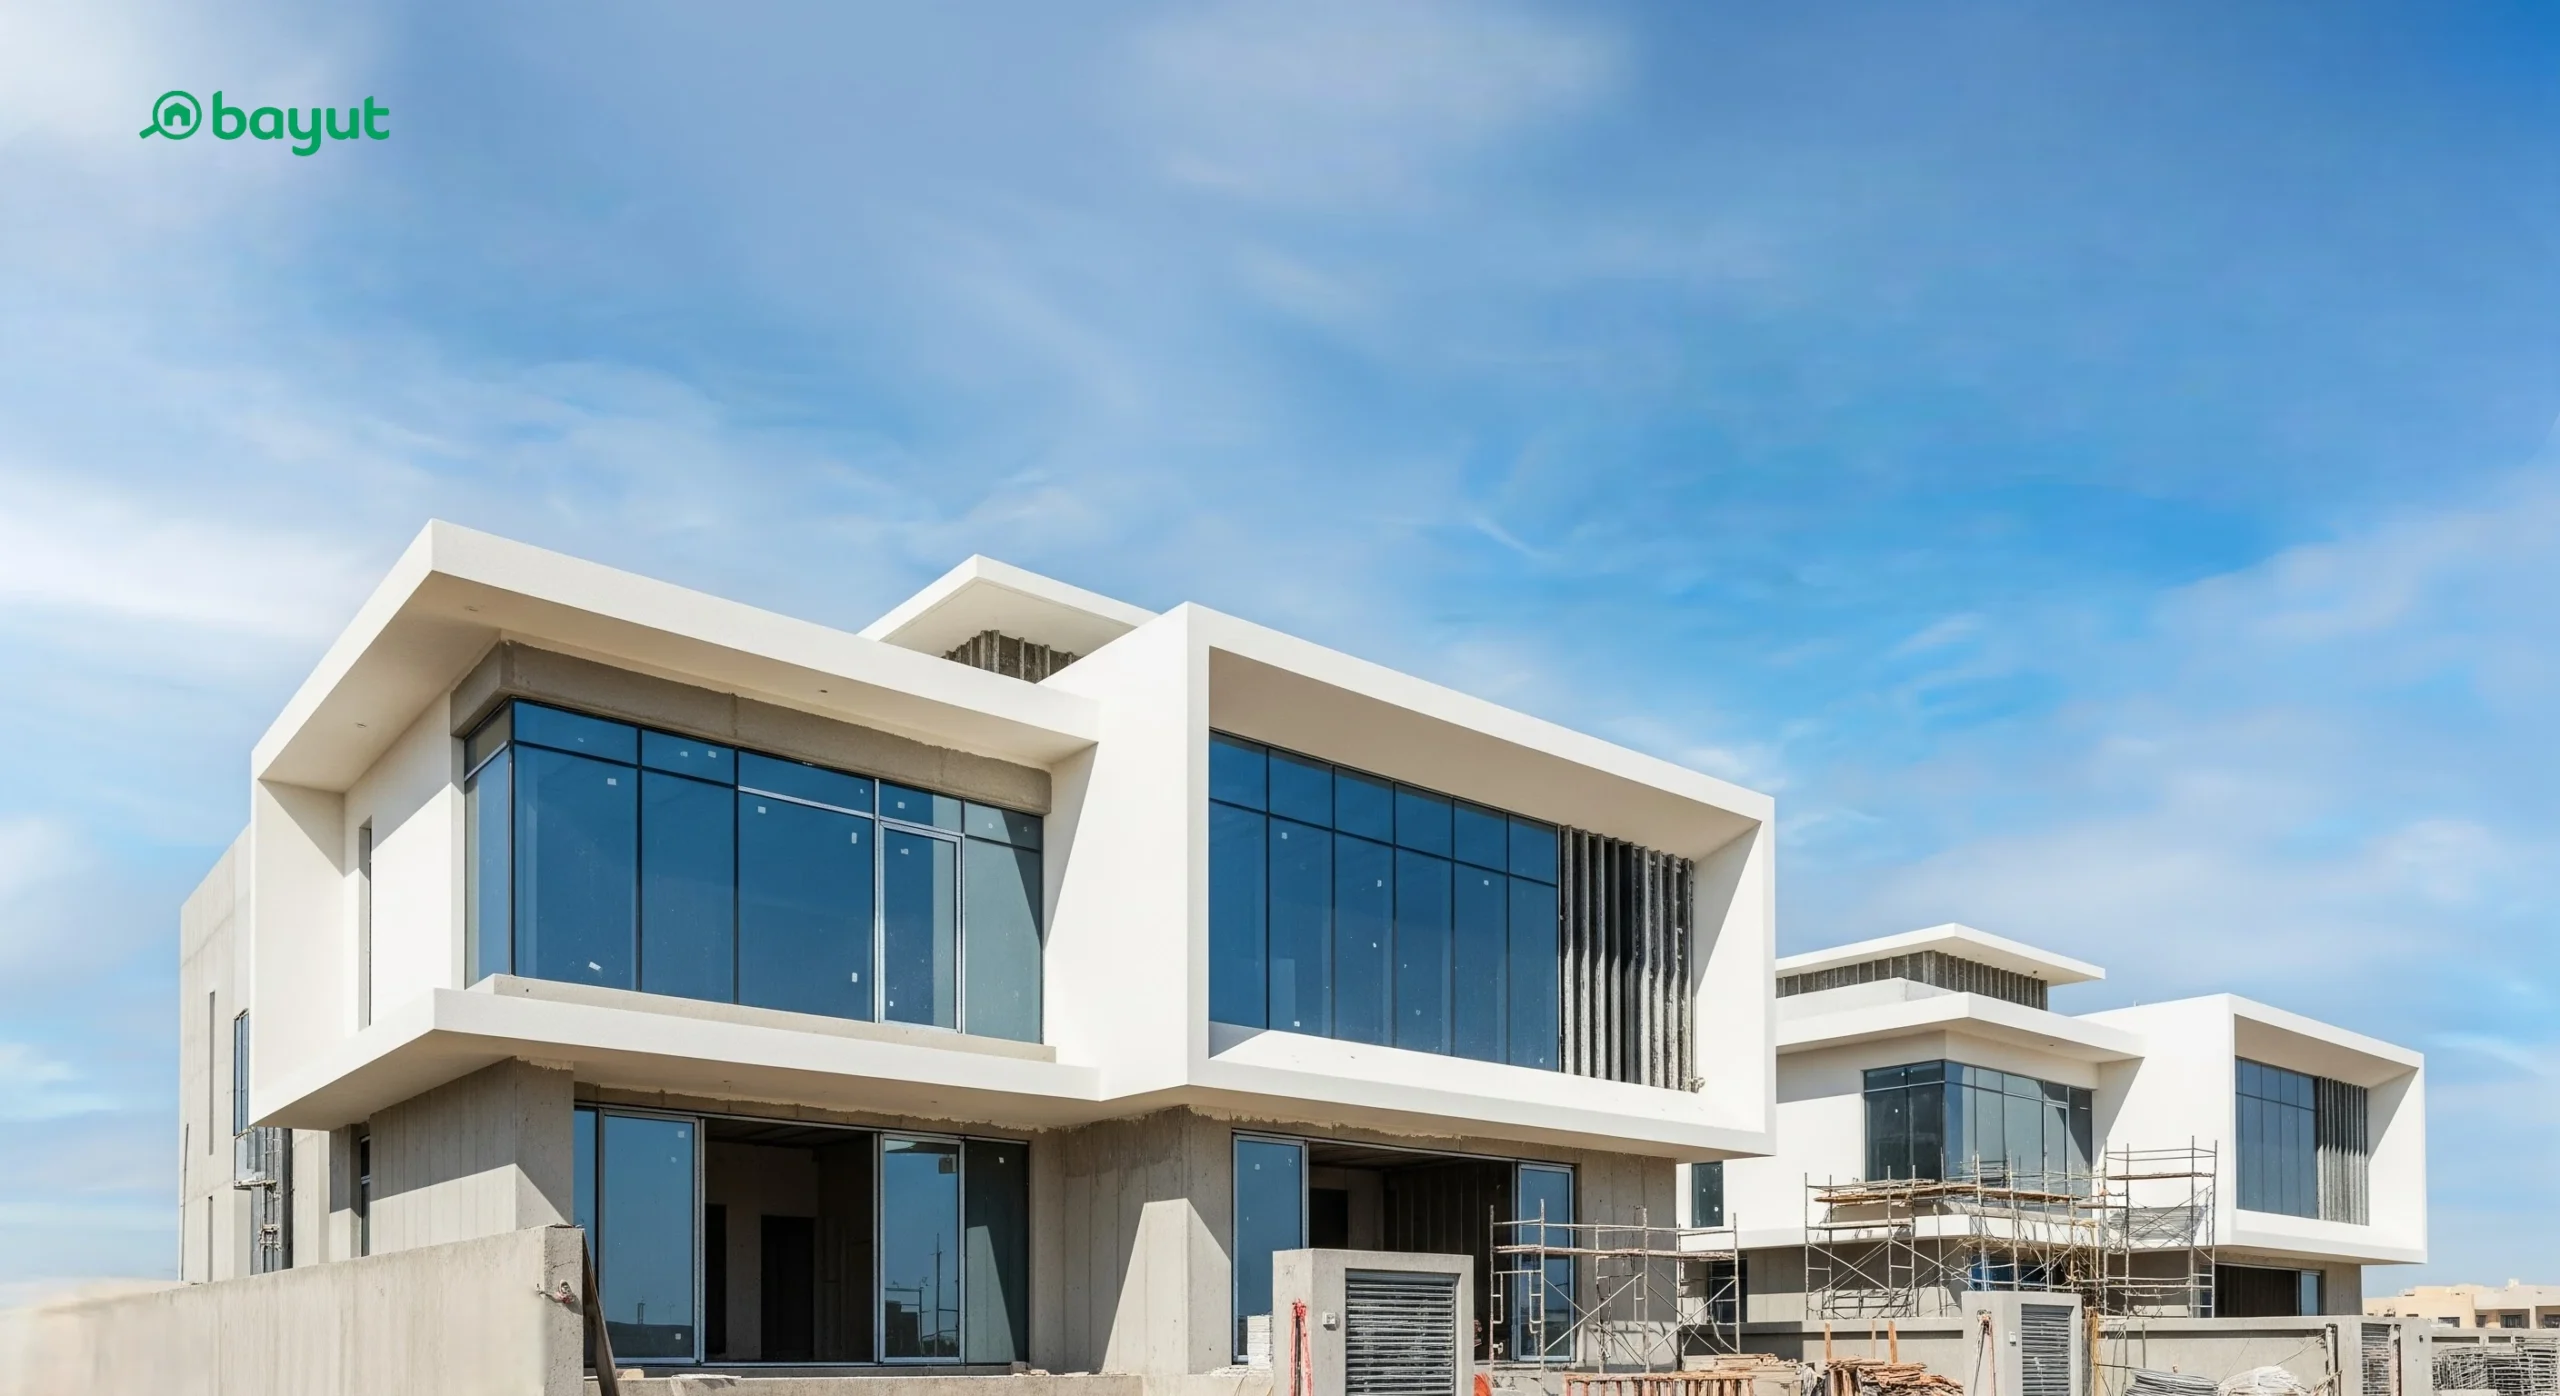
    If you want to explore live inventory, major portals like Bayut list a range of off-plan and ready villas across Abu Dhabi with filters for community, price, handover timing, and floor plan. Browsing active listings lets you compare properties directly and identify value in real time.

    FAQs

    Are foreigners allowed to buy villas in Abu Dhabi?

    Yes. Foreign buyers can purchase property in designated freehold zones such as Yas Island, Saadiyat Island, Al Raha Beach, and Al Reef.

    Do off-plan villas offer post-handover payment plans?

    Many do. Some developers allow a portion of the price to be paid after you receive the keys.

    What taxes apply when buying a villa in Abu Dhabi?

    There is no ongoing property tax. Buyers typically pay a 2% registration fee to Abu Dhabi Municipality at transfer.

    Can I get a mortgage for an off-plan villa?

    Yes. Banks finance off-plan purchases, and terms depend on the developer, the build stage, and your eligibility as a borrower.

    What documents will I need to buy a villa?

    Plan on a valid passport, Emirates ID if you are a resident, the signed sales agreement, and either proof of funds or a mortgage preapproval.

    How do service charges compare between off-plan and ready villas?

    Service charges apply in both cases. Newer off-plan communities can start with lower maintenance needs, while older ready villas may require larger upkeep budgets over time.

    Choosing Your Path

    Both off-plan and ready villas can work well in Abu Dhabi. Off-plan offers a lower entry point and room for appreciation during the build. Ready villas offer clarity, faster income, and fewer moving parts. Once you match the option to your budget, your timeline, and your comfort with risk, the decision becomes straightforward.

  • The Essential Role of General Contractors in Canada’s Construction Projects

    The Essential Role of General Contractors in Canada’s Construction Projects

    Rarely are construction projects easy. Numerous moving parts need to function as a cohesive unit, from scheduling and quality control to planning and budgeting.

    General contractors act as the backbone for any project, and guarantee that the vision is brought to life, safety is upheld, and the deadlines is completed.

    Why General Contractors Matter

    We’ve seen how easy a project can go due to lack of effective supervision. The coordination between architects, engineers and subcontractors is governed by General contractors, who act as primary coordinators. They prevent costly delays by ensuring that skilled trades, such as Freemasons and electricians, work in the same way.

    Among their primary duties are:

    • Budget management to maintain expenses in line with client expectations.
    • Sequence the work so that each step is basically flows into the next.
    • Hiring and management of undercontinents that contribute specialized expertise to the project.
    • To ensure safety and code compliance for customers and employees.

    Even the best design can fail during implementation if this structured process is not followed.

    Core Functions in a Project

     It is useful to examine the special areas that the general contractors are responsible for better understanding of their meaning:

    • Planning and permitting: They receive permits and guarantee the following by local regulations.
    • Resource allocation: They ensure that resources, such as equipment and materials, are available according to plan.
    • Problem solving: Entrepreneurs receive effective troubleshooting training when unexpected problems arise on a daily basis.
    • Quality assurance: They monitor each step to ensure that craftsmanship meets industry standards.

    Benefits for Clients

    There are many benefits to working with a general contractor:

    • Vendor relationships: Entrepreneurs often interact with labor and suppliers at negotiated rates.
    • Single point of contact: Customers save time not to manage many schedules and subcontractors.
    • Time efficiency: Coordinated actions cut waste and delay.
    • Risk reduction: Contractors manage insurance, responsibility and safety protocols.

    Customers can now focus on their goals instead of getting stuck with details.

    Collaboration with Designers and Architects

    How contractors work with creative professionals is another often overlooked factor. Contractors take over after a designer creates a vision in order to assess feasibility, recommend materials, and turn ideas into reality. This collaboration guarantees that the final product embodies both creativity and functionality.

    General contractors are critical regardless of the project size, from minor remodeling to major industrial construction. Having a reliable general contractor on board isn’t just helpful for customers, designers, and developers alike, but it’s also necessary for setting up success from the ground up.

  • Installing Your Own Wood Stove Chimney: A Smart Investment for Dallas Homeowners

    Installing Your Own Wood Stove Chimney: A Smart Investment for Dallas Homeowners

    When you’re looking at ways to add value to your Dallas home while cutting down on those sky-high heating bills, installing a wood stove might just be the smartest move you make this year. But here’s where most homeowners get sticker shock: the installation costs.

    Professional chimney installation can easily run $3,000 to $5,000 or more, turning what should be a money-saving upgrade into a major expense. Installing your own chimney system might sound complicated, but it’s actually a lot simpler than you think. With the right guidance and quality materials, you can tackle this project yourself and pocket thousands of dollars in the process.

    Why Dallas Homeowners Are Going DIY

    The Texas housing market has been red-hot for years, and with that comes higher costs across the board. Contractors are busier than ever, which drives up installation costs. Meanwhile, energy prices keep climbing, making alternative heating sources more attractive than ever.

    A quality wood stove can slash your heating bills by 50% or more during those chilly North Texas winters. When you factor in the money you’ll save by doing your own installation, you’re looking at a payback period of just a few seasons instead of several years.

    But beyond the financial benefits, there’s something satisfying about completing a project like this yourself. You’ll know exactly how everything is installed, which components were used, and how to maintain the system properly. That peace of mind is worth plenty on its own.

    Understanding Chimney System Basics

    Before diving into installation, it helps to understand what you’re working with. A modern wood stove chimney system consists of several key components that work together to safely vent combustion gases outside your home.

    The stove pipe connects your wood stove to the chimney system. This is typically single-wall or double-wall pipe that runs from the stove outlet to where it meets the insulated chimney pipe. The diameter matters here – most residential installations use 6-inch pipe, though some larger stoves require 8-inch systems.

    Once you transition from the living space to areas where the pipe passes through walls, ceilings, or the roof, you’ll switch to insulated chimney pipe. This double-wall or triple-wall pipe is designed to maintain safe clearances from combustible materials while keeping the flue gases hot enough to maintain proper draft.

    Manufacturers have standardized connections, included detailed instructions, and engineered systems that don’t require specialized tools or extensive construction experience.

    Planning Your Installation

    Every successful installation starts with proper planning. Begin by determining the best location for your wood stove, keeping in mind both heating efficiency and installation requirements. You’ll want to minimize the number of turns and horizontal runs in your chimney system, as straight vertical runs provide better draft.

    Measure carefully from your proposed stove location to where the chimney will exit through the roof. This helps you determine exactly what components you’ll need and avoid costly delays while waiting for additional parts.

    Local building codes do apply to chimney installations, even DIY ones. While requirements vary by municipality, most areas require permits for new chimney installations. The good news is that most building departments are familiar with modern chimney systems and the permitting process is usually straightforward.

    Don’t forget about clearances to combustible materials. Modern insulated chimney systems have specific clearance requirements that are much less restrictive than older masonry chimneys, but they still need to be followed exactly. Your installation instructions will spell these out clearly.

    Selecting Quality Components

    This isn’t the place to cut corners. Your chimney system is a critical safety component, and quality materials are essential for safe, reliable operation. Look for UL‑listed chimney systems that are tested and listed by recognized testing laboratories.

    When shopping for the best chimney pipes for wood stoves, you’ll find systems designed specifically for different applications. Class A chimneys are required when passing through or near combustible materials, while connector pipe is used in the living space from the stove to the wall or ceiling penetration.

    A 6-inch stove pipe diameter is standard for most residential wood stoves, though you should always verify what your specific stove requires. Using the wrong diameter pipe can create dangerous draft problems and void your stove’s warranty.

    Many suppliers offer wood stove chimney kit packages that include all the components you need for a typical installation. These kits take the guesswork out of ordering and ensure all your components are compatible.

    The Installation Process

    Modern chimney systems are designed to go together logically, almost like a sophisticated set of building blocks. Most installations follow a similar sequence, starting with the stove pipe connections and working upward through the house to the roof termination.

    You’ll typically start by connecting the first section of stove pipe to your wood stove outlet. From there, you’ll run pipe to your wall or ceiling penetration point, where you’ll install the appropriate thimble or support box.

    The transition to insulated chimney pipe happens at this penetration point. This is where the single-wall connector pipe ends and the double-wall or triple-wall chimney pipe begins. This transition point is critical for both safety and proper system function.

    Once you’re in the insulated chimney section, installation becomes a matter of assembling sections as you work your way up through the house. Most systems use a twist-lock connection that creates both a mechanical joint and an airtight seal.

    The roof penetration requires careful attention to weatherproofing. A quality roof flashing system will keep water out while allowing the chimney to expand and contract with temperature changes. Take your time here – a small leak can cause big problems down the road.

    Getting Expert Guidance When You Need It

    Even with detailed instructions and quality components, questions come up during installation. Maybe you’re not sure about a specific clearance requirement, or you need advice on the best way to route your chimney through a particular part of your house.

    This is where having access to experienced technical support makes all the difference. The specialists at Flue-Pipes understand that DIY installers need a different kind of support than contractors. They can walk you through specific installation challenges over the phone, helping you work through problems without requiring an expensive service call.

    Having this kind of backup gives you confidence to tackle the project yourself while knowing help is available if you need it. It’s like having an experienced installer looking over your shoulder, ready to offer advice when you need it.

    Cost Savings That Add Up

    A typical professional installation might cost $4,000 to $6,000, while the same chimney system purchased directly costs $800 to $1,500 depending on height and complexity.

    Even factoring in tools you might need to purchase and the value of your time, you’re looking at savings of $2,500 to $4,000 on a typical installation. For many homeowners, that’s money that can go toward other home improvement projects or simply stay in your pocket.

    Safety Considerations

    Working on roofs and handling chimney components require attention to safety. Take your time, use proper safety equipment, and don’t hesitate to get help when you need it. A helper makes many parts of the installation easier and safer.

    Follow all manufacturer’s instructions exactly. These systems are engineered to work safely when installed according to specifications, but shortcuts or modifications can create dangerous situations.

    When in doubt, consult with experts. A phone call to technical support can answer questions and ensure you’re on the right track. It’s much better to ask questions during installation than to discover problems later.

    Maintenance and Long-Term Value

    A properly installed chimney system should provide years of trouble-free service with minimal maintenance. Annual cleaning and inspection are typically all that’s required, and these are tasks you can handle yourself once you understand your system.

    Regular maintenance protects your investment and ensures safe operation. A clean, well-maintained chimney provides better draft, burns more efficiently, and lasts longer than a neglected system.

    The value added to your home by a quality wood stove installation often exceeds the cost of the materials, especially when installation costs are minimal. Energy-efficient heating options are attractive to buyers, particularly in areas where heating costs are significant.

    Taking the Next Step

    Installing your own wood stove chimney system represents both an immediate cost saving and a long-term investment in your home’s value and comfort. With quality components, proper planning, and access to expert guidance when needed, it’s a project that’s well within reach of most homeowners.

    The key is starting with quality materials from reputable suppliers who understand the DIY market and can provide the support you need for a successful installation. Don’t let installation costs prevent you from enjoying the benefits of efficient wood heat in your Dallas‑area home.

    Your heating bills will thank you, your home’s value will benefit, and you’ll have the satisfaction of completing a significant home improvement project yourself. In today’s economy, that combination of practical benefits and personal satisfaction makes DIY chimney installation a smart choice for Dallas homeowners looking to maximize their investment.

  • Bay Window Prices and Options: Pella Bay Window Cost, Andersen Models, and Vinyl Options

    Bay Window Prices and Options: Pella Bay Window Cost, Andersen Models, and Vinyl Options

    A bay window is more than a functional addition. It’s a design feature that immediately transforms a room, projecting outward from the wall to create an alcove that feels made for a cushioned bench, a reading chair, or low built-ins. Angled side panels invite daylight from different directions, so the room brightens through more hours of the day. When the flank units open, you also get steady airflow. Once installed, the unit is a permanent improvement that becomes part of your real property, not a removable accessory.

    Homeowners choose this style to get curb appeal from the outside and extra square inches inside, without adding a full addition. Bay configurations commonly use 30‑, 45‑, or 60‑degree angles, and you can pair fixed or operable flank windows with a larger center picture panel. In living rooms, kitchens, and bedrooms, that combination adds seating, storage, or a sunny spot for plants with a clean, built‑in look.

    You can order wood, fiberglass, or vinyl frames. Wood delivers warmth and a furniture‑grade finish. Fiberglass offers crisp lines and strong thermal performance. Vinyl keeps maintenance light and pricing accessible. Finish choices range from stained interiors to color‑matched exterior cladding. Grilles, factory‑installed blinds between the glass, and screens round out the look. Energy‑saving low‑E glass and argon fills help control heat gain and loss, which supports lower utility costs and can make your home more attractive when it is time to sell.

    Bay Window Cost Comparison: Pella, Andersen, and Vinyl

    Pella bay window cost

    For a typical replacement, a Pella bay window often lands between $2,000 and $5,500. Size, the projection angle, wood or fiberglass construction, upgraded glass packages, and options like between‑the‑glass shades move the number. Custom sizing and factory staining add to the total. Labor varies by region and by whether your opening needs structural reinforcement, so it makes sense to gather a few written quotes before you decide.

    Andersen bay window cost

    Andersen is known for long‑running product lines and its Fibrex composite frames. An Andersen bay usually ranges from $2,500 to $6,000 depending on configuration and options. Fibrex resists warping and takes darker exterior colors well, which keeps the look consistent on modern and traditional homes alike. As with any premium brand, glass, finish choices, and size influence the final amount.

    Vinyl bay windows

    If you want the most budget‑friendly route, vinyl bays generally price in the $1,200 to $3,000 range. Vinyl trims routine upkeep and stands up well to moisture. The tradeoff is a simpler, more utilitarian look compared to stained wood interiors or composite exteriors. For rentals, secondary living spaces, or refresh projects where cost control matters most, vinyl often makes the short list.

    Energy‑efficient and custom builds

    Energy‑efficient packages with insulated glass and upgraded weather seals increase the bid up front and help rein in energy spend through the seasons. Bespoke units with unique dimensions, deeper seatboards, or color‑matched trims command more at install and give you a tailored fit that reads as part of the architecture long term. Those upgrades support comfort and operating savings in day‑to‑day living, which is why many owners prioritize them.

    Replacement timing and long‑term value

    • When to consider replacement
      Drafts you can feel, fog or moisture between panes, soft or discolored wood, or flank units that no longer open and close cleanly are all signals. A new bay improves comfort, trims hot‑and‑cold spots near the opening, and refreshes the elevation you see from the street.
    • What you’ll likely spend
      Bay window replacement often falls between $2,000 and $6,500+ depending on size, brand, frame material, and installation scope. Structural work, exterior roofing over a deep projection, and interior trim carpentry influence labor.
    • Budgeting for upkeep
      Set aside a small portion of your home budget each year for maintenance like exterior caulking, paint or finish touch‑ups on wood interiors, and hardware tune‑ups. Many homeowners use a simple 1% to 3%‑of‑purchase‑price rule of thumb for annual home maintenance to stay ahead of surprises, which keeps projects like window care manageable.

    Installation basics that affect price

    • Opening type
      Insert replacements slide into the existing frame and can shorten labor. Full‑frame replacements remove the old frame and add new interior trim, exterior cladding, and insulation around the seatboard and headboard, which raises the bid and often yields better performance.
    • Support and weatherproofing
      Installers anchor the head, seat, and jambs, then tension overhead support cables so the unit carries its weight cleanly. Insulation under the seatboard, pan flashing, and careful exterior cladding keep out water and air.
    • Local codes and details
      Tempered safety glass, egress rules in bedrooms, and exterior projections over sidewalks are examples of items your contractor will review so the new bay meets local requirements. A clear scope and timeline in your contract helps everyone align on milestones and what is included, which is the same mindset you bring to a smooth real estate closing.

    How to shop and compare quotes

    • See products in person
      Showrooms help you compare frame profiles, interior finishes, and hardware side by side. It is the easiest way to decide whether you prefer a stained wood interior, a low‑gloss composite, or a clean white vinyl. Visiting a model space also helps you visualize seat depth and projection before you order.
    • Ask for line‑item proposals
      Request written bids that separate product, labor, disposal, and carpentry. Confirm the glass package, grille pattern, screen type, and projection angle in writing. Ask about lead times, whether interior painting or staining is included, and how your exterior will be finished.
    • Check warranties and references
      Look for a manufacturer warranty on glass and frames and a separate workmanship warranty from the installer. Ask to see one or two recent bay installs nearby and look for clean exterior cladding and tight interior trim.
    • Plan your walk‑through
      Build in a final walk‑through with your installer to confirm operation of operable units, verify even reveals, and review exterior sealing. Clear timelines for selection, ordering, installation, and punch‑list items keep the project moving and reduce rework. That same approach works in real estate transactions where defined timelines help both sides reach the finish line.

    A bay window changes the way a room looks and feels. Pella and Andersen deliver higher‑end materials and finishes with cost ranges to match, and vinyl keeps the project simple and economical. Energy‑efficient glass, careful installation, and a clear scope support comfort today and value tomorrow.

  • How To Make Your Short‑Term Rental More Appealing And Maximize Bookings

    How To Make Your Short‑Term Rental More Appealing And Maximize Bookings

    In the highly competitive world of short-term rentals, having a place to stay is no longer enough. Today’s guests want more than four walls and a bed. They book places that feel easy, comfortable and well run, with the kind of details they would expect at a good hotel and the personality they can only get in a home. When you set up your place with that mindset, you raise reviews, improve occupancy and build real cash flow. Travelers now look for hotel‑like amenities with a personal touch, which is exactly where you can stand out.

    1) First Impressions That Sell: Curb Appeal And Landscaping

    Guests start forming opinions the moment they pull up. Keep the exterior clean and cared for, then layer in simple features that read as premium without adding a lot of maintenance.

    • Landscape for impact, not upkeep.
      Mix native, drought-tolerant plants into a well-manicured garden, accented with a few potted color pops near the entry. Define pathways with pavers or gravel, and add low-voltage lights to guide guests at night.
    • Create a spot to linger.
      A small patio with comfortable chairs, an outdoor rug and a side table photographs well and gives guests a place to enjoy morning coffee.
    • Automate watering.
      With an automated irrigation system, including a drip line for beds and a simple sprinkler controller for turf, your landscape stays healthy while you focus on turnovers.
    • Mind the property line.
      When you place a fence, garden bed or pergola, confirm boundaries so your improvements stay on your land. A quick check with a plat map or, for trickier lots, a boundary survey avoids encroachment issues later. If a neighbor’s tree or fence crosses into your space, start with a friendly conversation, then formalize solutions if needed.
    • Think like an owner.
      Built‑in elements, like a fixed bench, a hard‑plumbed grill station or a permanent fire feature, become part of the real property and can support value, which is different from movable furniture.

    2) Make Comfort A Given: Climate Control And Smart Basics

    Comfort drives five‑star stays. Keep temperatures steady and controls simple.

    • Reliable heating and cooling.
      Service HVAC regularly, install a smart thermostat guests can adjust, and keep spare filters on hand. Efficient air conditioning for hot summers makes comfort effortless.
    • Quiet, dark and breezy.
      Blackout shades, a ceiling fan in each bedroom and door sweeps help with sleep.
    • Energy touches that matter.
      LED bulbs, weather‑stripping and a smart thermostat lower costs, and guests engage with listings that highlight efficiency. Renters are more likely to pursue homes that share positive energy‑efficiency details, which helps the listing and your utility spend.

    3) Set Up A Kitchen Guests Can Actually Use

    Many travelers book a home so they can cook. Equip the space so every meal is easy to prep and easy to clean.

    • Appliances that work hard.
      Full‑size fridge, range, microwave and a quiet dishwasher. Add both drip and single‑serve coffee options, an electric kettle and a quality toaster.
    • Tools that make sense.
      A complete cookware set, sharp knives, cutting boards, sheet pans, mixing bowls, a colander, storage containers and a basic bakeware set.
    • Stock the staples.
      Salt, pepper, cooking oil, a few spices, coffee, tea and sweeteners. Refill between stays and keep a labeled owner bin for bulk supplies.
    • Cleanup is part of the amenity.
      Dish tabs, sponge, towels and a small starter pack of trash bags. Upgraded kitchens and amenities help you command stronger rates, which supports cash flow.

    4) Bedrooms And Baths Guests Look Forward To

    Sleep and showers set the tone for the whole stay.

    • Beds worth bragging about.
      Quality mattresses, breathable sheets, two pillow types per person and spare blankets.
    • Blackout plus bedside.
      Full blackout window treatments, a nightstand and lamp on each side, and convenient outlets or USB ports.
    • Hotel‑level bath setup.
      Oversized towels, extras on the shelf, full bottles of shampoo, conditioner and body wash, a hair dryer, great lighting and a mirror guests can actually use. A rainfall shower head reads luxe, while leak‑free fixtures read professional.

    5) Entertainment And Work‑From‑Here Essentials

    Cover the basics guests now expect for downtime and remote work, then add a few memorable touches.

    • Streaming‑ready TV and strong Wi‑Fi.
      Set up a smart TV with the major apps, include an HDMI cable, and display the Wi‑Fi name and password on the welcome card.
    • Analog fun.
      A small stack of board games and a shelf of easy reads.
    • A real workspace.
      A desk and task chair with a power strip where it is obvious.

    Travelers increasingly look for hotel‑style amenities paired with a home feel, so this mix lands well and photographs clearly in your listing.

    6) Thoughtful Touches And Your Welcome Guide

    You set the tone before guests even arrive.

    • Clear, friendly check‑in.
      A smart lock with a unique code, step‑by‑step directions, parking info and quiet‑hours guidance.
    • House binder plus digital guide.
      Include appliance instructions, trash day, emergency contacts, Wi‑Fi details and a neighborhood map with your favorite coffee, markets, trails, family spots, and local activities.
    • A little “hello.”
      A small welcome basket with local snacks, bottled water and coffee pods goes a long way with reviews.

    7) Photos, Listing Copy And Pricing That Convert

    Your page on the platform is your storefront. Make it easy for guests to say yes.

    • Stage the hero shot.
      Lead with your best angle, then show the floor plan flow, sleeping setups and outdoor spaces. Turn on all the lights, open the blinds and switch on lamps for warm photos.
    • Write for clarity.
      Bullet the top five amenities in the first lines. Set house rules in plain language.
    • Price with a plan.
      Put numbers behind your targets. As one large market example, a one‑bedroom in Los Angeles can see an average daily rate near the high‑$200s with an occupancy rate a little over half the nights in a year, which points to five‑figure gross revenue before expenses if you hit similar performance in your market. Use your own comps locally, then apply a simple check: ADR × nights booked ≈ gross nightly revenue.
    • Reduce vacancies thoughtfully.
      Use seasonal minimum‑night rules, offer a small discount for week‑long stays, and keep your calendar open and accurate. Simple incentives and flexible terms can trim gaps, which supports cash flow.

    8) Operations You Can Repeat Every Time

    Treat cleanings, restocks and safety like a checklist business.

    • Turnover checklist.
      Bed order and laundry sequence, kitchen reset, bath setup, dust and floors, patio sweep, supplies restock.
    • Safety and maintenance rhythm.
      Test smoke and carbon‑monoxide alarms, keep a charged fire extinguisher, inspect stair rails and trip points, and walk the exterior lighting each month.
    • Know the local rules.
      Some areas require registrations, tax remittance or specific occupancy and parking rules for short‑term rentals or for homes in an HOA. Many hosts hire a property manager when they scale or when they live far away, which keeps response times consistent for guests. Running an STR is a hands‑on operation, so management help can be a smart line item.

    9) Switching From Long‑Term To Short‑Term, Or Buying A Place With Tenants

    If you are purchasing a property that already has renters or you are converting a long‑term rental, plan the timeline and the legal side before you list.

    • Honor existing leases.
      Tenants keep the rights in their leases, and you take on landlord duties when you buy. In most cases, you change terms only when the lease ends, which means a conversion to short‑term hosting starts after that date unless your contract says otherwise.
    • Expect real responsibilities.
      You are on the hook to keep the home safe and habitable, keep systems working and handle repairs promptly.
    • Plan ahead if you need possession.
      Some buyers negotiate for the current owner to end the lease before closing, or they use an owner‑move‑in path where that is permitted. Evictions follow formal timelines and are a last resort, so a clean handoff plan is the easier route.

    10) Invest Once, Keep It Simple: What Stays With The Home

    When you add permanent features, you create a clearer, more valuable setup.

    • Permanent vs movable.
      A fixed deck, built‑in banquette, hard‑plumbed gas line or anchored pergola is part of the real property and conveys with the home. Freestanding furniture and décor count as personal property and do not affect the property itself. Use this lens when you choose upgrades.

    11) When You Want Higher Income Potential

    Short‑term rentals can lift revenue when demand is there, which is why many investors look at this approach in the first place. It does come with more involvement from you, and higher setup and operating costs, so plan staffing and reserves as part of the model. In strong markets, nightly pricing plus steady occupancy can outperform a traditional year‑long lease. That is where your photography, amenities and guest experience pay off.

    Quick Room‑By‑Room Checklist

    • Exterior
      Entry clean and lit, clear address numbers, tidy landscaping, seating vignette, irrigation set, boundary‑aware fence plan.
    • Living
      Smart TV ready, Wi‑Fi card visible, games shelf, reading light, surge‑protected power strip.
    • Kitchen
      Complete cookware, sharp knives, coffee setup two ways, labeled staples, dishwasher tabs, trash bags.
    • Bedrooms
      Quality mattresses, breathable linens, two pillow types, blackout, bedside lights, hangers and a luggage rack.
    • Baths
      Oversized towels, extras on shelf, full‑size toiletries, hair dryer, good mirror and lighting.
    • Safety
      Tested alarms, extinguisher, first‑aid kit, railings tight, exterior lights working.
    • Listing & Ops
      Hero photo staged, top five amenities listed, house rules clear, price plan built from local comps, turnover checklist printed, restock bins labeled.

    Why This Playbook Works

    You are making it easy for someone to choose your place, enjoy their stay and tell the next person to book. Strong curb appeal gets the click. Comfortable beds, reliable climate control and a fully stocked kitchen win the review. Clean photos, clear copy and smart pricing fill the calendar. Energy‑smart features keep operating costs in line while also helping your listing stand out.

  • How to Protect Your Online Privacy While Working From Home

    How to Protect Your Online Privacy While Working From Home

    Do you know how to safeguard your personal data while working from home? These days, many people work from home, which is why it is important to understand how you can protect your privacy during a time when cybercrime is on the rise. This post will show you what steps to take for digital hygiene, secure browsing, and peace of mind. Read on for all you need to know.

    Install a VPN Chrome Extension for Private Browsing

    A browser-based VPN is a useful tool for encrypting your traffic, which keeps online activity hidden from ISPs and potential eavesdroppers. This is critical for accessing sensitive personal data while working remotely. A VPN Chrome extension will add a layer of privacy and protection that can provide peace of mind when browsing and accessing sensitive information online.

    Use Strong, Unique Passwords & Two-Factor Authentication

    Hackers are often able to steal sensitive information simply by guessing or stealing login information. Therefore, one of the best ways to improve home office security is to use strong, unique passwords and to change these on a regular basis. In addition to this, two-factor authentication adds an extra layer of security that can prevent unauthorized access if your password is compromised. This dual approach will prevent unauthorized access to email, financial, and personal accounts.

    Secure Your Home Network

    It is also important to secure your home network to protect both personal and business data. This involves using strong Wi-Fi passwords, enabling WPA3 encryption, and considering network segmentation of work devices. A secure network reduces the risk of hacking attempts.

    Avoid Phishing & Suspicious Links

    Phishing attacks remain the most prevalent form of cybercrime. They are also becoming more sophisticated and harder to detect, even by those who are aware of their prevalence. Therefore, you need to be extra vigilant and cautious of unsolicited emails, pop-ups, and links that request personal information.

    Educating yourself on common phishing tactics and the latest methods is key to staying safe online. If you are ever unsure about an email, contact the company directly from the information on their website.

    Keep Software & Operating Systems Updated

    Finally, you must make sure that you keep your software and operating systems up to date. It is easy to delay updates, but regular updates fix security vulnerabilities and protect against malware and spyware that could compromise personal data. This is why you should always complete updates as soon as they become available for protection against the latest threats. 

    Many people work from home these days, so it is vital that they know how to protect sensitive data during a time when cybercrime is a huge and growing threat. The advice in this post will help you create a robust cybersecurity defense and give you peace of mind, knowing that you are protecting your privacy and sensitive information online.

  • From Curb Appeal to Click Appeal: Blending Offline and Online Marketing

    From Curb Appeal to Click Appeal: Blending Offline and Online Marketing

    Image Source: dreamstime.com

    For a long time, curb appeal set the stage for a sale. Fresh paint, tidy landscaping, and a front porch that feels like home still matter. Today, the first impression often happens on a screen. Your next client usually meets a property on a listing page, scrolls through photos, and skims neighborhood content long before they park the car. The idea is to combine them into one clear experience that builds trust, earns attention, and moves a buyer from a click to a showing.

    Why Offline Marketing Still Pulls Buyers In

    You make an emotional connection in real life. A drive through the neighborhood, a well-staged living room, and a high-quality brochure feel tangible. Those details give your listing presence and help a buyer picture daily life there. You also set expectations for ownership. If a feature is attached to the property and part of the real property rights, it conveys with the land, while removable items are personal property, so you want your materials to reflect what truly transfers at closing.

    Keep your staples tight and useful: welcoming curb appeal, printed pieces that buyers can reference later, open houses that let them feel the layout, and a visible presence in the community. Each element works on its own, and each one tees up your digital follow-through.

    The Rise of Click Appeal

    If curb appeal invites people through the door, click appeal gets them interested in the first place. With the majority of buyers beginning their search online, a property’s digital presentation is often the deciding factor in whether they schedule a showing.

    Click appeal relies on several digital tools:

    • High-quality visuals.
      Professional photography and videography are essential. Even supplemental lifestyle stock photos can enhance a listing or campaign when used strategically.
    • Compelling copy.
      Descriptions that go beyond square footage and features to highlight lifestyle benefits resonate with modern buyers.
    • Virtual tours.
      Immersive 3D walkthroughs and video tours allow buyers to explore properties anytime, anywhere.
    • Digital ads.
      Targeted social media and search ads bring listings directly to the feeds of the right audience.
    • SEO-optimized content.
      Blogs, neighborhood guides, and landing pages increase visibility in search results.

    Strong click appeal gives your listing an edge online, and the tools you use can make all the difference.

    Bridge the Gap With Simple Systems

    • Use events to grow your audience.
      Promote your open house across email and social. At the door, offer a QR code that leads to the listing page. After the event, follow up with a short note and a link to the virtual tour and floor plan.
    • Repurpose what you already made.
      Turn your printed brochure into a shareable PDF. Turn a kind comment from a neighbor into a short quote graphic. A few behind-the-scenes photos from staging can become a carousel post that reinforces your brand.
    • Keep your brand consistent everywhere.
      Your sign, flyer, and postcard should match your website and profiles. When a buyer recognizes your look in both places, it builds credibility and helps them find you again.
    • Match your online info to real-world steps.
      As buyers move forward, your materials should help them navigate the process. A simple explainer about what happens before closing day, a reminder to review the Closing Disclosure three business days before closing, and a checklist of what to bring to the table make your service feel complete. The Closing Disclosure outlines your loan term, amount, rate, estimated monthly payment, closing costs, and cash to close, so encourage buyers to read it carefully and compare it to their loan estimate.

    Tell One Story Across Every Channel

    Pick a clear theme for the home and keep it steady. If you position a listing as great for entertaining, stage the patio and kitchen to show how guests can move easily through the space. Post a quick video that walks that same path. Use the brochure to point out the flow and the storage that supports it. A single message repeated in different formats sticks with buyers and helps them picture their own routines.

    Use Helpful Market Markers Buyers Already Know

    The MLS language buyers see online can support your strategy during showings and follow-ups. If a property is marked contingent, the seller has accepted an offer and the sale is working through conditions, and if the contingencies are met the status moves to pending. A pending status signals the deal is underway and past its major hurdles. If backup offers are welcome or the home is still being shown, you can guide your client on timing, preapproval strength, and next steps.

    You can also prepare buyers for common protections inside an offer. An inspection contingency gives a short window, usually seven to ten days from acceptance, to evaluate the property and renegotiate or cancel if needed. Set that expectation early and help buyers schedule quickly so they make decisions before the deadline.

    Add Practical Education That Builds Trust

    Your digital content can answer the simple questions buyers ask after an open house.

    • What happens after the inspection?
      Share a short post that explains the difference between minor fixes and major issues, how credits or repairs might be handled, and how long sellers have to respond.
    • What will I see on closing day?
      Provide a clear checklist that covers title documents, insurance, cash to close, and a reminder to lock in the rate within a reasonable window so the payment stays predictable through closing.
    • What payments sit in escrow?
      Explain in plain language that taxes and homeowners insurance are often paid through an escrow account inside the monthly payment to protect the lender’s collateral, and that some borrowers may qualify to manage those bills on their own with an escrow waiver if they meet equity and credit guidelines.

    You can also outline regular homeownership costs so buyers know what to budget for beyond principal and interest, including property taxes, insurance, HOA dues where applicable, and utilities. Clear, friendly education reinforces your expertise and keeps your brand useful between showings.

    Final Thoughts

    Keep investing in curb appeal that welcomes people in person, and keep polishing click appeal that invites them to lean in online. When your print, signage, listing pages, and follow-up content all tell the same story, you make it easy for buyers to take the next step with you.